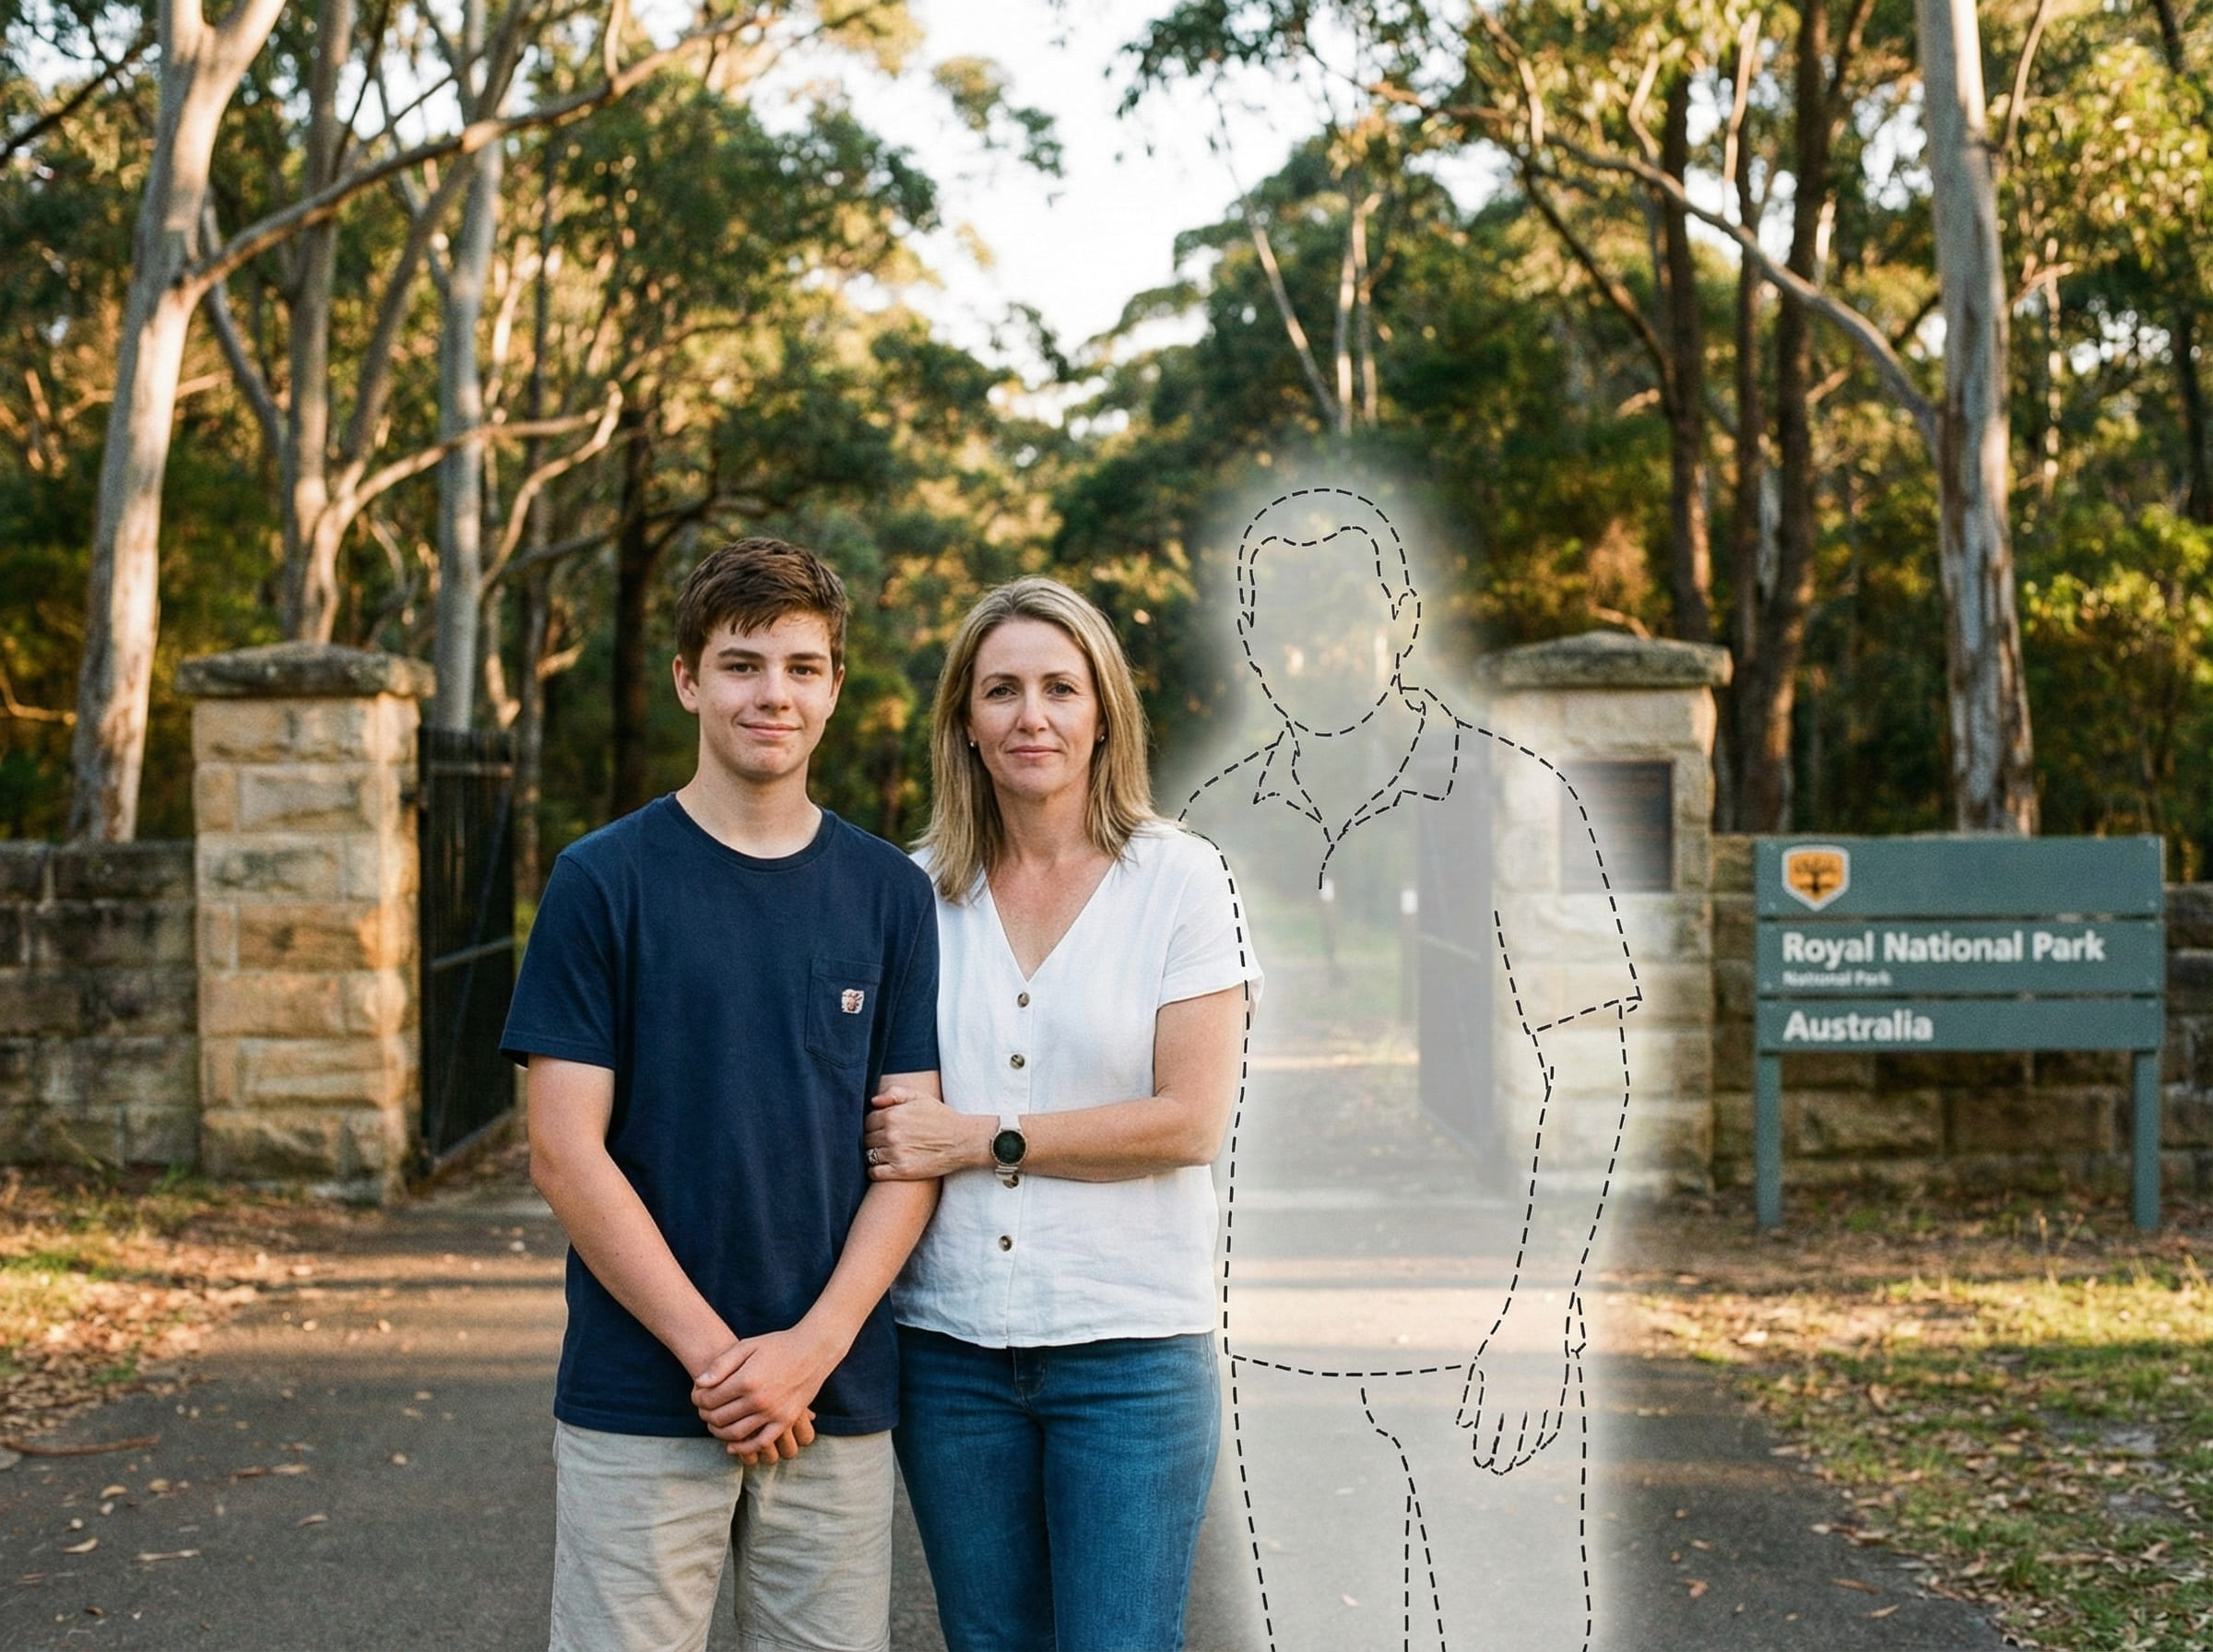
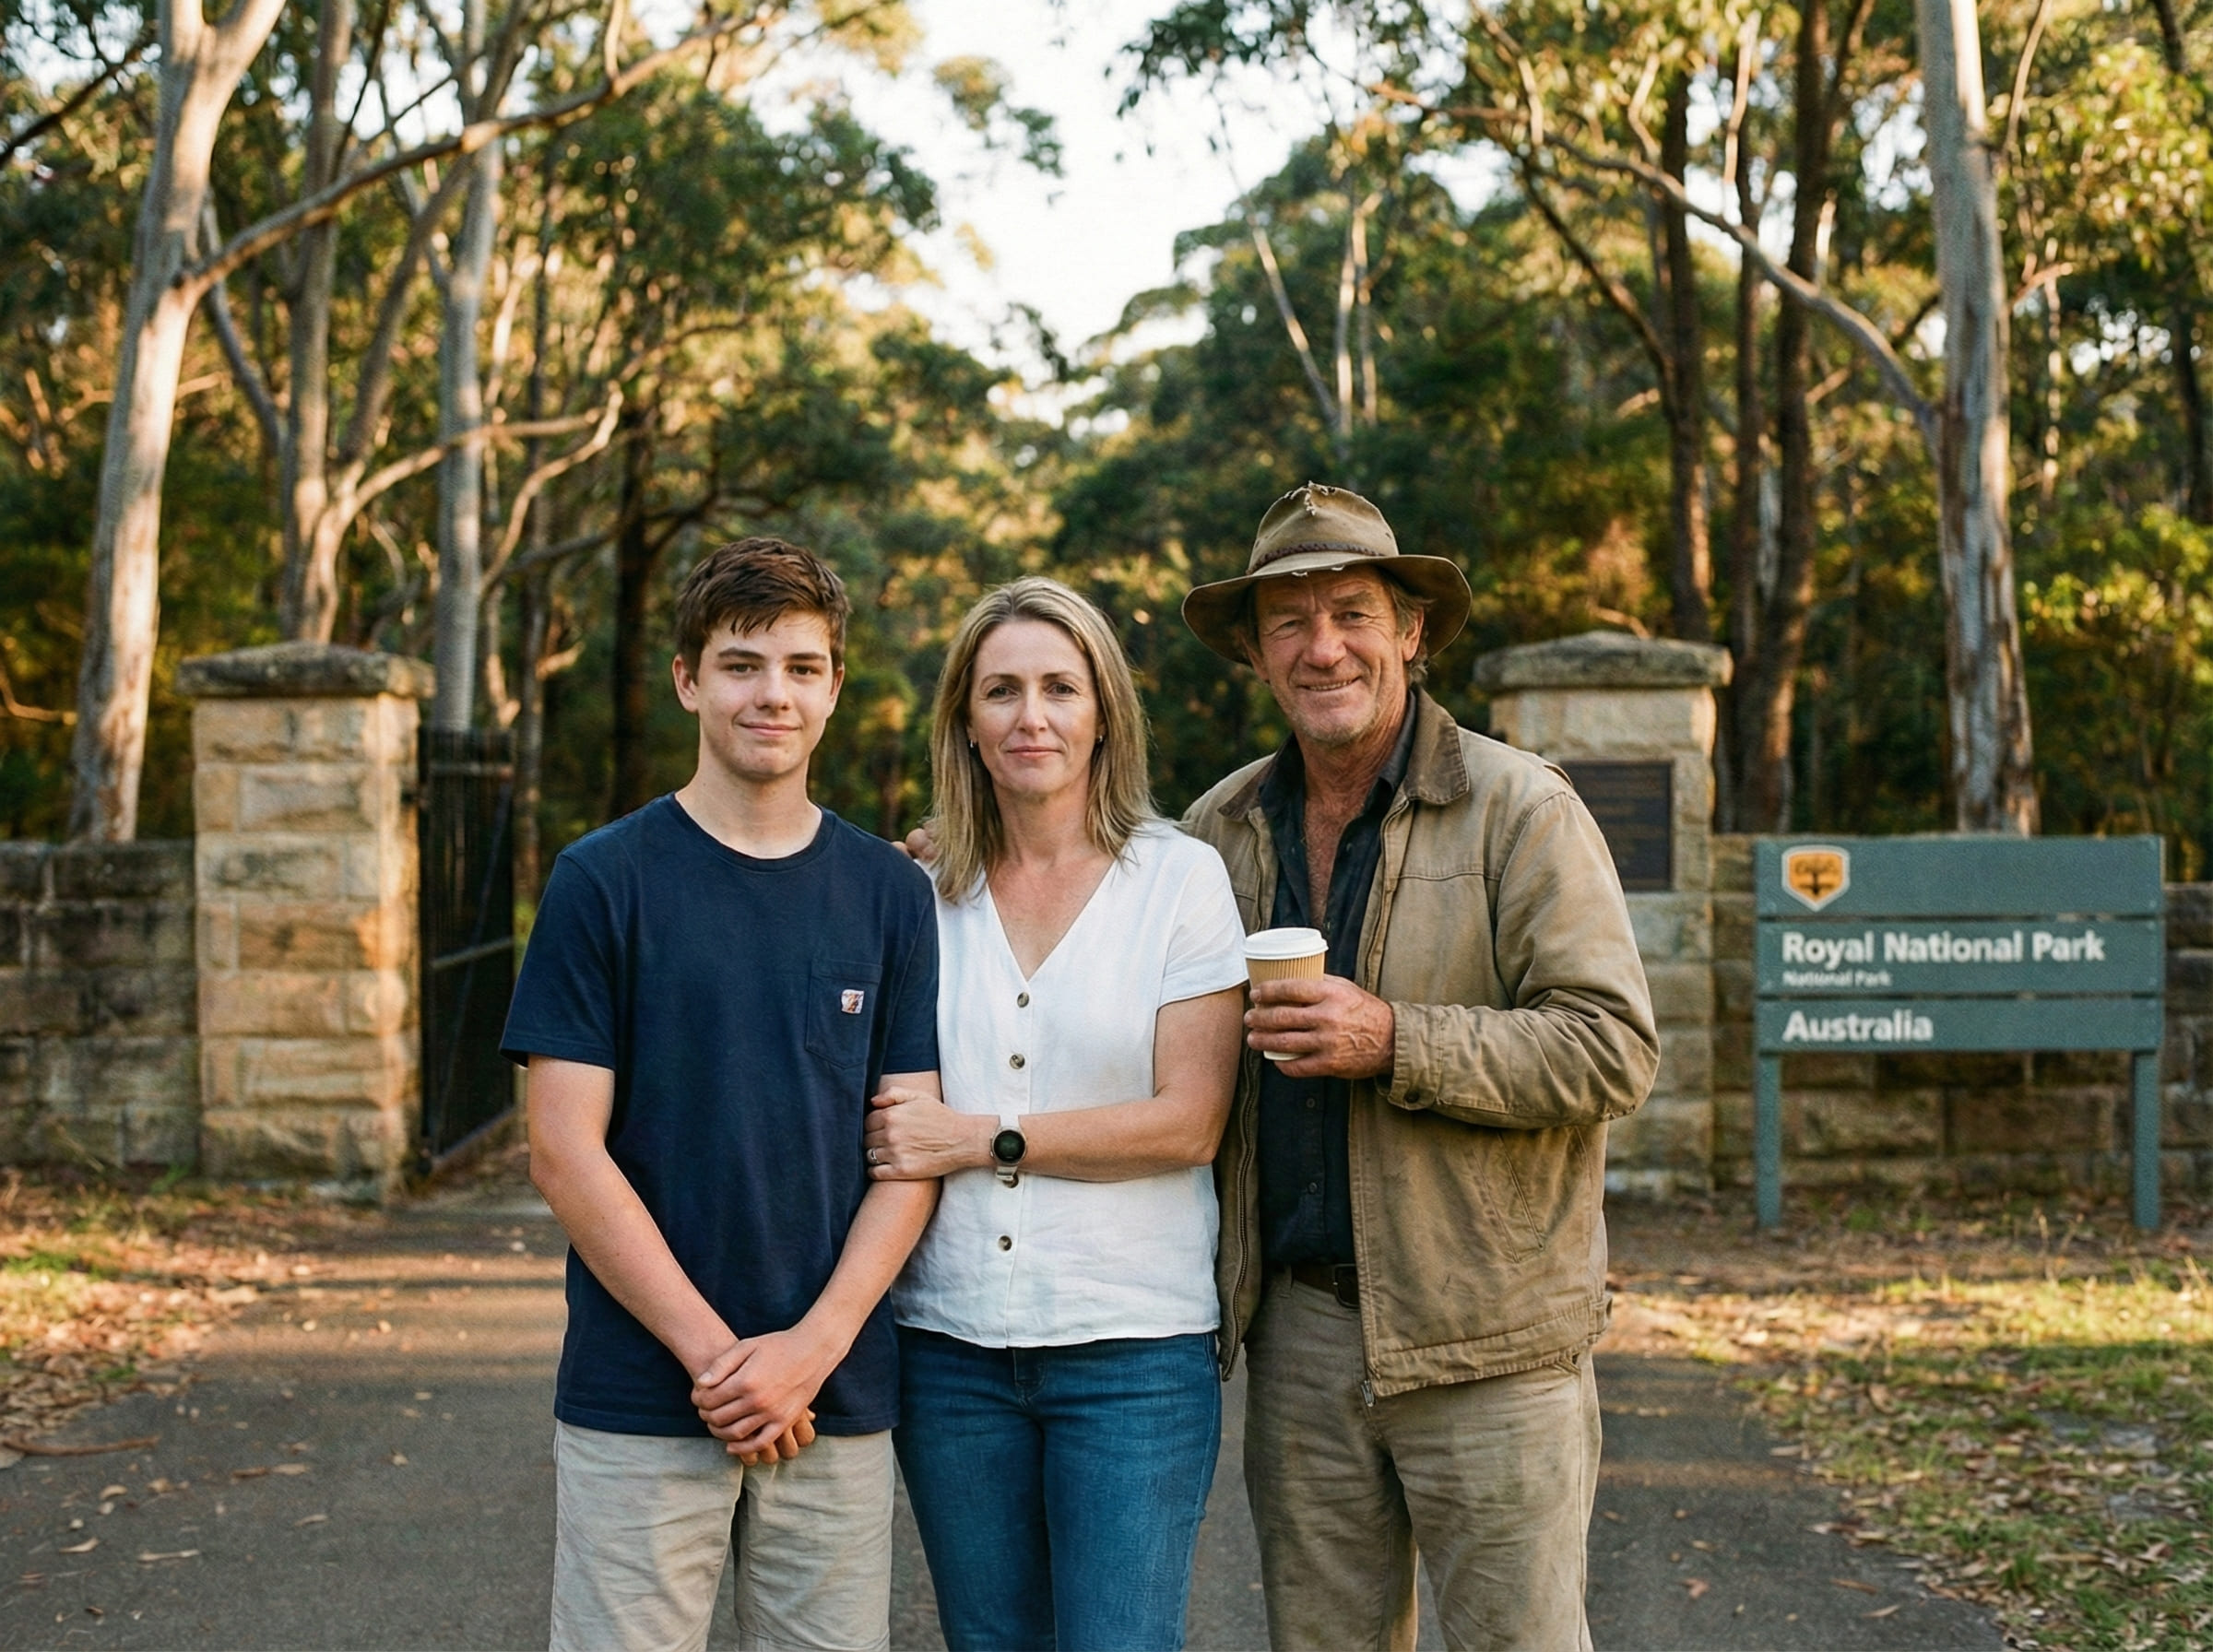
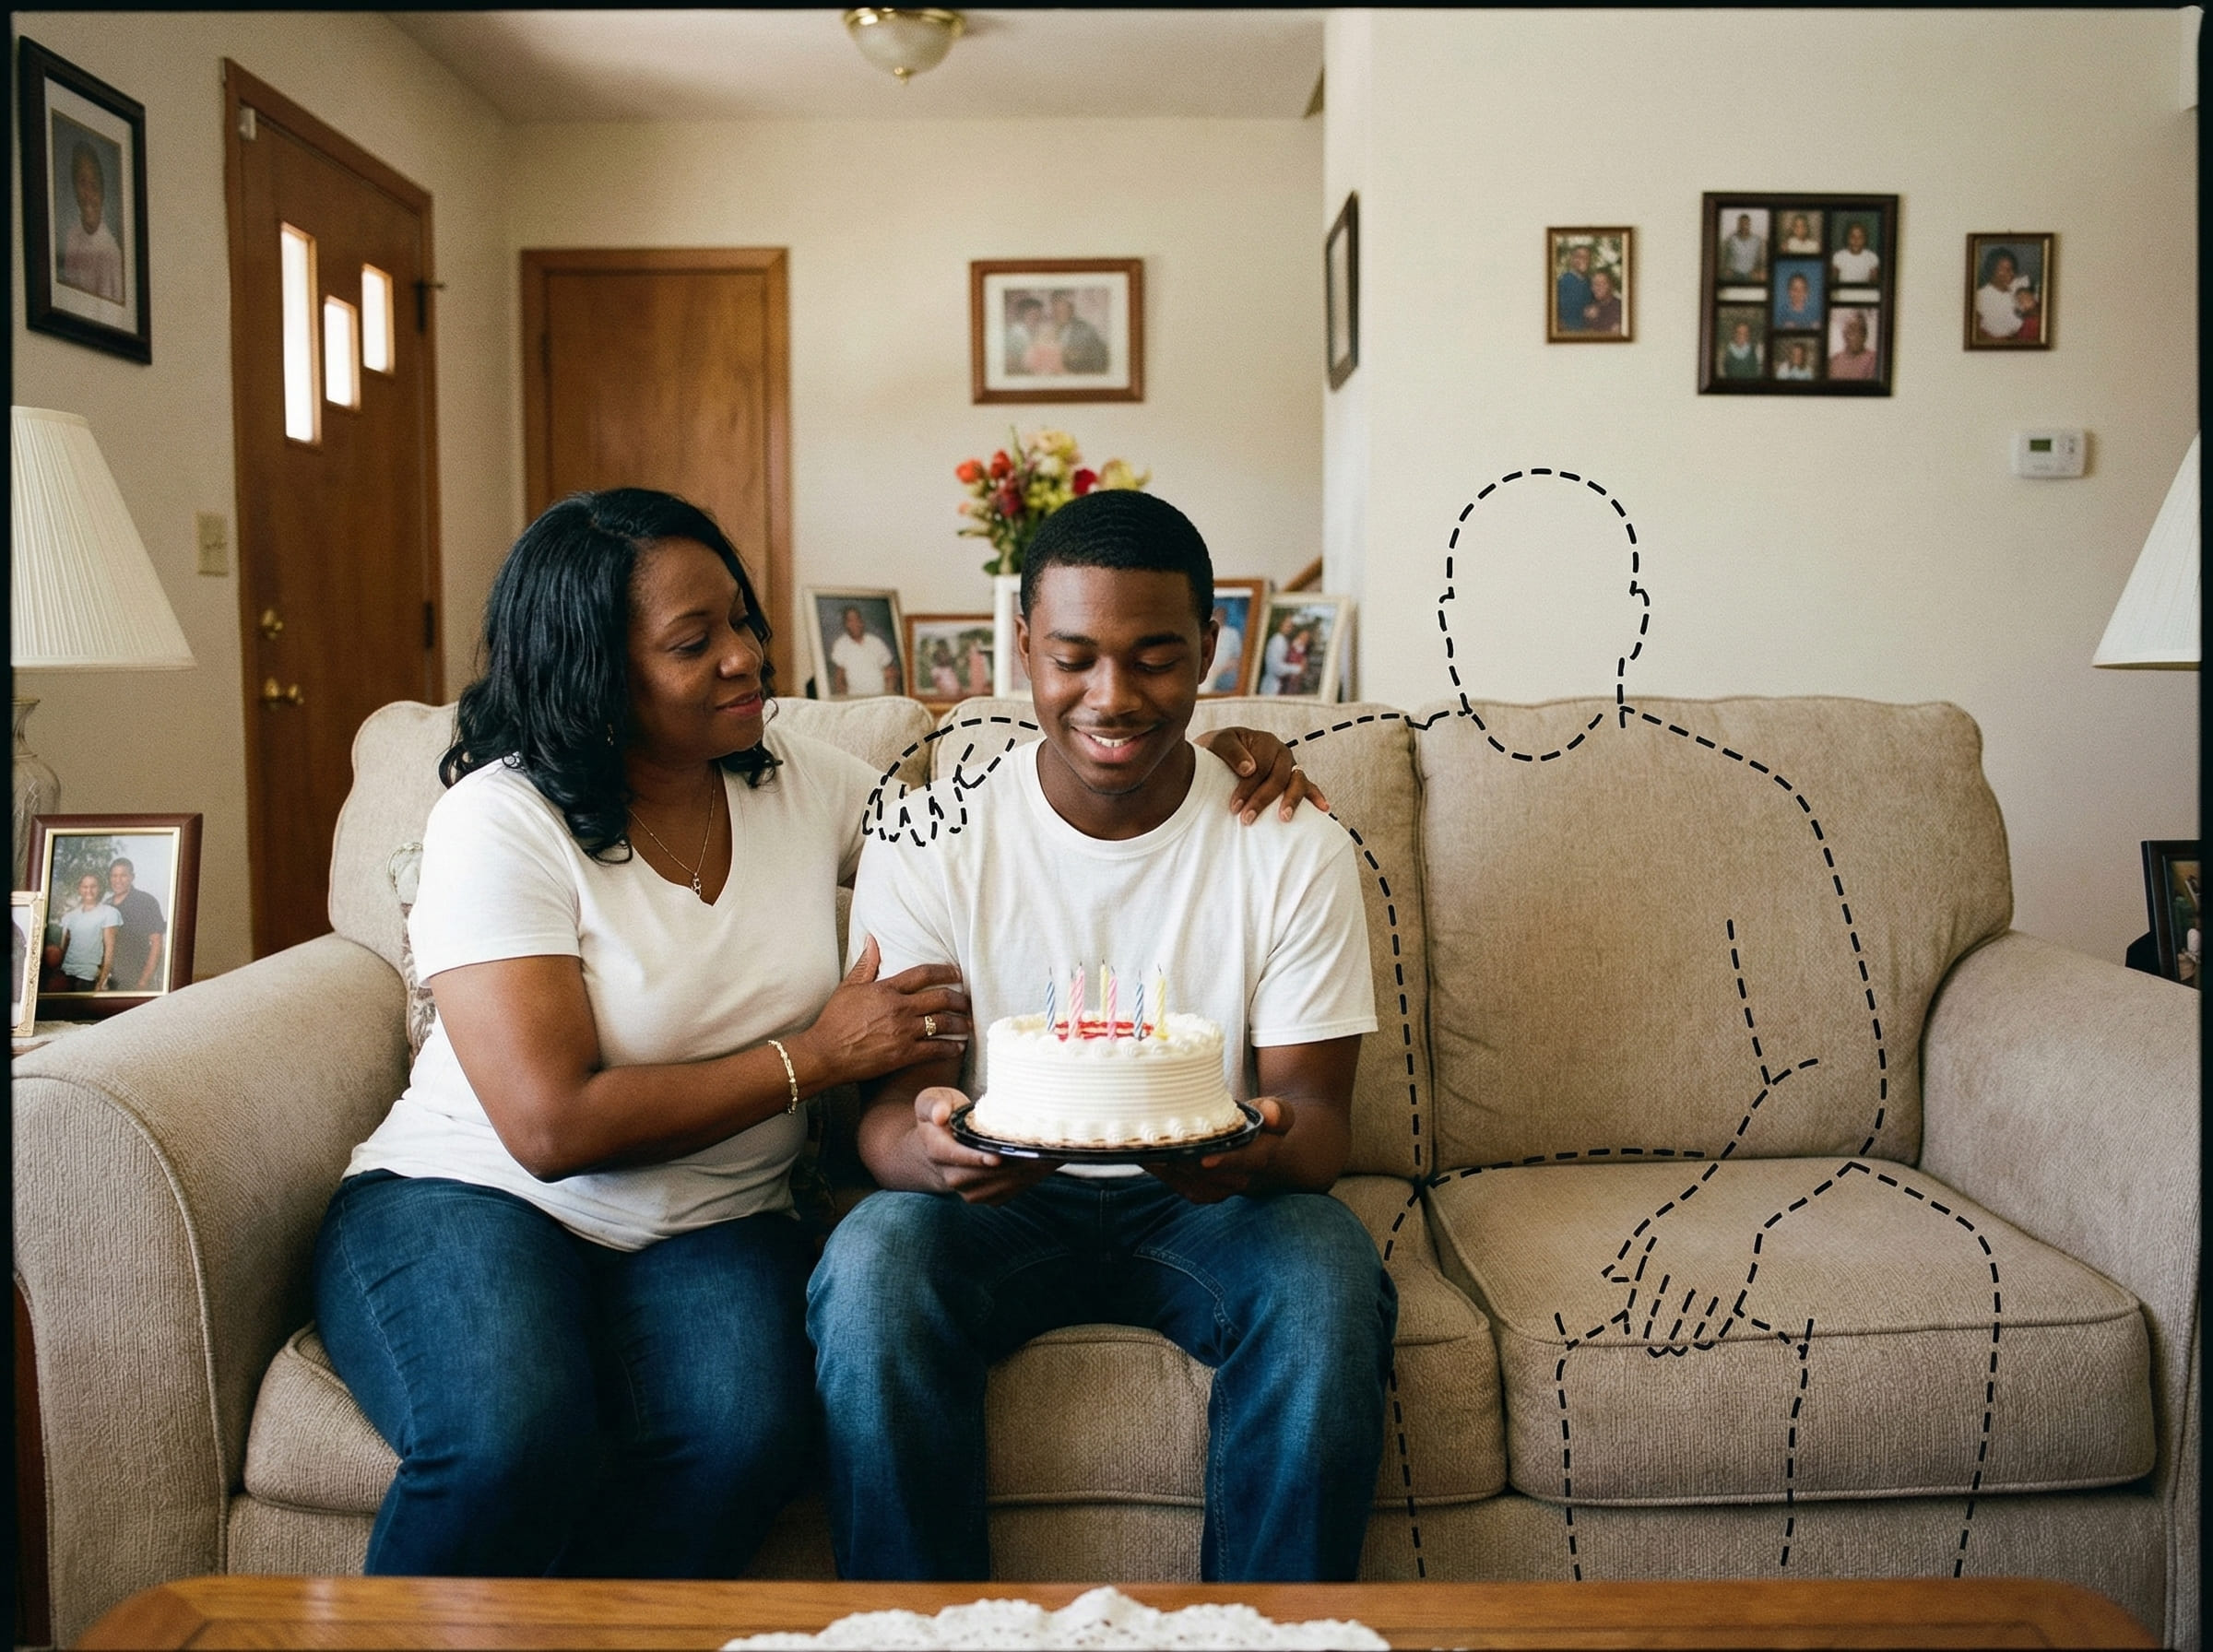
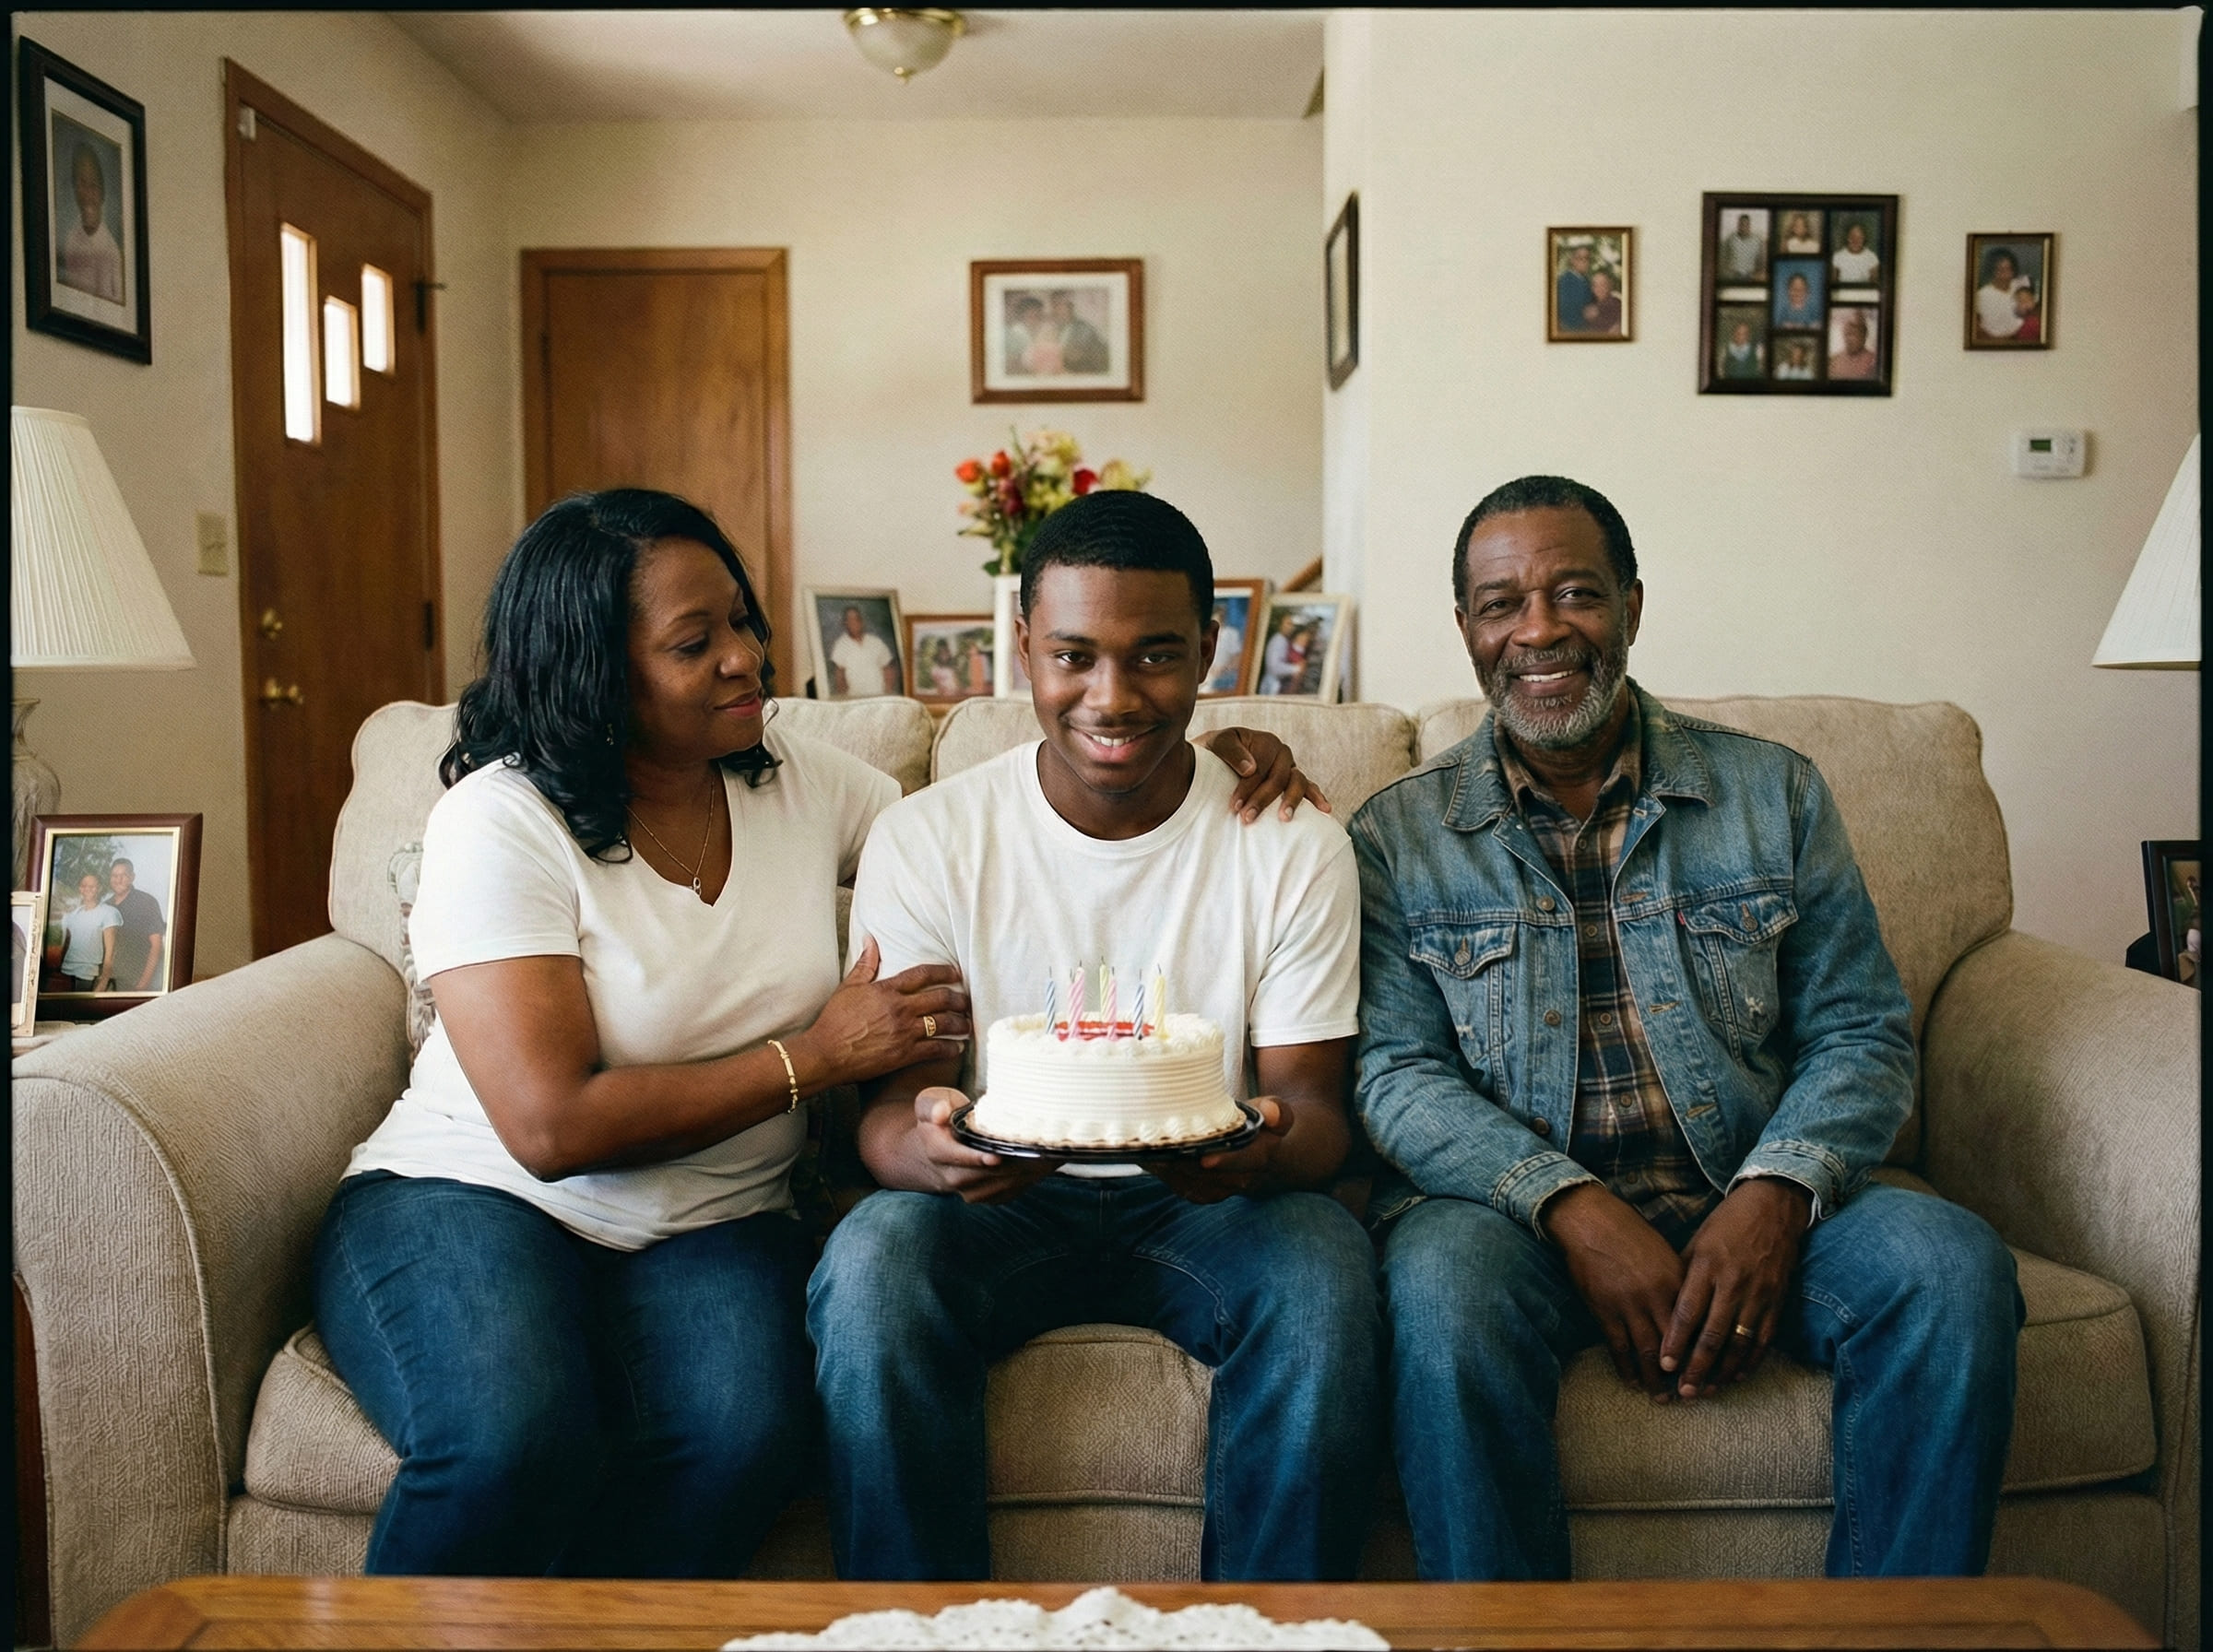
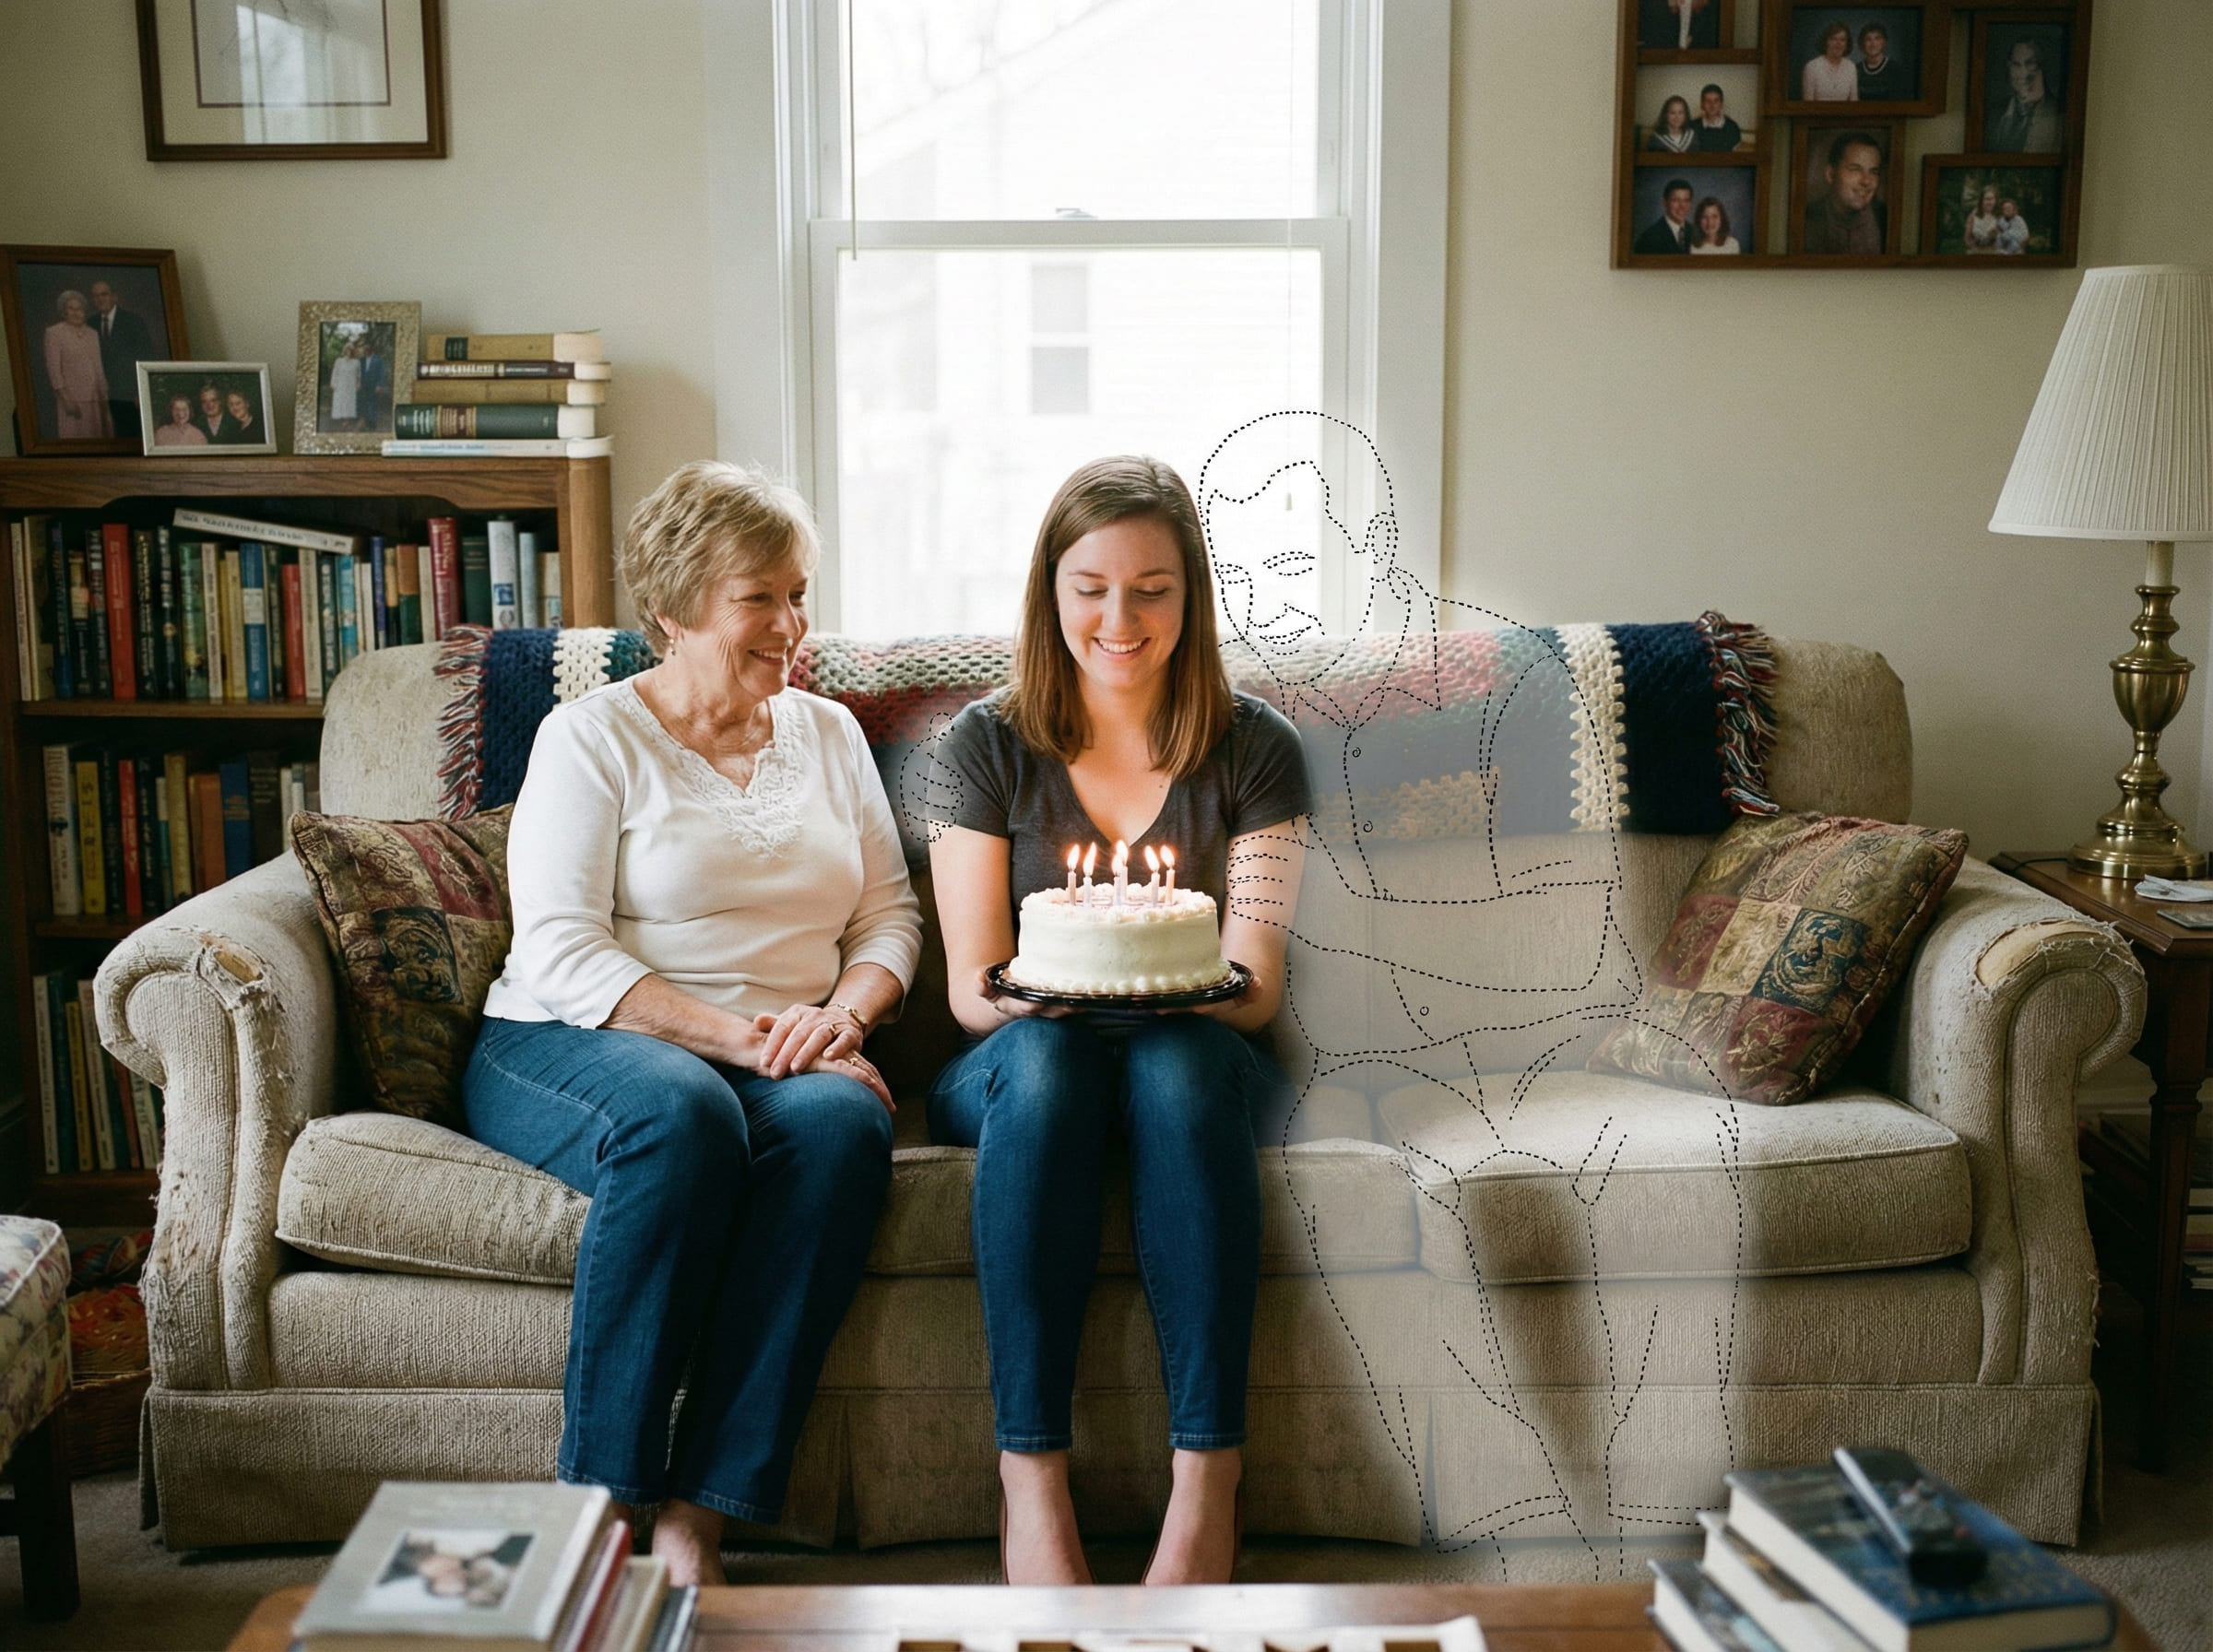
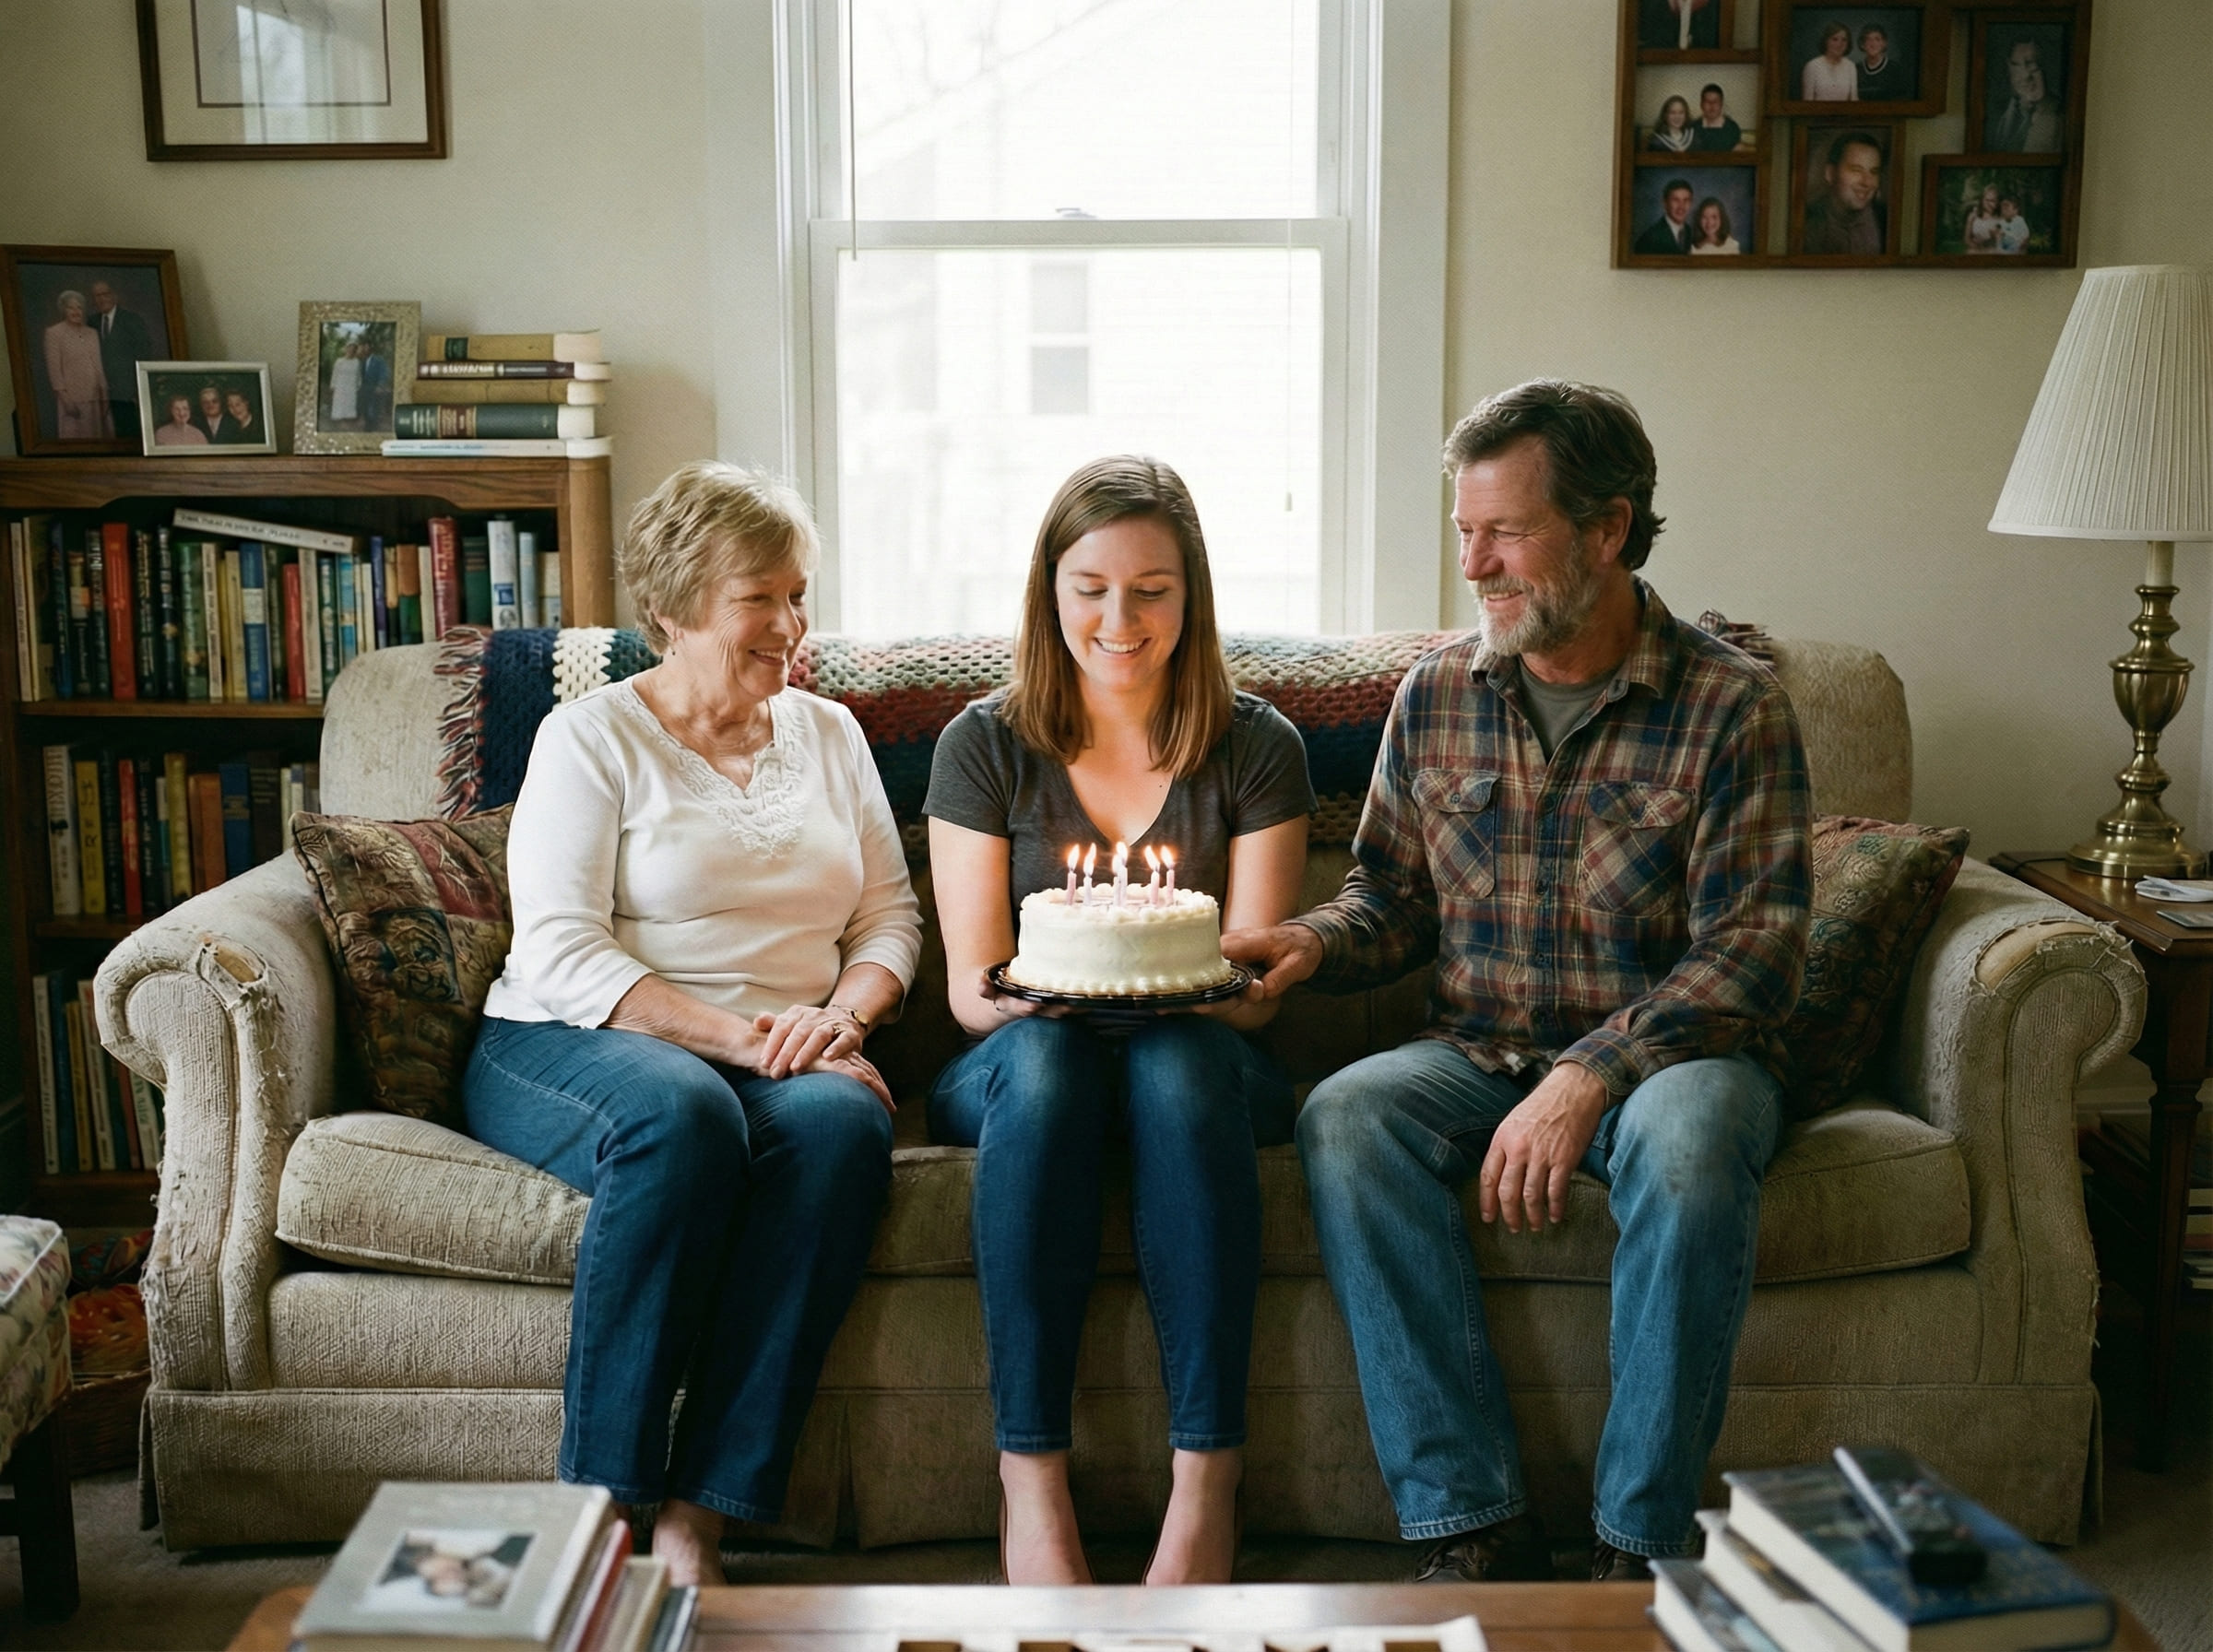
Add Dad to a Photo
A calm, realism-first way to include your dad in a meaningful photo — without heavy edits or uncomfortable effects.
For moments where a picture doesn’t fully reflect how the memory feels, this helps complete the scene with care and consistency.
Examples
Quick checklist
Small details matter more than complicated steps.
- Main photo: original file, minimal filters (avoid screenshots)
- Dad photo: clear face, natural lighting if possible
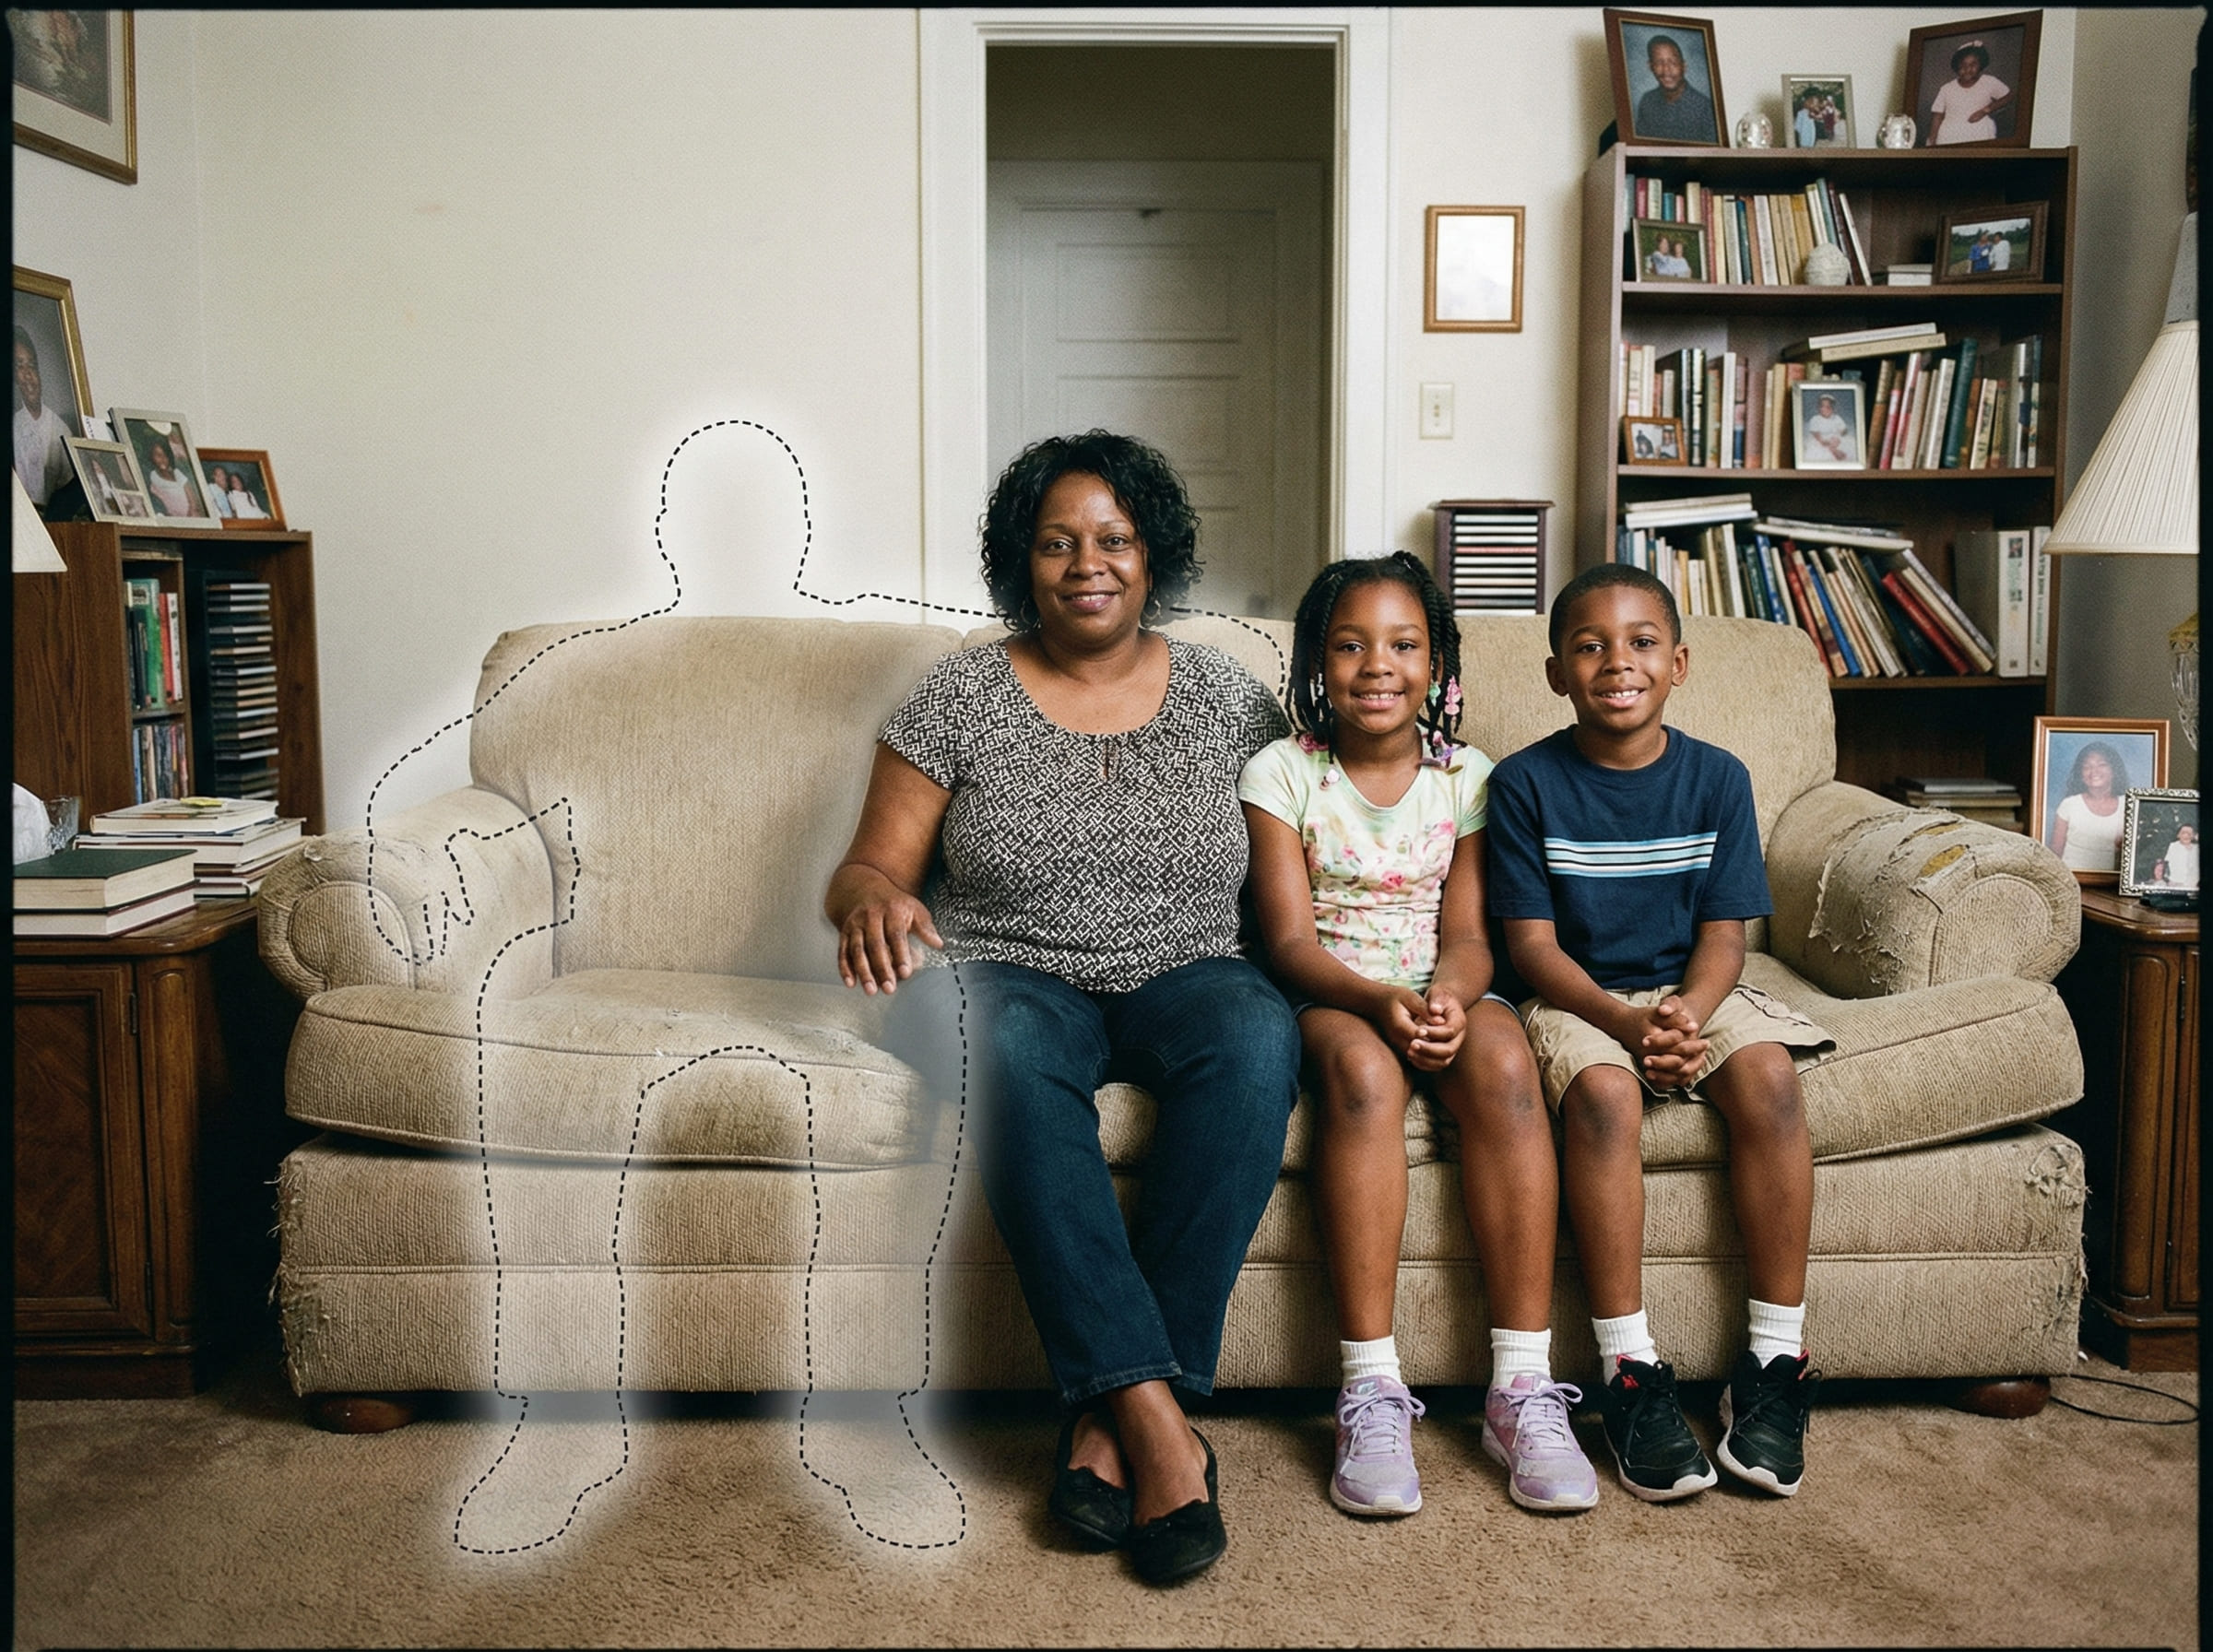
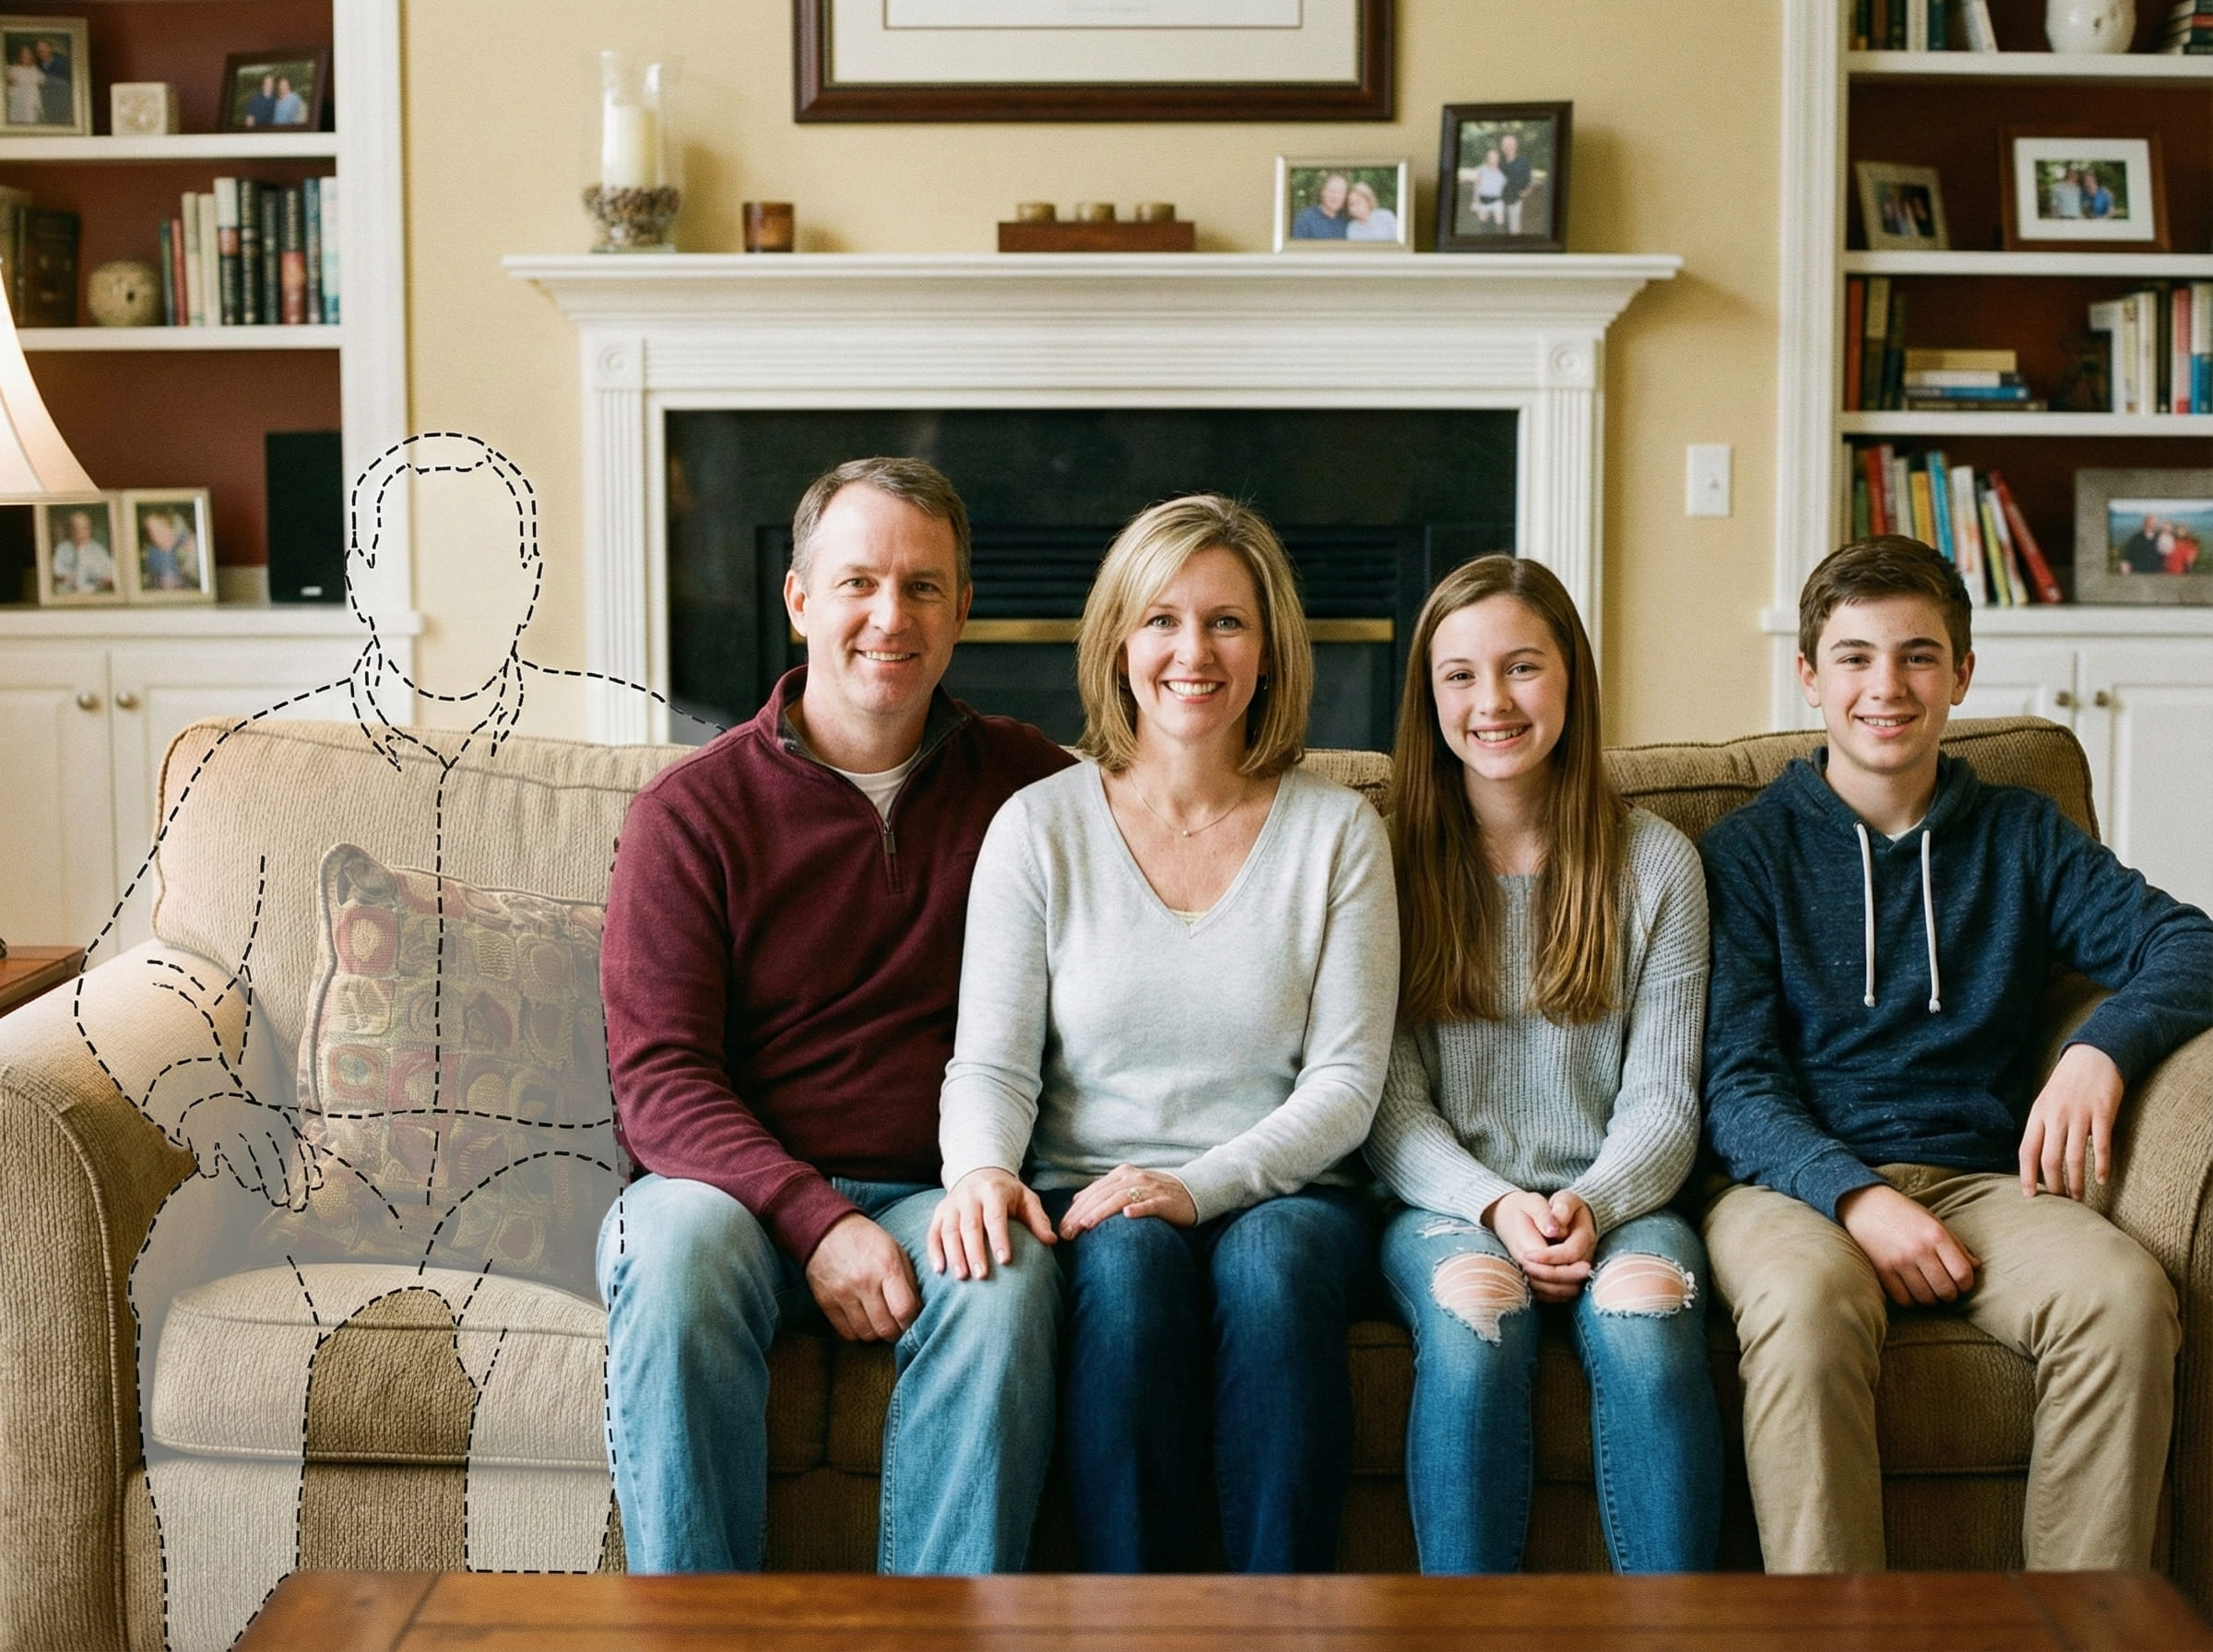
- Pick a spot where a person could realistically stand or sit
A quiet way to complete a meaningful memory
Some photos become part of family history. They’re saved, reprinted, and revisited — not because they’re perfect, but because they represent someone important.
When a dad has passed away or couldn’t be present, certain pictures can feel incomplete in a specific way. The photo may look “fine,” yet it doesn’t carry the full truth of how the moment is remembered.
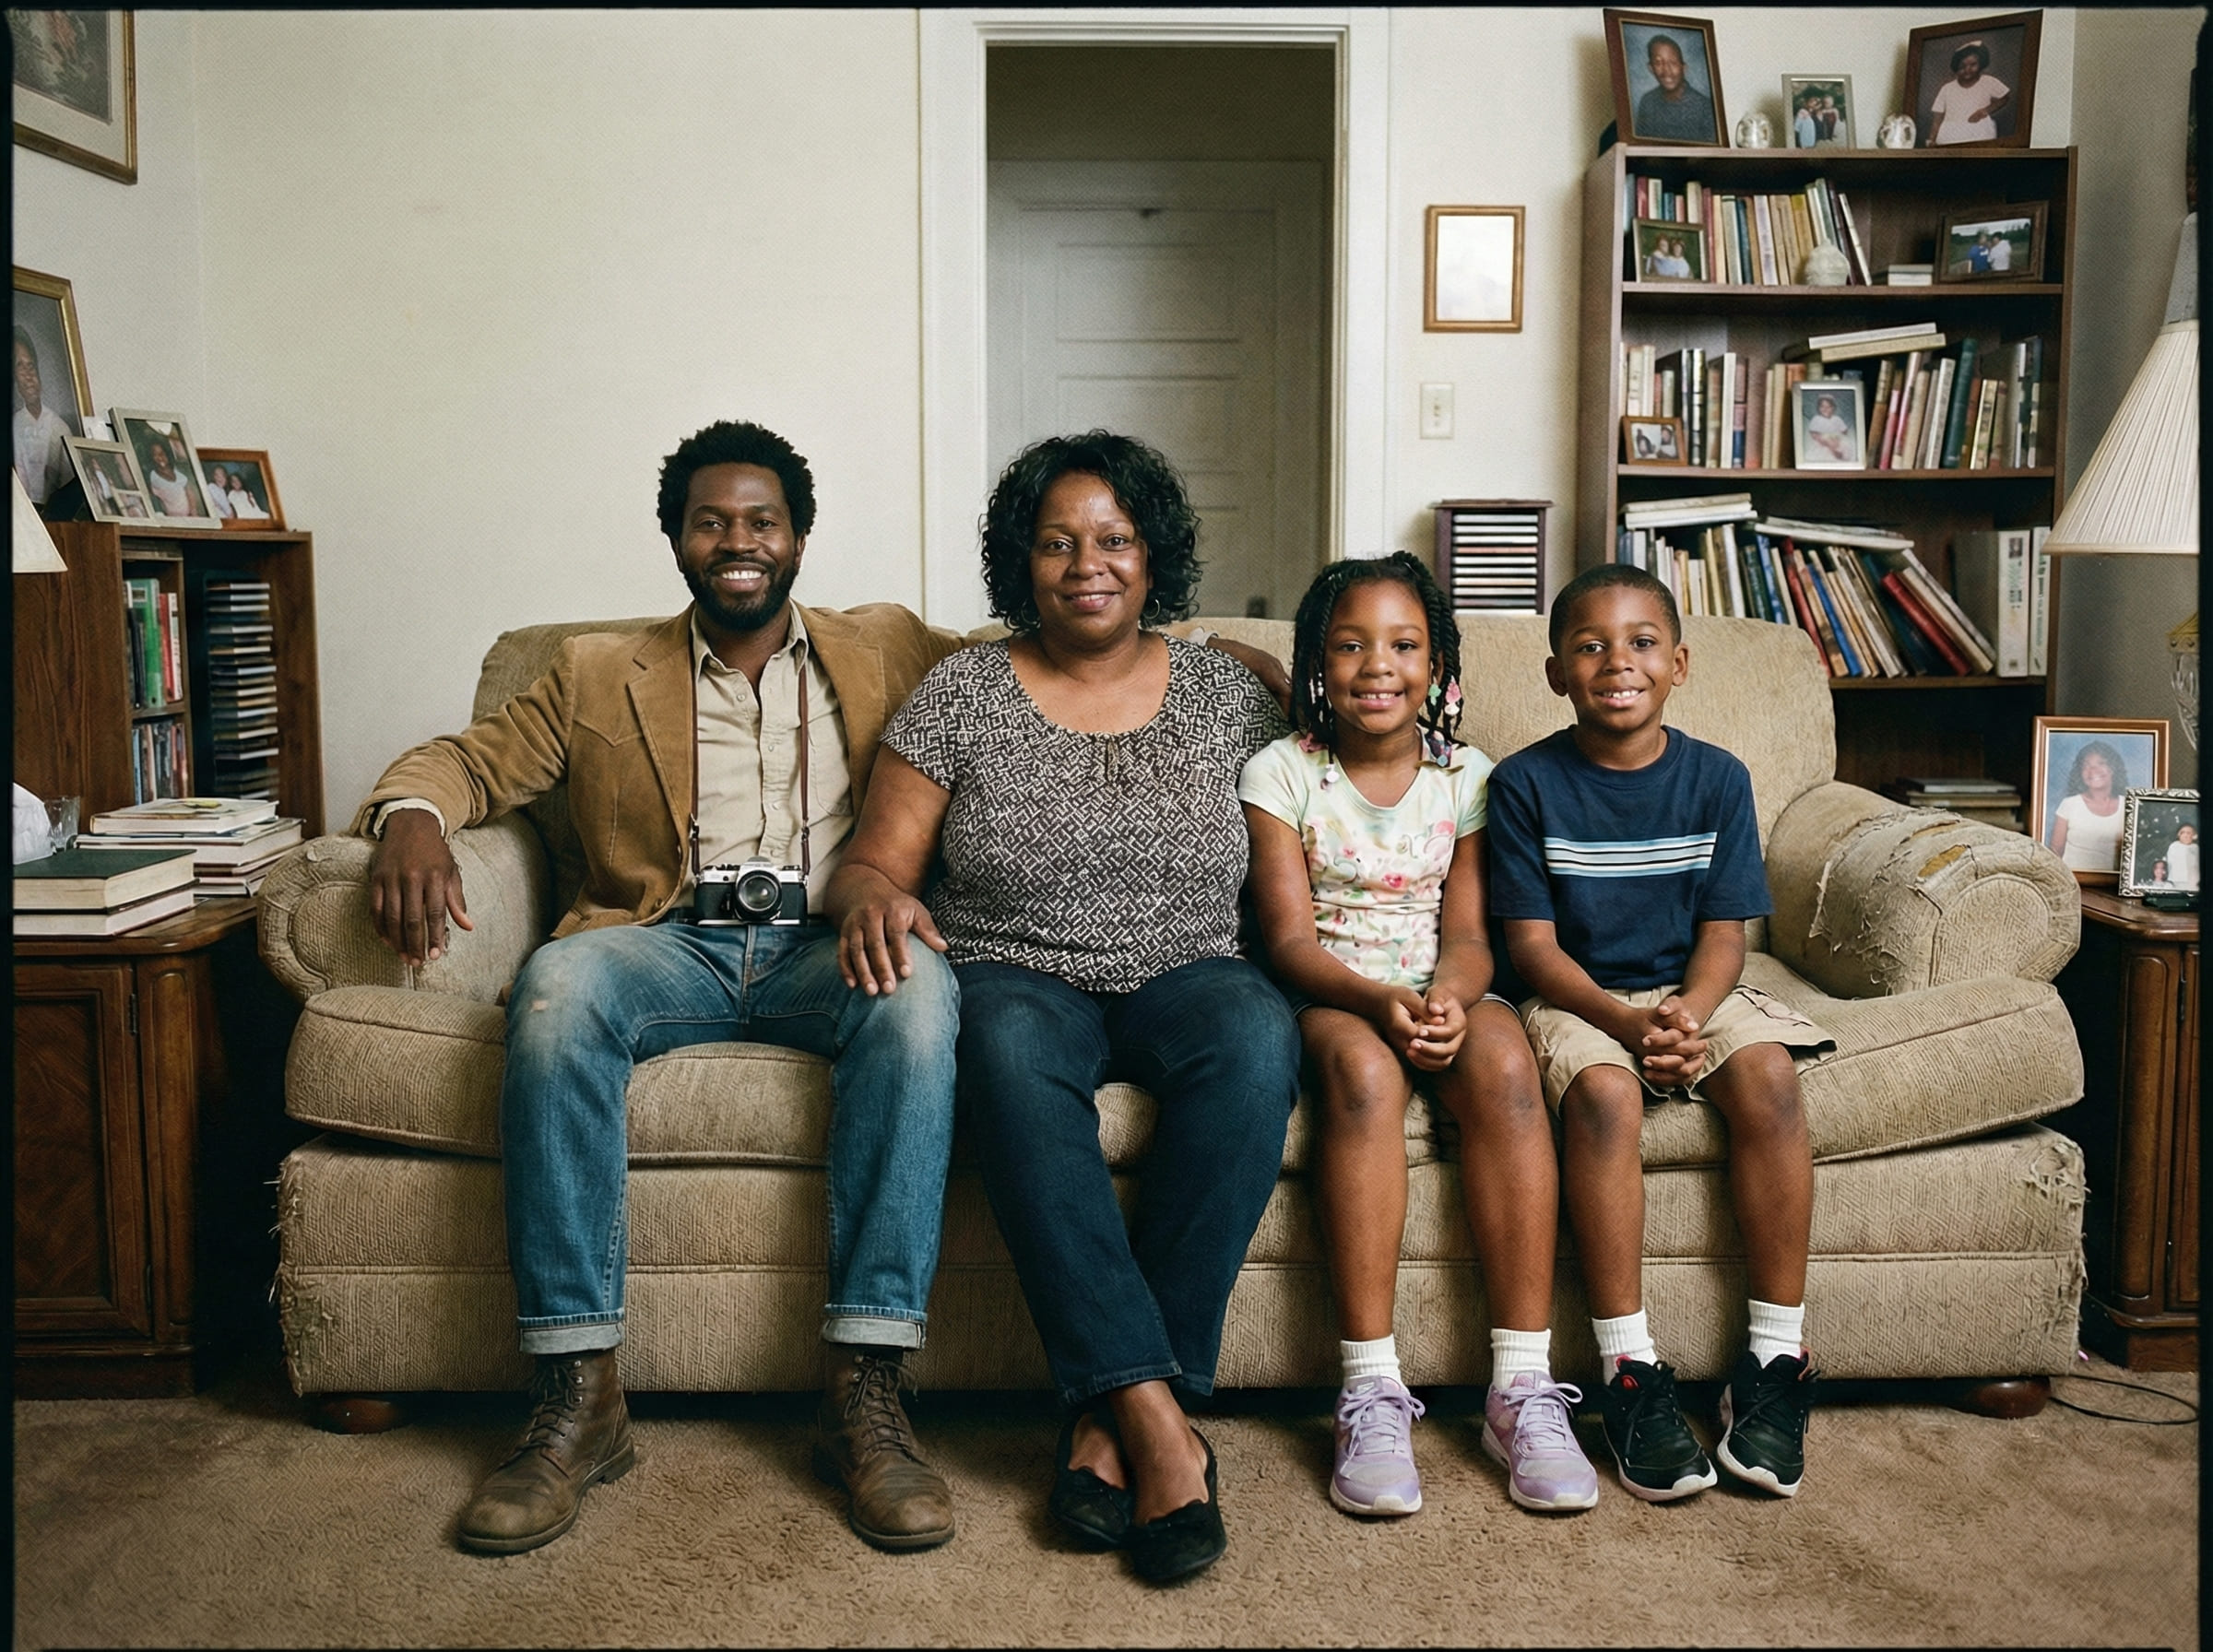
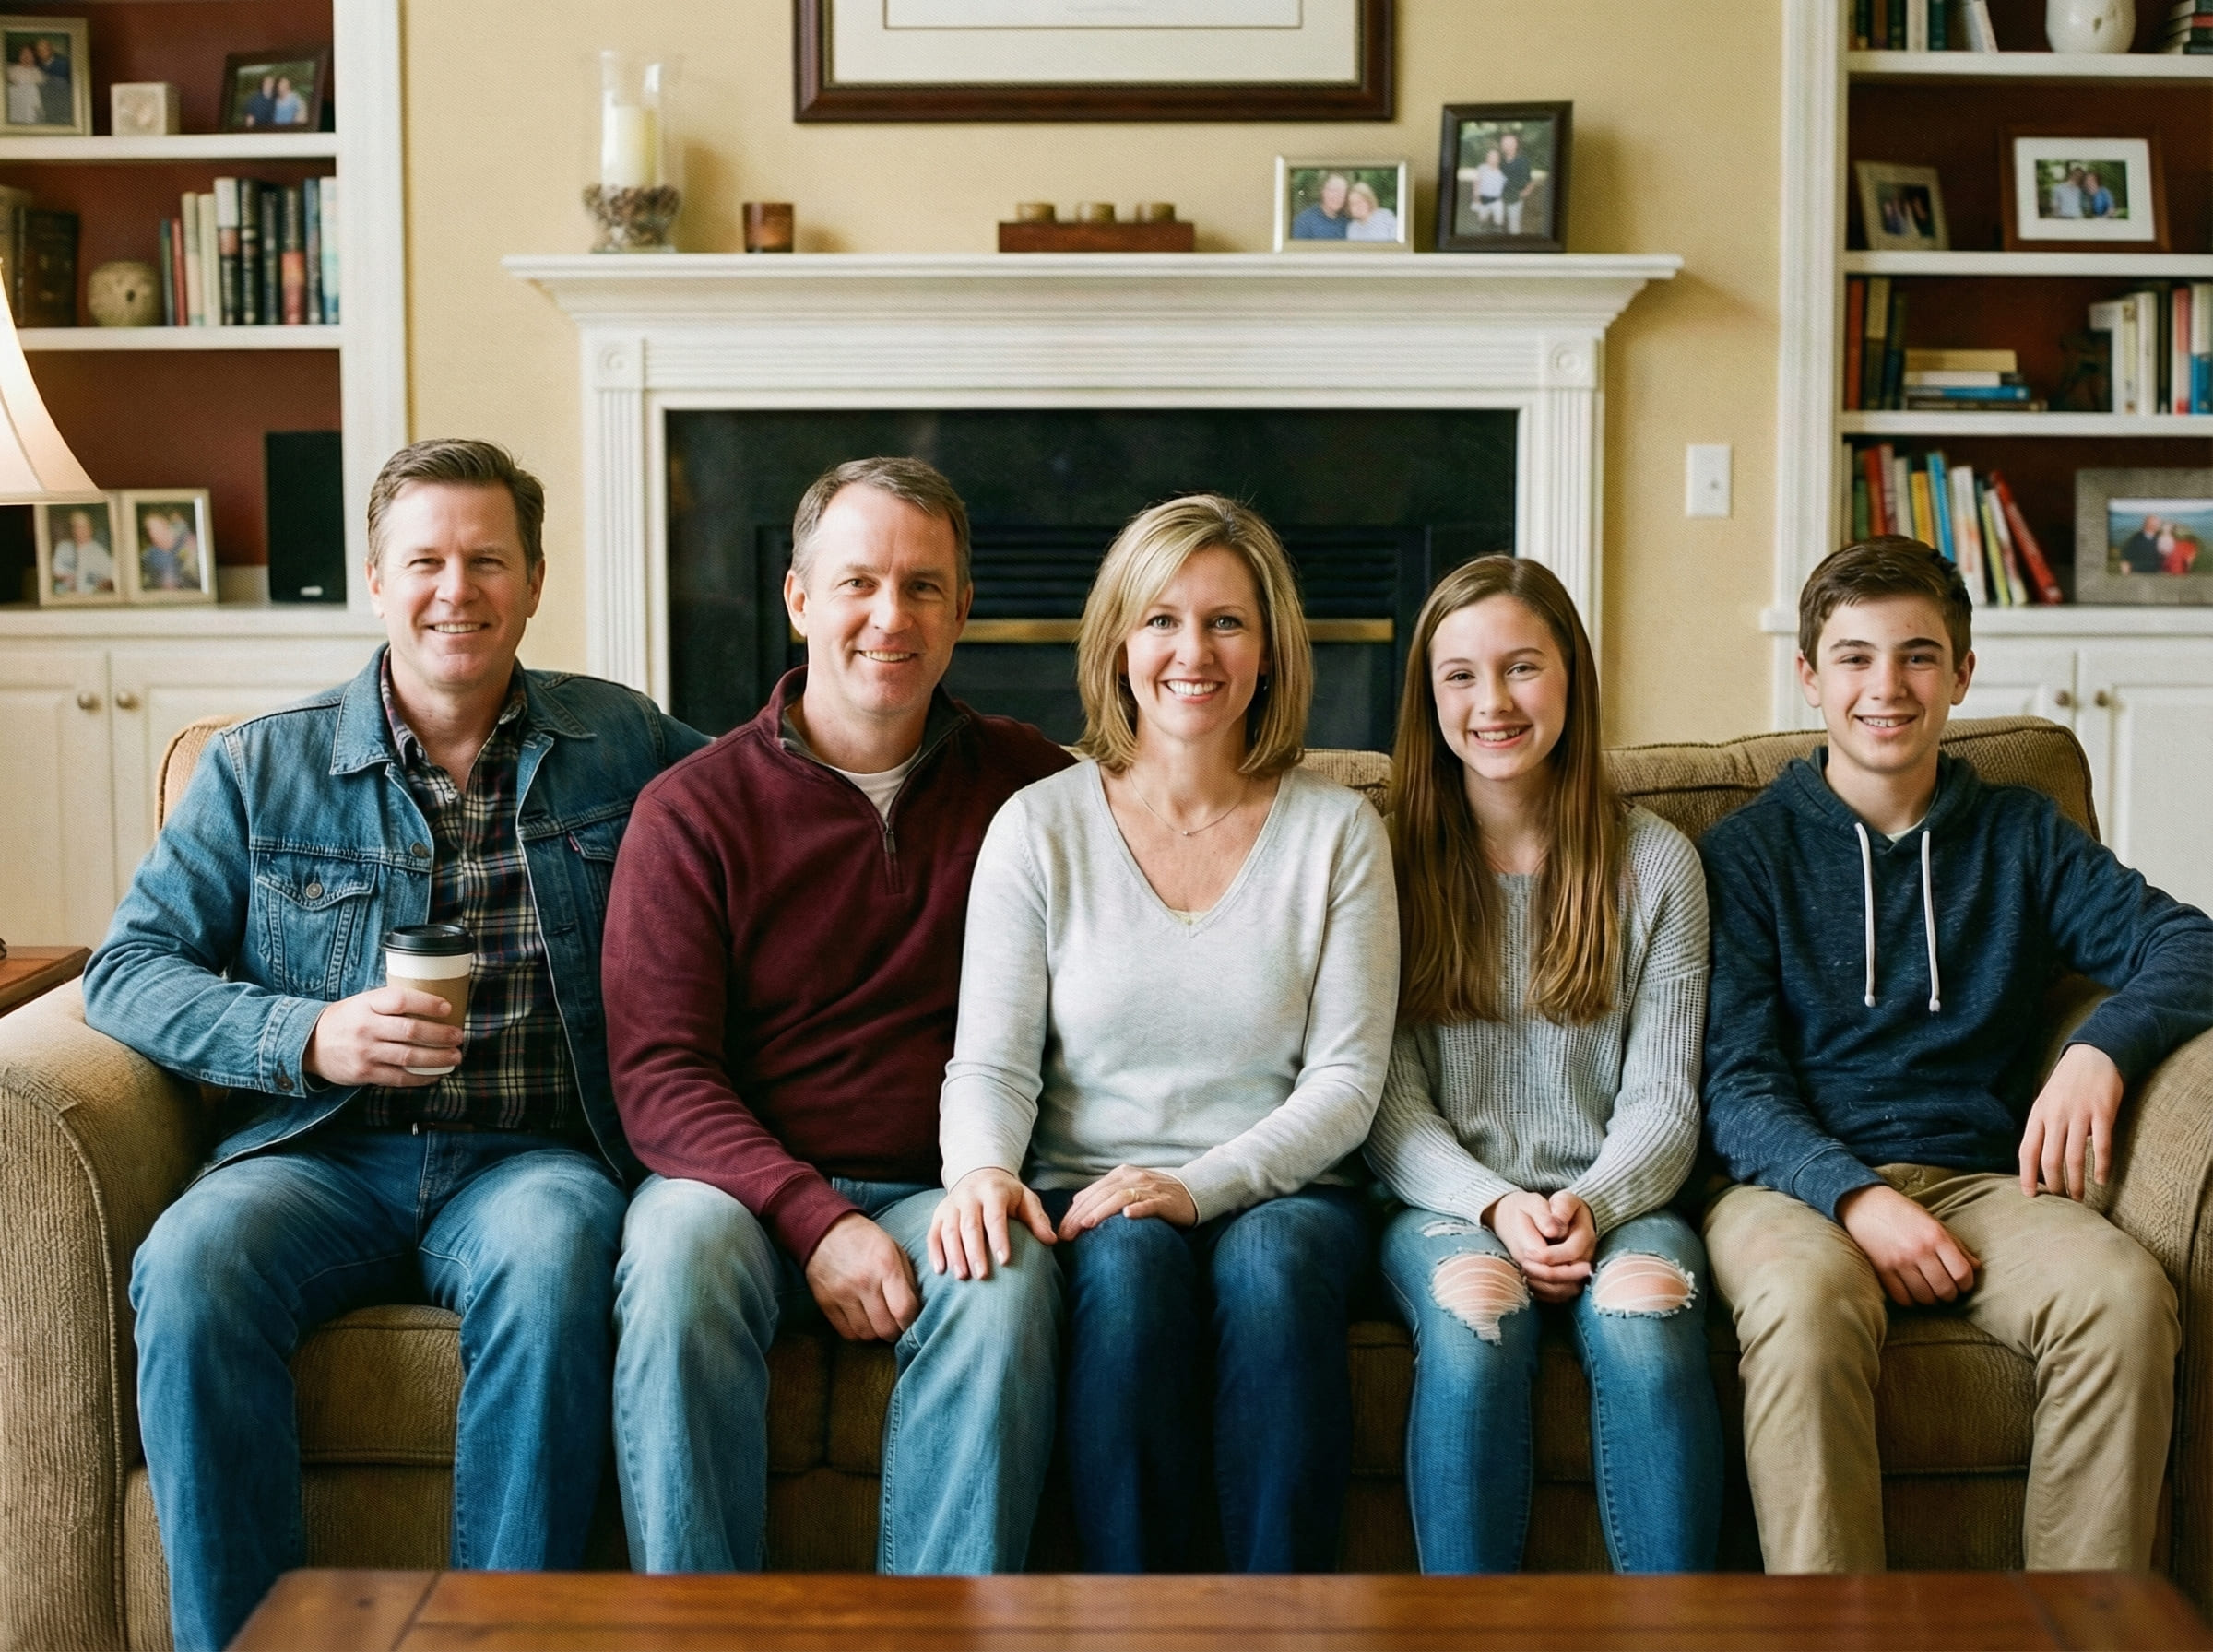
That’s why people look for ways to Add Dad to a Photo. The intention isn’t to create a new story or amplify emotion. It’s to complete the same scene, with the same camera feel — so the finished image sits calmly alongside other family photos.
People do this for everyday moments (a family dinner photo), milestone moments (a graduation picture), and especially the kinds of images that end up in albums and frames.
It’s normal to hesitate before you begin. A respectful result usually comes from going slowly: start with clear inputs, choose the simplest placement, and stop when the image feels appropriate to you.
If you plan to print, subtle realism matters even more. Print makes lighting direction, distance, and cutout edges easier to notice — so the guidance below focuses on those details first.
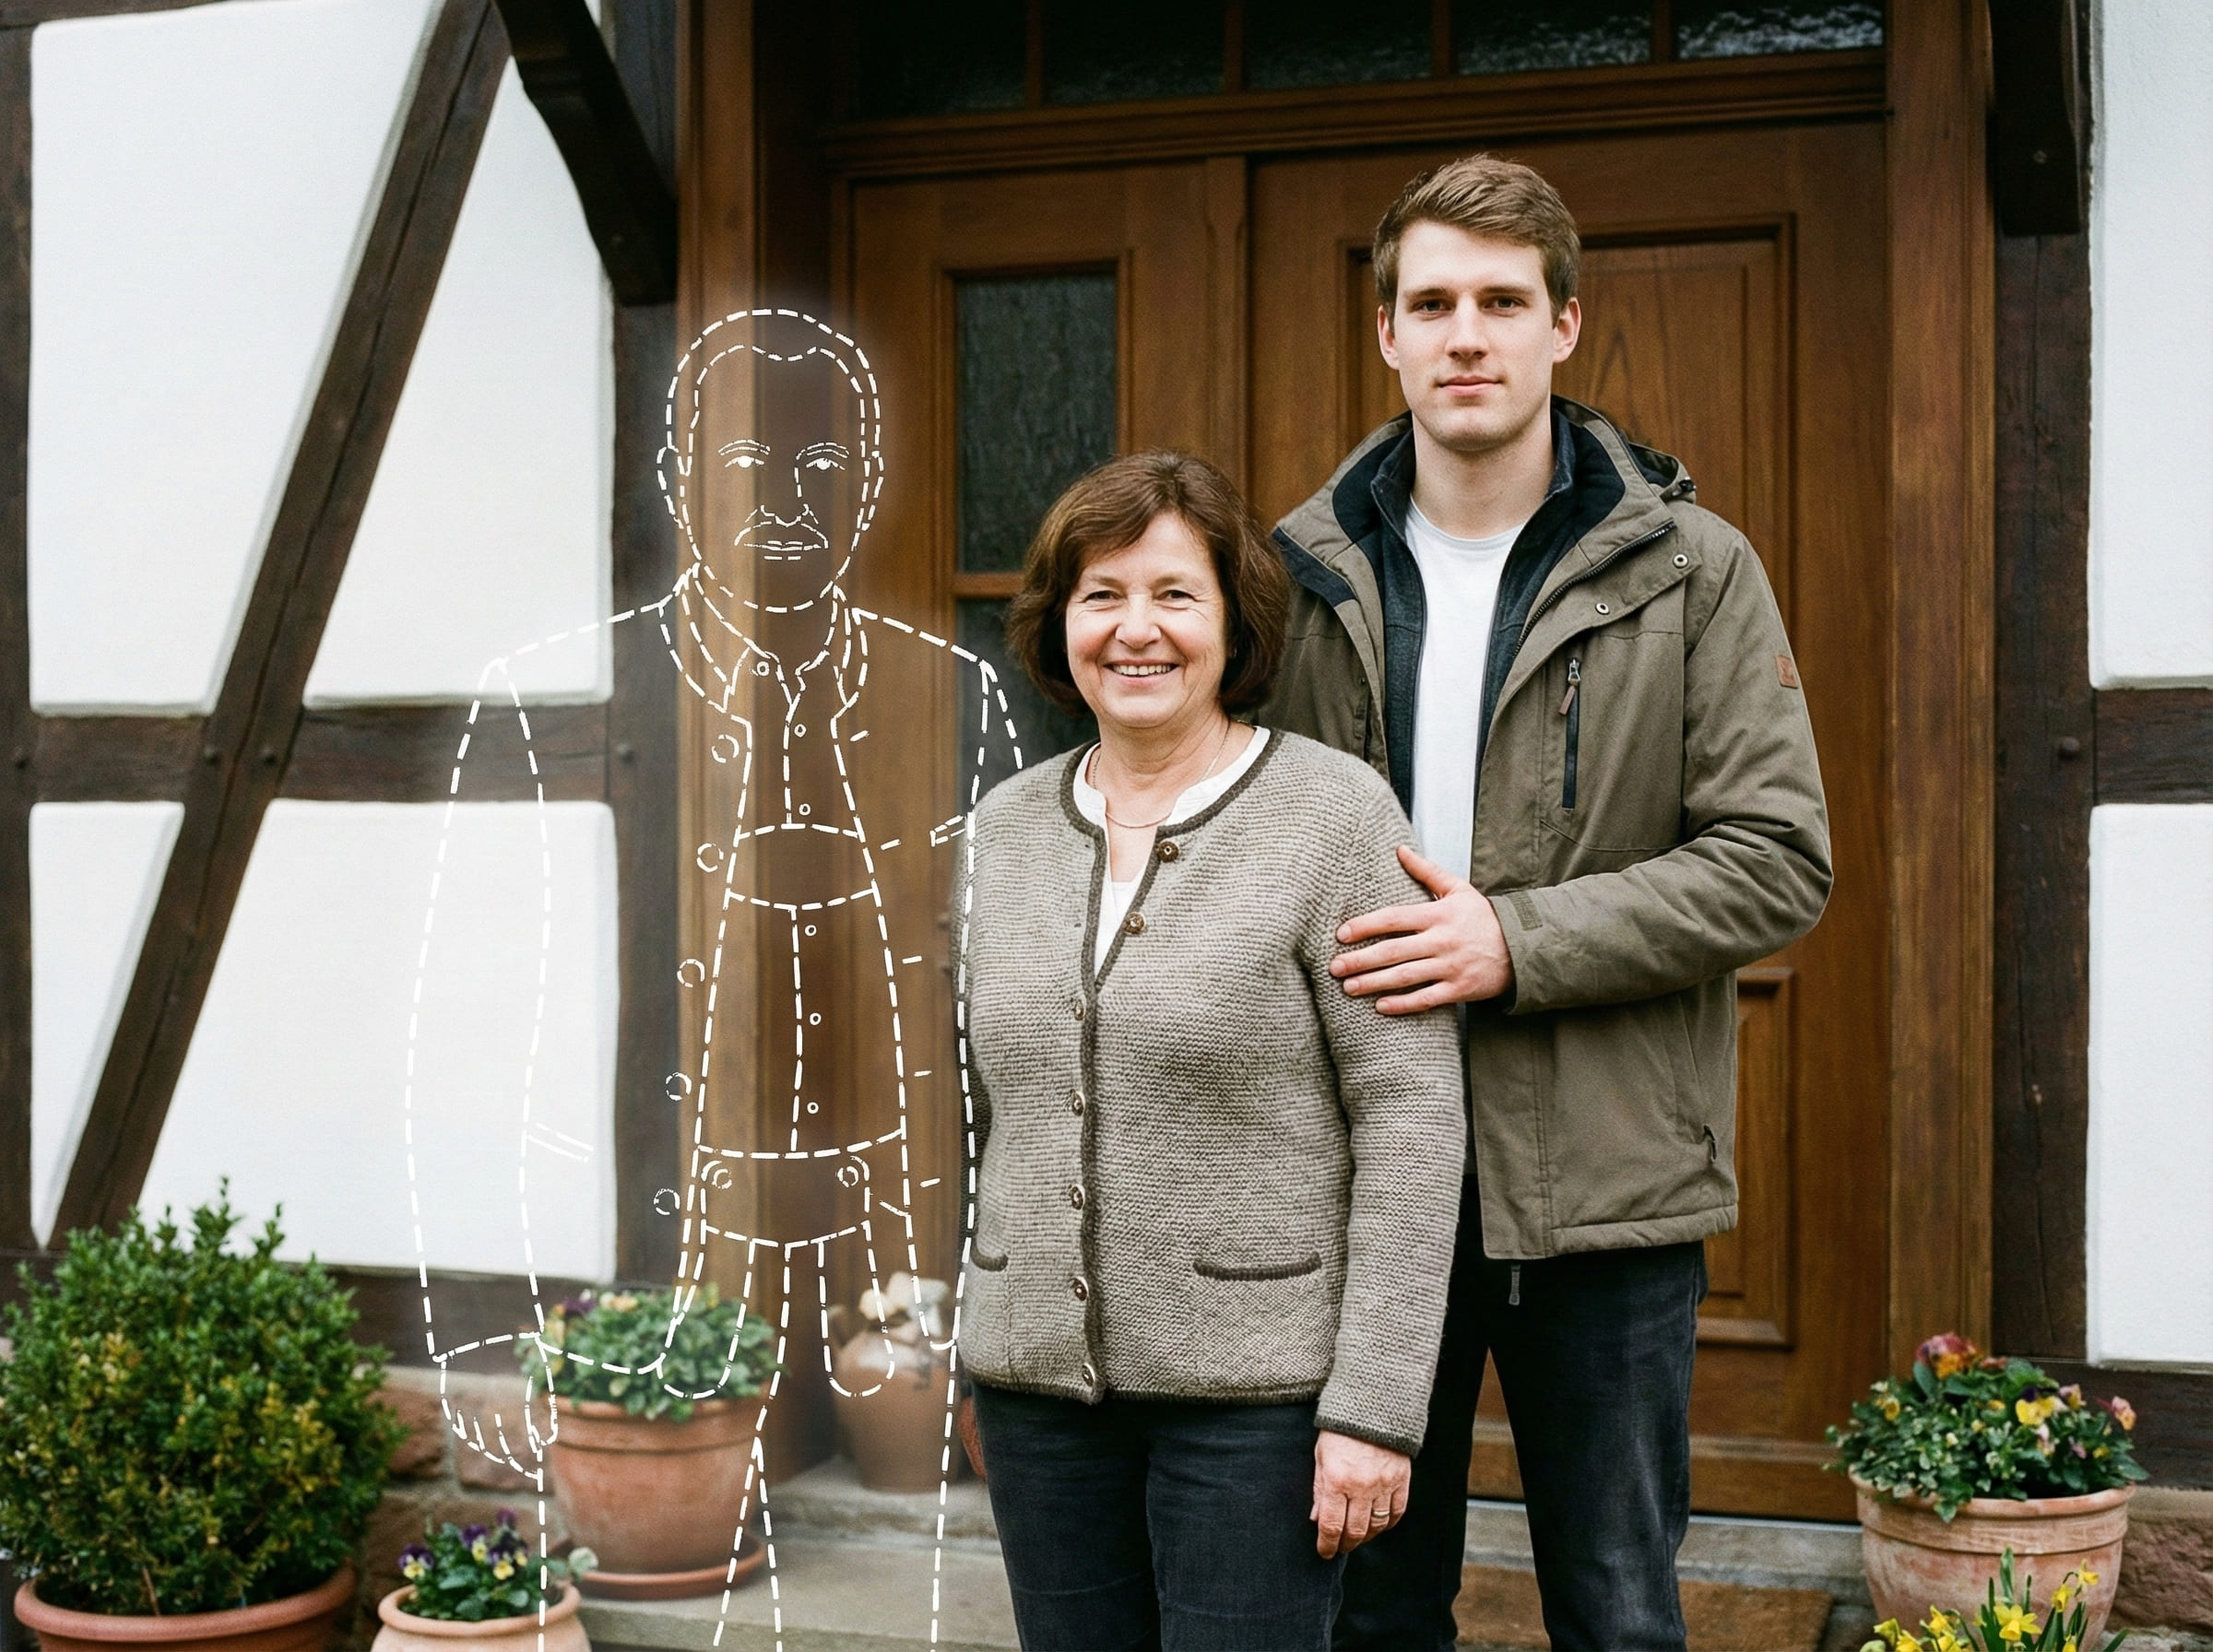
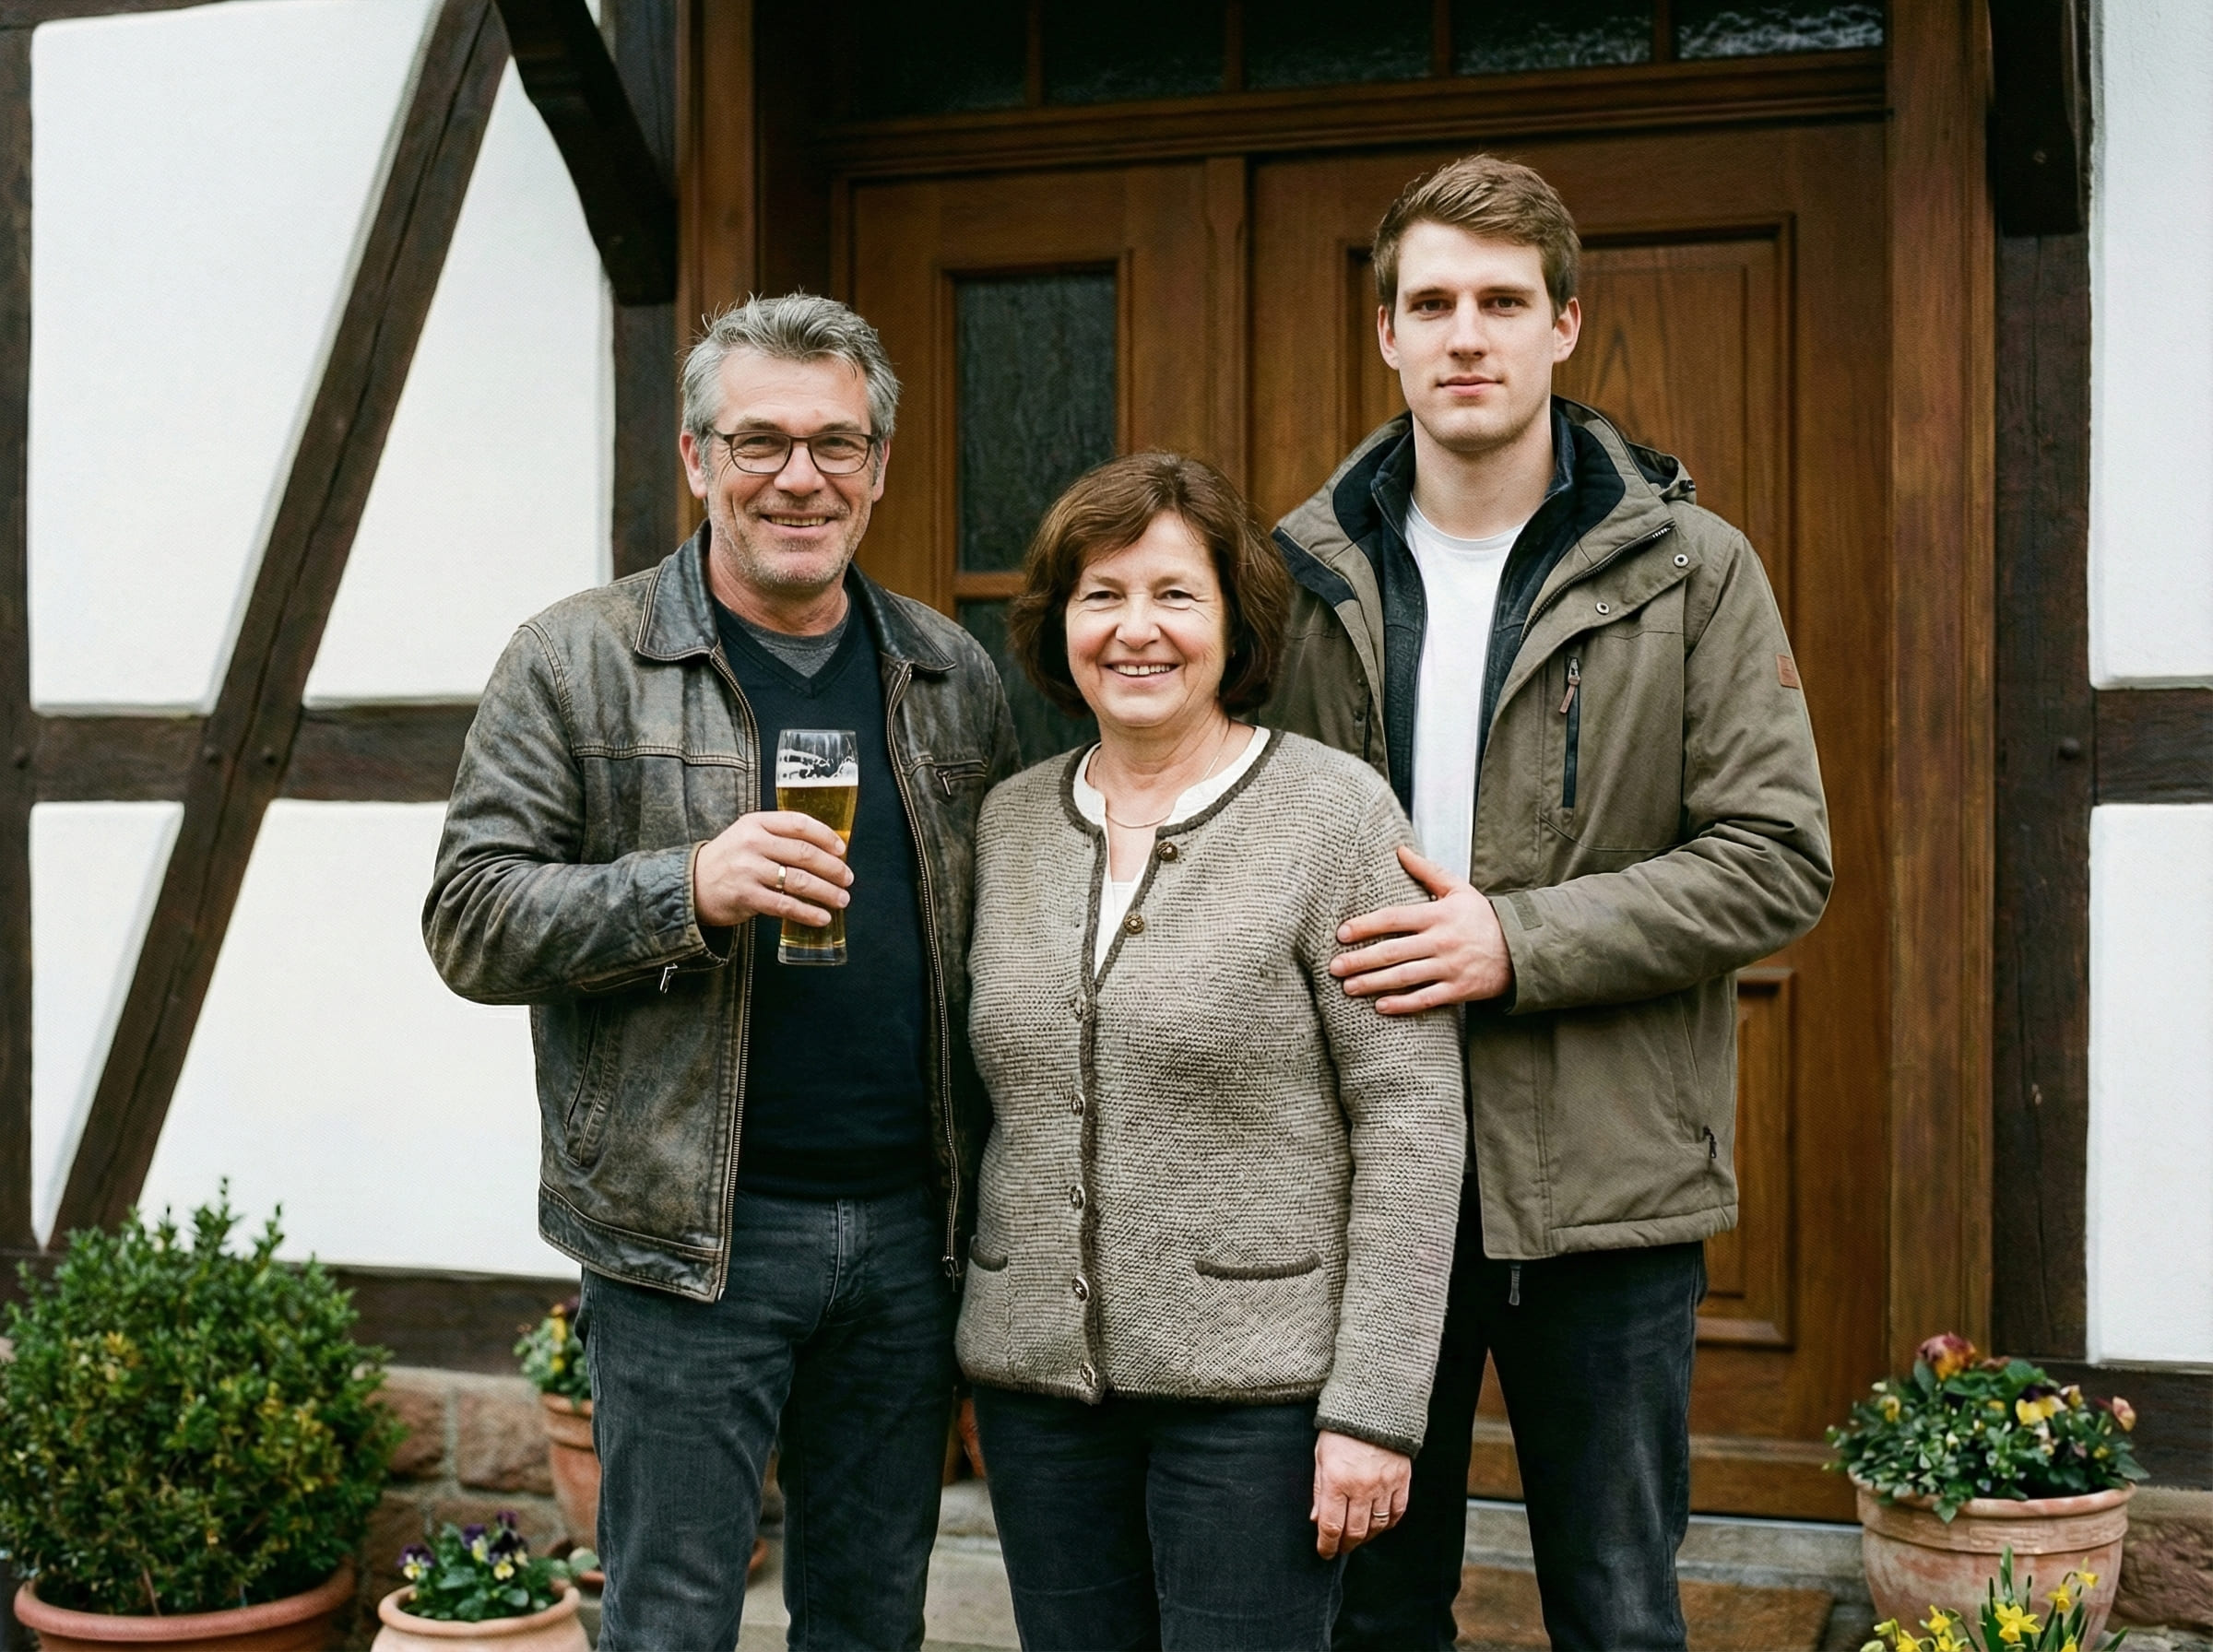
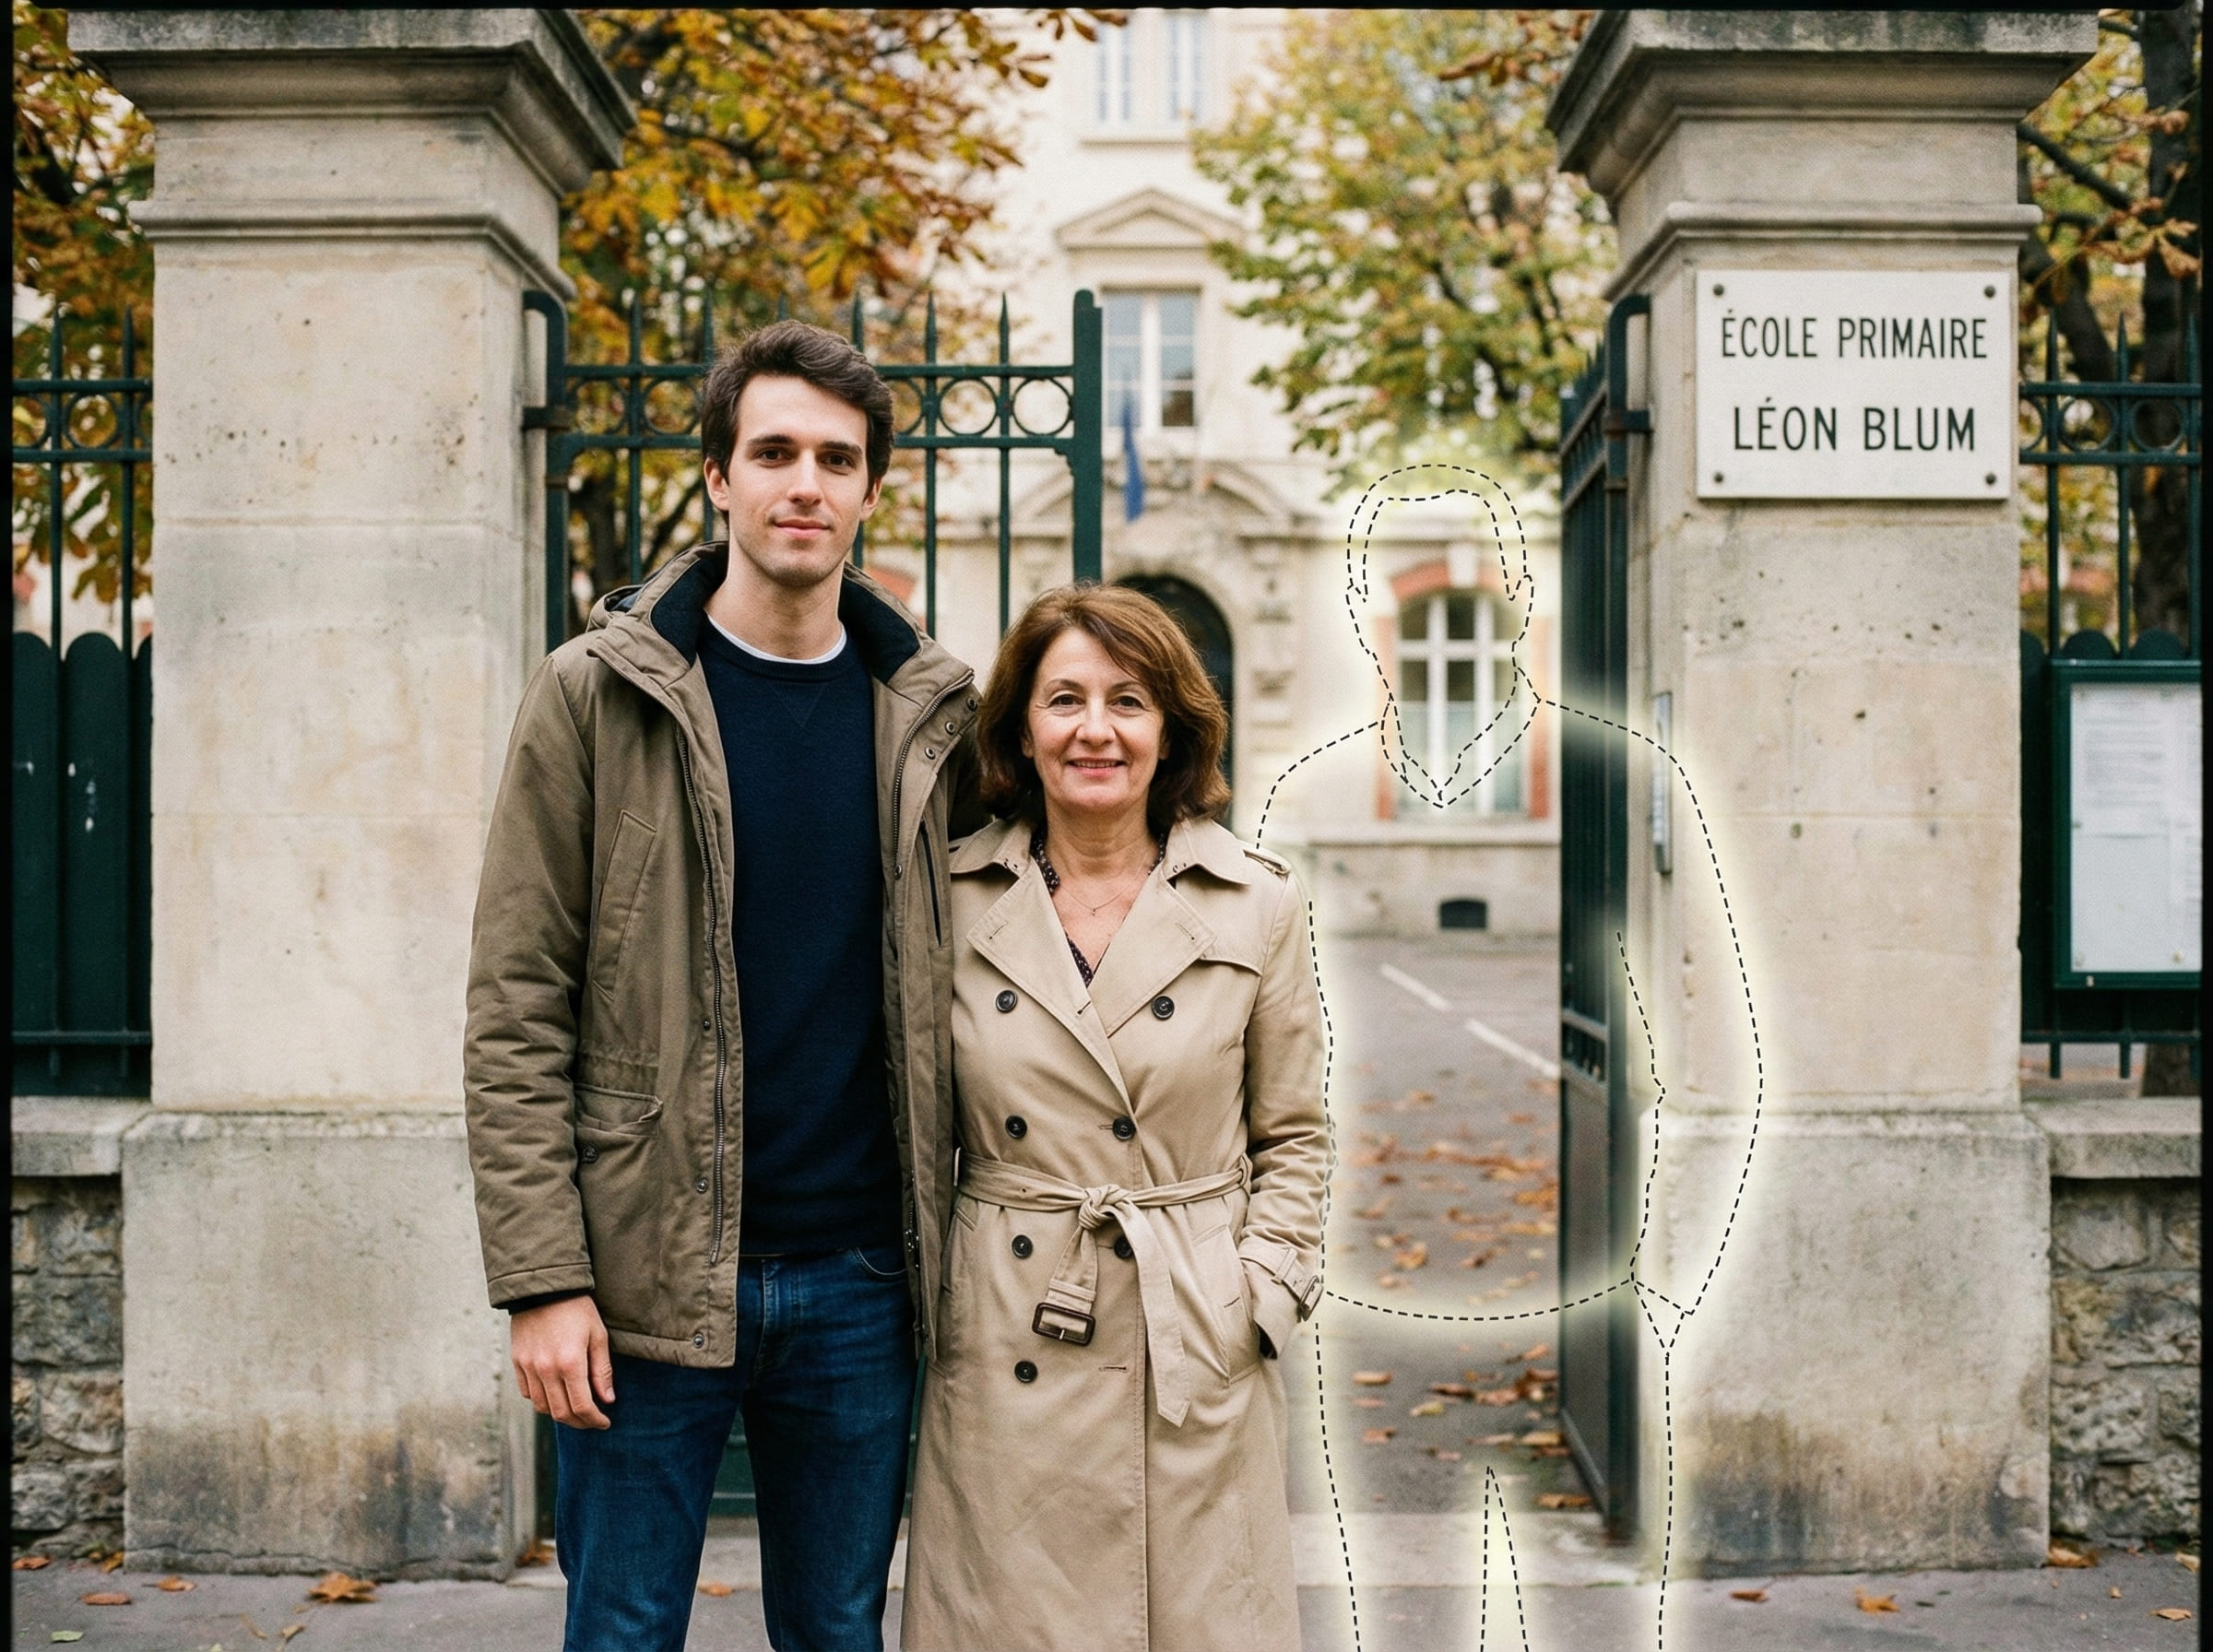
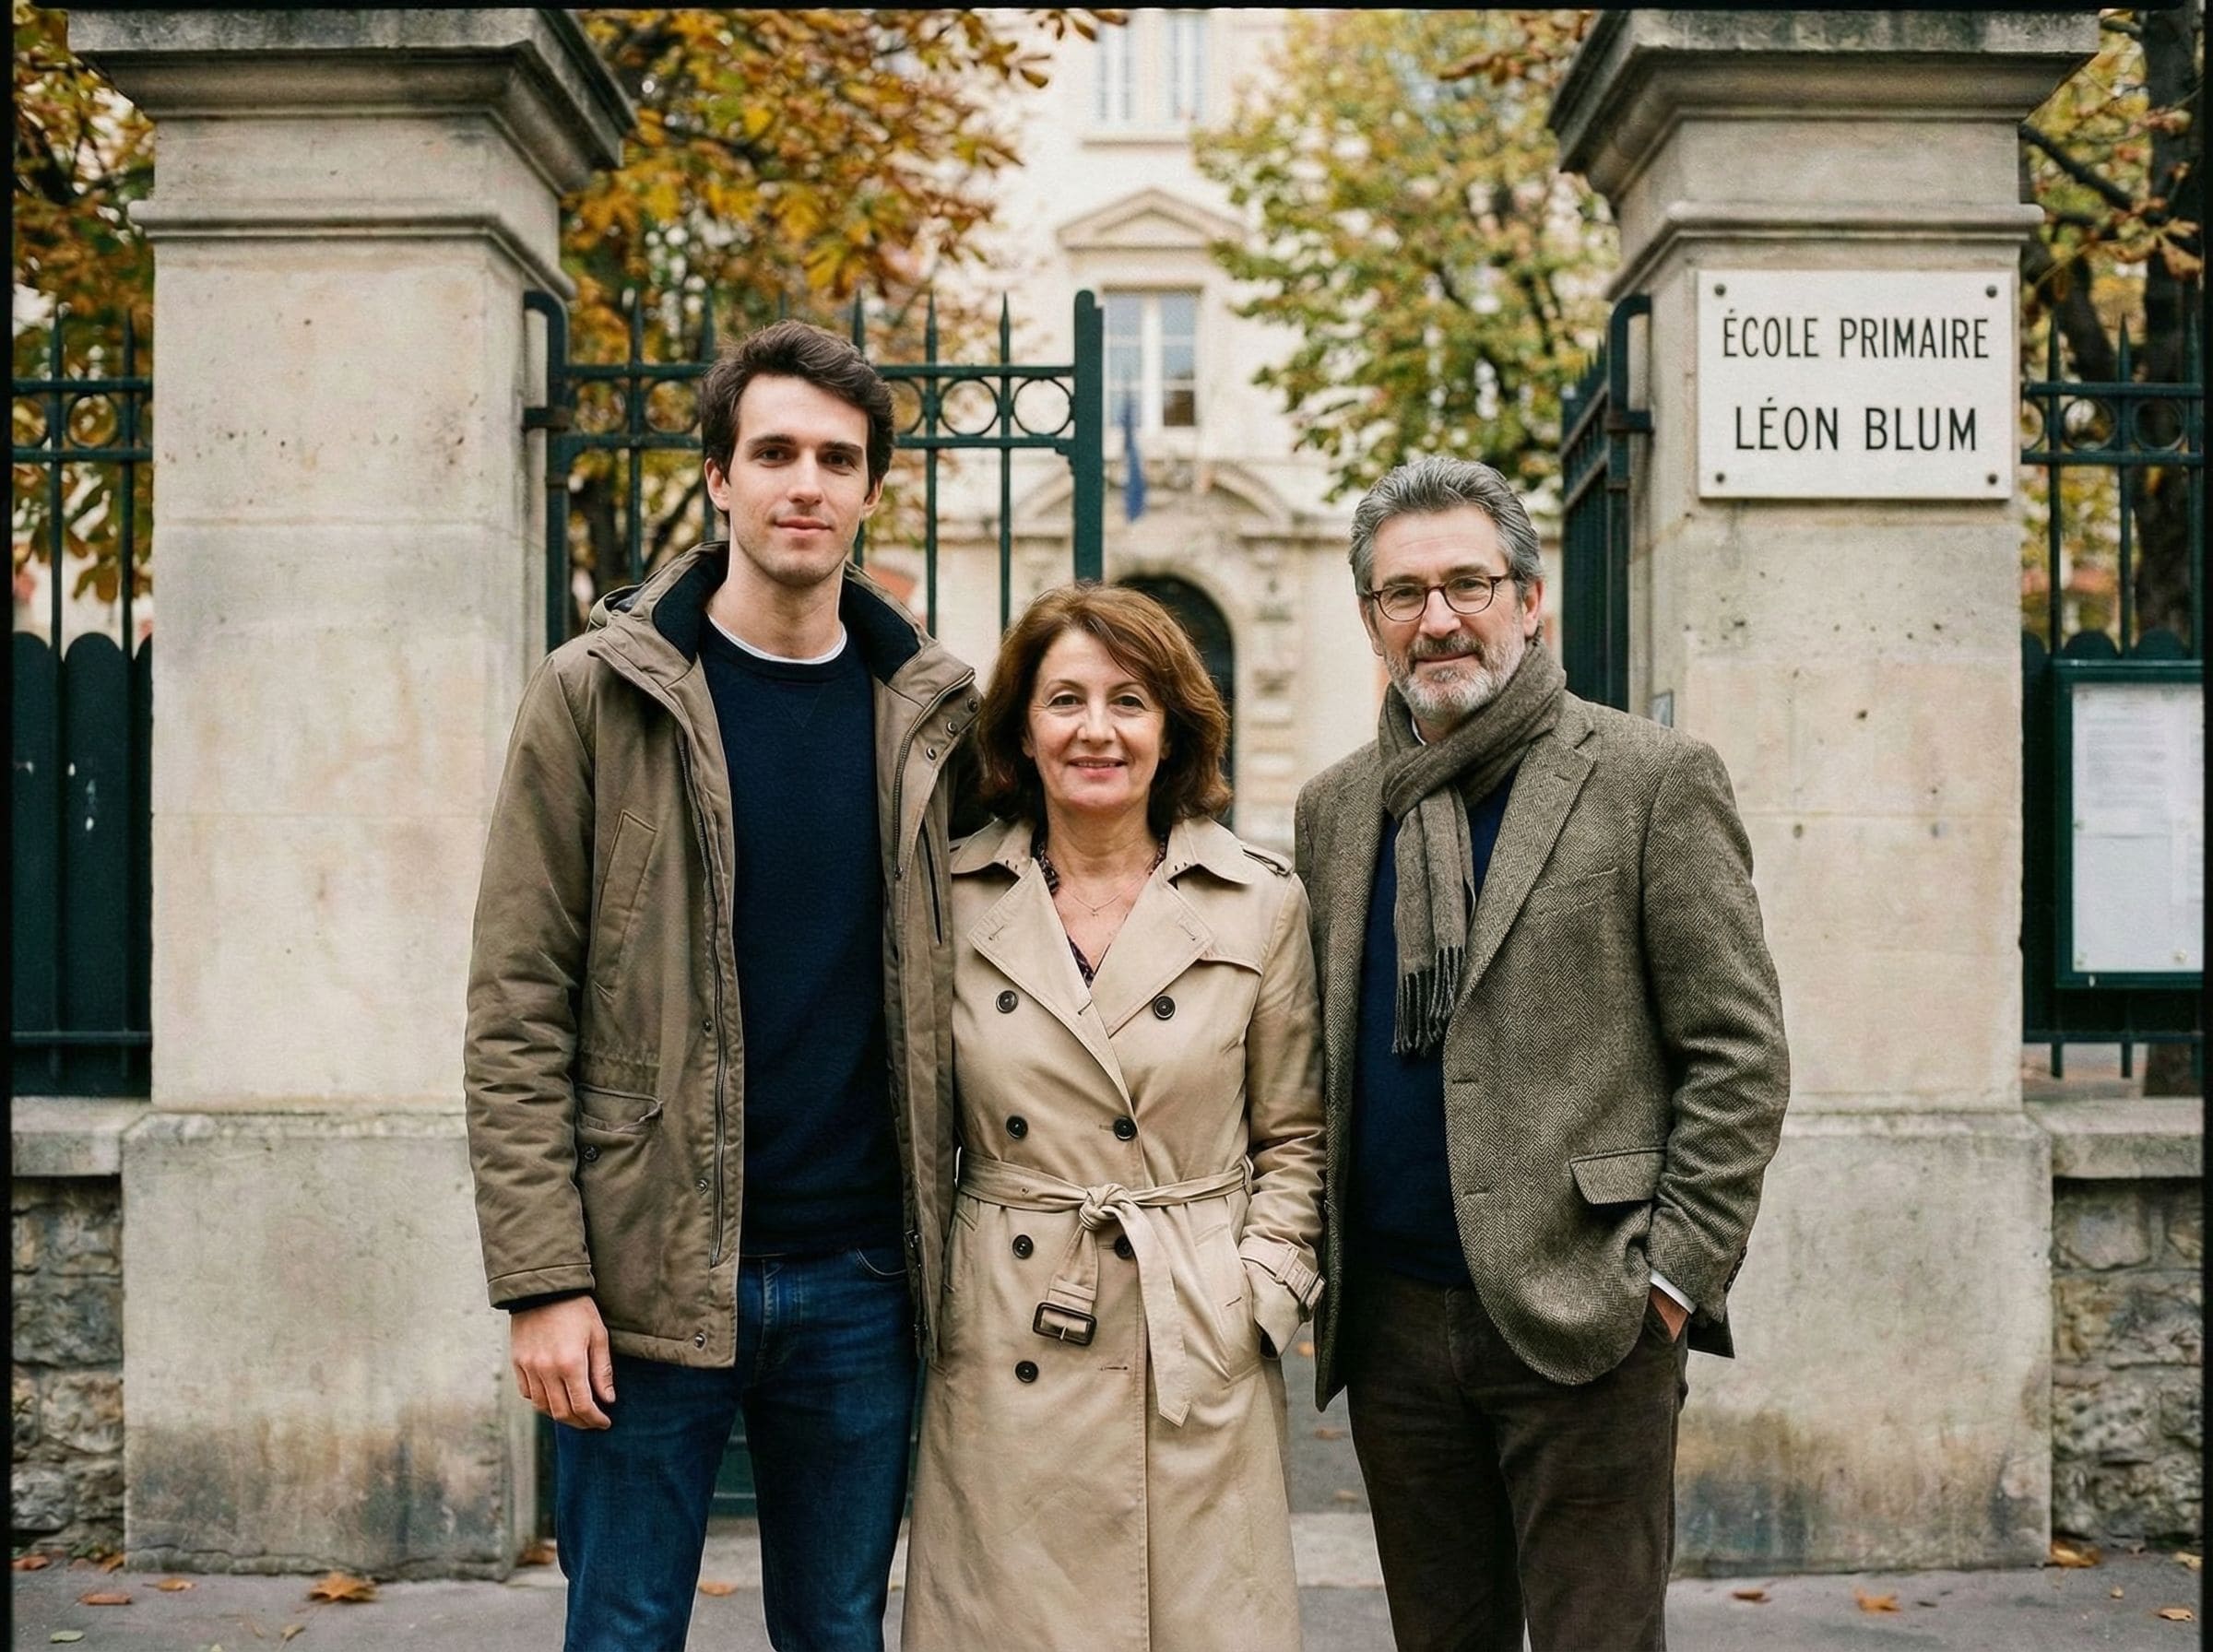
How people create a complete photo
The workflow is intentionally simple. You’re matching one person into one existing scene without changing the scene itself.
Most people do 2–3 attempts. Not because it’s difficult — but because realism often comes down to subtle placement: a small shift back, a shoulder alignment, or choosing a spot with natural overlap.
If you’re unsure where to place him, follow the scene’s logic: standing if the group is standing, seated if everyone is seated, and never in a spot where nobody could physically be.
What makes the result look natural
People often assume realism is mostly about facial detail. In practice, realism is mostly about the scene: light direction, depth, edges, and color temperature.
If you want to Add Dad to a Photo and keep it believable, these four factors matter most:
If something looks “off,” it’s usually one of three things: the lighting direction conflicts, the placement depth is wrong, or the dad photo is much lower quality than the main image. Small adjustments usually work better than starting over from scratch.
Understanding realistic expectations
It helps to set expectations before you begin. A meaningful keepsake doesn’t need to look “perfect.” It needs to look consistent with the original scene.
Best case: both photos are clear, with similar scene type (indoor-to-indoor or outdoor-to-outdoor) and comparable lighting softness.
Normal case: you’ll do a couple of tries. Slight placement changes can dramatically improve realism.
Hard case: extreme differences in angle (top-down vs straight-on), lighting (flash vs daylight), or sharpness (grainy vs crisp) can reduce believability.
In the hard case, switching to a different dad photo usually helps more than forcing a placement to work.
Tips for the best result
- Use the highest-resolution original file you have
- Avoid heavy filters or extreme blur
- Pick a photo with natural space for someone to stand or sit
- Group photos work best when lighting is consistent across faces
- If you plan to print, avoid screenshots or compressed chat exports
- A clear face with soft light blends best
- Front-facing or slight side angle is usually ideal
- Avoid harsh shadows across the face
- Choose a photo where he’s the main foreground subject
- If possible, match scene type (indoor vs outdoor) to the main photo
A quick realism upgrade is to match “scene type” first. Outdoor-to-outdoor blends more naturally. Indoor-to-indoor blends more naturally. If the main photo is warm indoor lighting, a bright daylight portrait can feel separate — using a different source photo often helps more than repeated tweaks.
Common ways people use this
People use this for photos that will be kept — not scrolled past. Common scenarios include:
- A family portrait meant to represent everyone
- A holiday gathering photo (Christmas, Thanksgiving, New Year) for albums
- A graduation or milestone picture you want to frame
- A birthday or reunion photo that feels missing someone important
- A printable keepsake for home or a remembrance table
If you want the most respectful feel, choose the version that looks like a real photo someone could have taken that day — not the one that looks most “edited.”
Is this right for you?
This is a good fit if your priority is realism and emotional comfort — a result that doesn’t feel like an “edit.”
- Want a calm, believable keepsake
- Prefer subtle completion over dramatic transformation
- Want control over placement and retries
- Plan to print the final image
- Care about matching the original moment
- You want artistic or stylized visuals
- Your photos are extremely low quality or heavily filtered
- You need a flawless result in one attempt
- You prefer a strongly “edited” look over realism
Being honest about fit keeps expectations aligned and the process respectful.
If you’re unsure, start with the clearest two photos you have and run one simple placement first. You can always adjust, retry, or pause — nothing is final unless it truly feels right to you.
Frequently asked questions
Start when you feel ready
Upload your main photo and a clear photo of your dad. Choose a realistic placement, then download a printable PNG/PDF for albums and frames.