Many families reach a moment where they think:
“I wish we had one more photo with them.”
Maybe you never got a picture of your parent holding your child.
Maybe a grandparent passed away before a big family reunion.
Maybe you only have old, blurry photos, but you’d love a clearer image where they are standing with the rest of the family.
That’s why more and more people look for ways to add a deceased loved one to a photo – not to pretend they are still alive, but to create a gentle image that says:
“You were part of us. You still are.”
In this guide, we’ll walk through:
- Why people choose to add a deceased loved one to a photo
- How to decide if it feels right and respectful for your family
- How to choose the right photos so the result looks natural
- Memorial photo ideas for different situations
- A simple, step-by-step process to do this without Photoshop, using a tool like Add Loved One to Photo
Why People Add a Deceased Loved One to a Photo
There are many reasons someone might want to combine photos with a loved one who has passed away:
-
Missing family photos
Maybe there was never a chance to take a full family portrait with everyone together. -
New family members who never met them
Children or grandchildren who were born later might never have stood next to that person in a photo, even though they hear stories about them. -
Special milestones
Weddings, graduations, birthdays, holidays – you might wish a certain person could have been there for that moment. -
A way to say “you’re still part of this”
Seeing them gently added to a new photo can be comforting, especially when grief has softened a little but the love is still strong.
Adding a deceased loved one to a photo is not about denying reality.
It’s about giving your memories a new, quiet shape.
Is It Disrespectful to Add a Deceased Loved One to a Photo?
If you’re thinking about doing this, you might also feel unsure:
- “Is this wrong or disrespectful?”
- “Will other family members be upset?”
- “What if the photo turns out creepy?”
These feelings are very normal.
Whether it’s respectful or not depends mostly on three things:
-
Your intention
- Are you doing this out of love, remembrance and longing?
- Or just to make something shocking or viral?
Loving intention is a strong foundation.
-
The style of the photo
- Gentle, natural, calm → usually feels respectful.
- Harsh effects, ghost-like transparency, glowing halos, heavy filters → often feel weird or “wrong”.
-
Your family’s feelings
- Some people will find it deeply comforting.
- Others may feel it’s too painful or too early.
- It’s okay to talk about it first and move slowly.
A simple approach is to ask one or two trusted family members:
“I was thinking about creating a photo with Mom in it, as if she were standing with us.
Would that feel comforting to you, or too hard right now?”
If most people feel it would be meaningful and you keep the style natural and gentle, then this can be a very kind, respectful way to honor someone’s memory.
How to Choose the Right Photos (So It Looks Natural)
A believable memorial photo starts with good source photos.
Two images matter most:
- The main photo (the one you want to add them into)
- The individual photo of your loved one
1. Choose a Clear Group or Background Photo
This is the photo where you want your loved one to appear.
Good examples:
- A family group photo in front of the house
- A birthday picture around the cake
- A wedding photo with the couple and close family
- A simple picture of a few people on the sofa
Look for a photo where:
- Faces are clearly visible
- People look relaxed, not overly stiff or posed
- The lighting is not too dark or too bright
- There is some space where another person could naturally stand or sit
2. Pick a Natural Photo of Your Loved One
Now choose a photo of the person you want to add.
Try to find:
- A clear view of their face
- A relaxed pose (standing or sitting)
- A calm or softly smiling expression that matches the mood you want
- Decent resolution (not too tiny or pixelated)
Try to avoid:
- Heavy filters that change colors too much
- Very dark or very overexposed photos
- Extremely odd angles, unless they happen to match the main photo
3. Try to Roughly Match Lighting and Angle
You don’t have to be perfect, but a rough match helps a lot.
- If the main photo is taken outdoors in soft daylight, a photo of your loved one in similar light will blend better.
- If the group is facing the camera, a front-facing photo of your loved one will usually look more natural than a strong side profile.
Modern AI can adjust many things, but good starting material always improves the result.
4. Think About Where They Would Naturally Be
Before you even upload anything, pause and imagine:
- “If they had actually been there that day, where would they stand or sit?”
Would they:
- Stand behind the family with a hand on someone’s shoulder?
- Sit on the sofa between two grandchildren?
- Stand next to the bride or groom?
- Sit on the floor near the kids?
Having this picture in your mind will make the final result feel less like an edit, and more like a moment that could have really happened.
Memorial Photo Ideas With a Deceased Loved One
If you’re not sure what kind of image you want, here are some gentle ideas that work for many families.
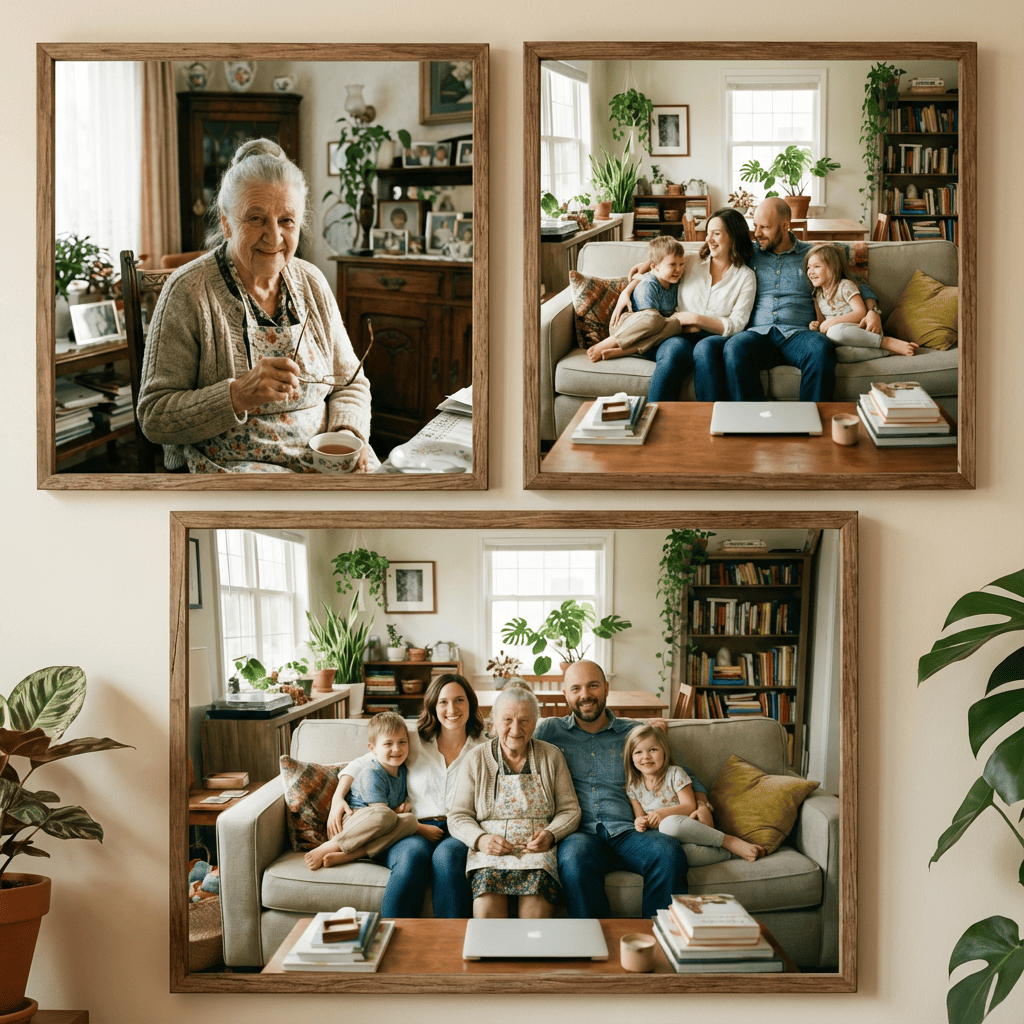
1. A Complete Family Portrait
Take a current family group photo, and add your loved one:
- Standing at one side, with a calm smile
- Sitting in their usual spot on the sofa
- Slightly behind the group, as if they’re watching over everyone
This kind of image often becomes a “new classic” family photo.
2. A Photo With Children or Grandchildren
You might want:
- A photo of your children with their late grandparent
- A picture of your child standing with a parent who passed away when they were very young
Choose a main photo where the children are clearly visible and leave room for your loved one to stand or sit close to them. This can be very meaningful as kids grow older and ask more questions.

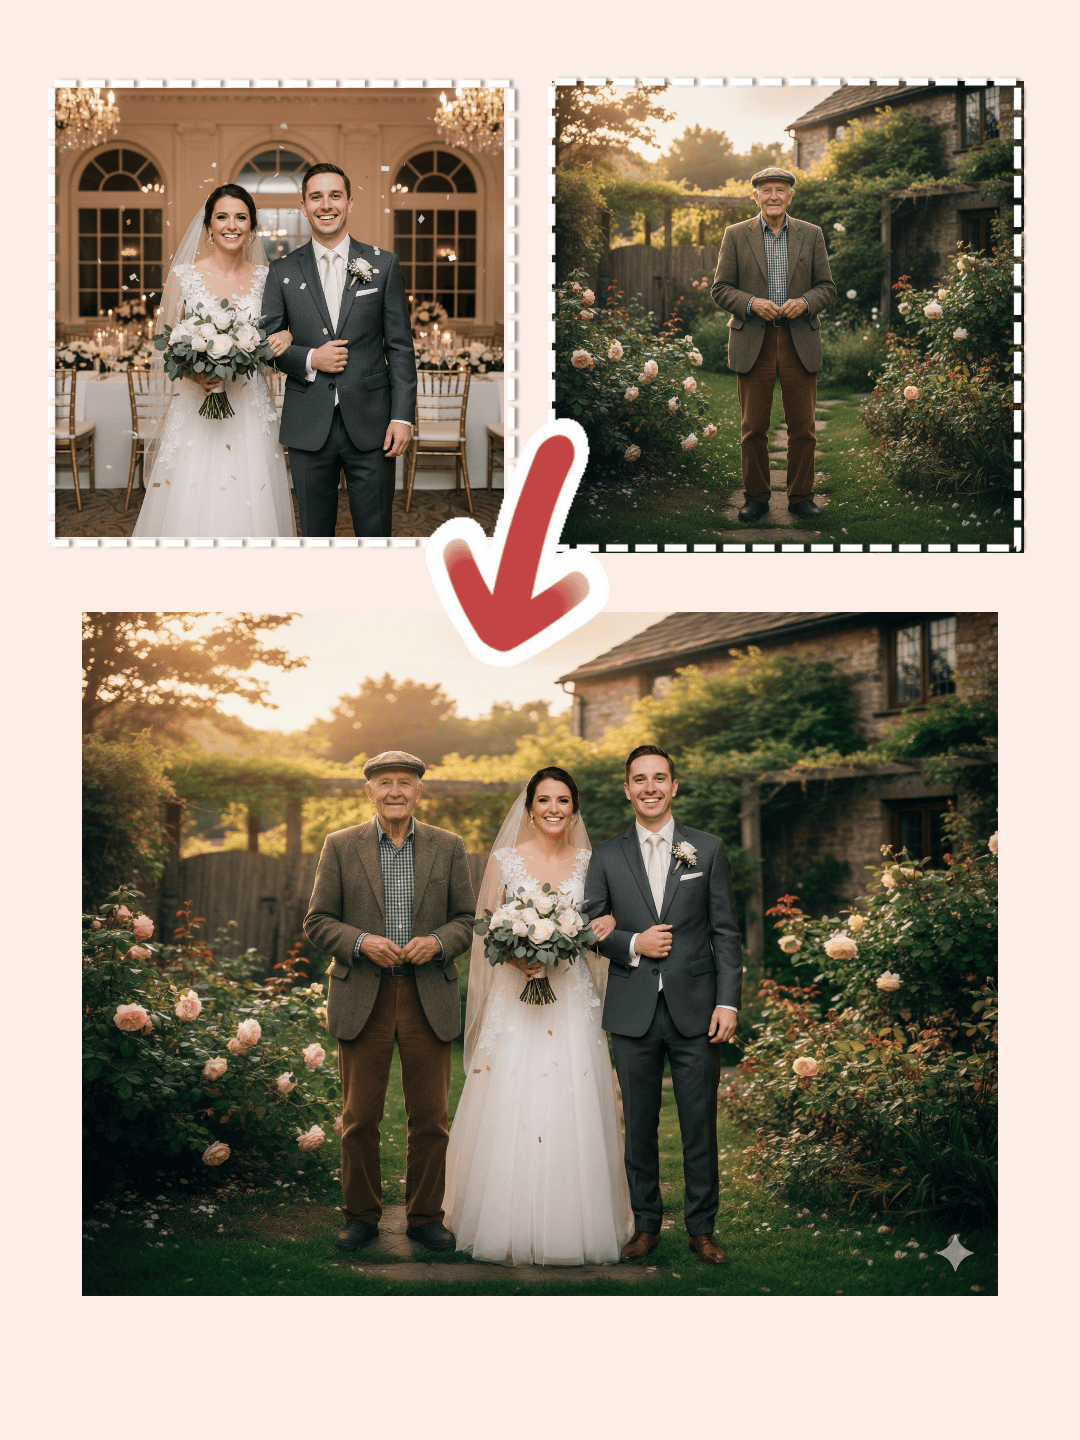
3. A Photo for a Special Moment
Some moments feel especially important:
- A wedding
- A graduation
- A big birthday
- A family reunion
You can create a memorial photo where your loved one is:
- Standing near the couple on their wedding day
- In the background of a graduation photo, close to the family
- Present at a birthday or anniversary celebration
If your special moment is Christmas, you might also like our detailed guide on
Christmas memorial photos – how to add a deceased loved one to your Christmas family picture.
4. A Calm, One-on-One Photo
Sometimes you don’t need a big group picture.
You might want a simple, soft image where:
- You are standing or sitting next to your loved one
- Two separate photos are combined into one shared scene
- The background is simple and peaceful
This can be beautiful for printing, framing, or keeping in a private place.

Step-by-Step: How to Add a Deceased Loved One to a Photo (Without Photoshop)
You don’t need Photoshop or advanced design skills to do this.
An online editor like Add Loved One to Photo can guide you through a few simple steps.
Here is a gentle workflow that matches how the tool works:
Step 1 – Start by uploading the group photo where you want to add someone
Choose the main photo first:
- A family group photo
- A wedding photo
- A casual picture with friends or relatives
This will be the background where your loved one appears.
Step 2 – Upload the individual photo of your loved one
Next, upload a single-person photo of the deceased loved one you want to add.
- Preferably one where they are alone in the frame
- Face and body clearly visible
- Expression and pose that fit the mood you want in the final image
The tool will use this photo to understand how they look and how to place them into the group.
Step 3 – Set the ratio or add extra instructions, then click the Generate button
Now it’s time to tell the tool what you want:
-
Choose the output ratio
- For example: 4:3, 3:2, 5:4, 16:9, etc.
- Pick a ratio that matches how you plan to use the image (print, frame, share online).
-
Optionally, add text instructions
You can type a short note like:- “Place him standing at the left side of the family, with a gentle smile.”
- “Add her sitting on the sofa between the children, looking toward the camera.”
When you’re ready, click the Generate button and let the AI do the heavy lifting:
it will cut them out, blend them in, and create a first version of your memorial photo.
Step 4 – Download and share thoughtfully
Look at the result slowly and ask yourself:
- Does this feel like them?
- Does it look calm and natural?
- Would I feel comfortable framing this or showing it to close family?
If the answer is yes:
- Download the final image
- Share it first with the people who knew this person best
- Give them room for their emotions – tears, smiles, silence, or a mix of everything
You don’t have to post it publicly.
This photo is, first of all, for you and the people who loved them.
Tips to Keep the Result Gentle, Not Creepy
A few simple choices can make a big difference in how the final photo feels.
Do:
- Keep the style of the photo consistent
- Use normal skin tones and realistic lighting
- Place your loved one where they might actually have stood or sat
- Choose a calm, soft expression whenever possible
- Ask a trusted friend or family member: “Does this feel comforting to you?”
Avoid:
- Ghost-like transparency, glowing blue edges, or horror-style effects
- Extra-strong filters or neon colors that don’t match the main photo
- Making them larger than everyone else in the picture
- Poses or expressions they would never have chosen in real life
- Forcing them into a silly or chaotic scene if you want a quiet, in-loving-memory feeling
A simple test:
“If I printed this and put it in my living room, would it feel peaceful or uncomfortable?”
If it feels peaceful, you are probably on the right path.
Final Thoughts: A Quiet Way to Say “You Still Matter”
Grief doesn’t follow a schedule.
Some days you feel okay. Other days, a song, a smell, or a date on the calendar brings back a wave of memories.
Creating a photo where you add a deceased loved one back into the picture is not about pretending they never left.
It’s about saying:
“You were here. You shaped us.
You still matter to our family story.”
For some people, this becomes a one-time project that brings a lot of comfort.
For others, it may become part of a new tradition — making a memorial photo for important milestones and family moments.
If you’d like to try this in a gentle, simple way, you can use an online editor like Add Loved One to Photo:
- Start by uploading the group photo where you want to add someone
- Upload a clear individual photo of your loved one
- Set the ratio, add any instructions you want, and click Generate
- Download and share thoughtfully, when you and your family are ready
Whatever you decide, we hope this guide gives you a little clarity, a little courage, and a kinder way to hold someone you miss inside a picture you can keep. 💛