Add a Deceased Loved One to a Photo App
A realism-first guide to what an app can (and can’t) do — with a gentle workflow that keeps the same scene, the same light, and the same moment.
If you’re searching for an app, you probably want something simple: upload two photos, choose placement, and get a believable keepsake — not a loud edit.
Examples
Quick checklist
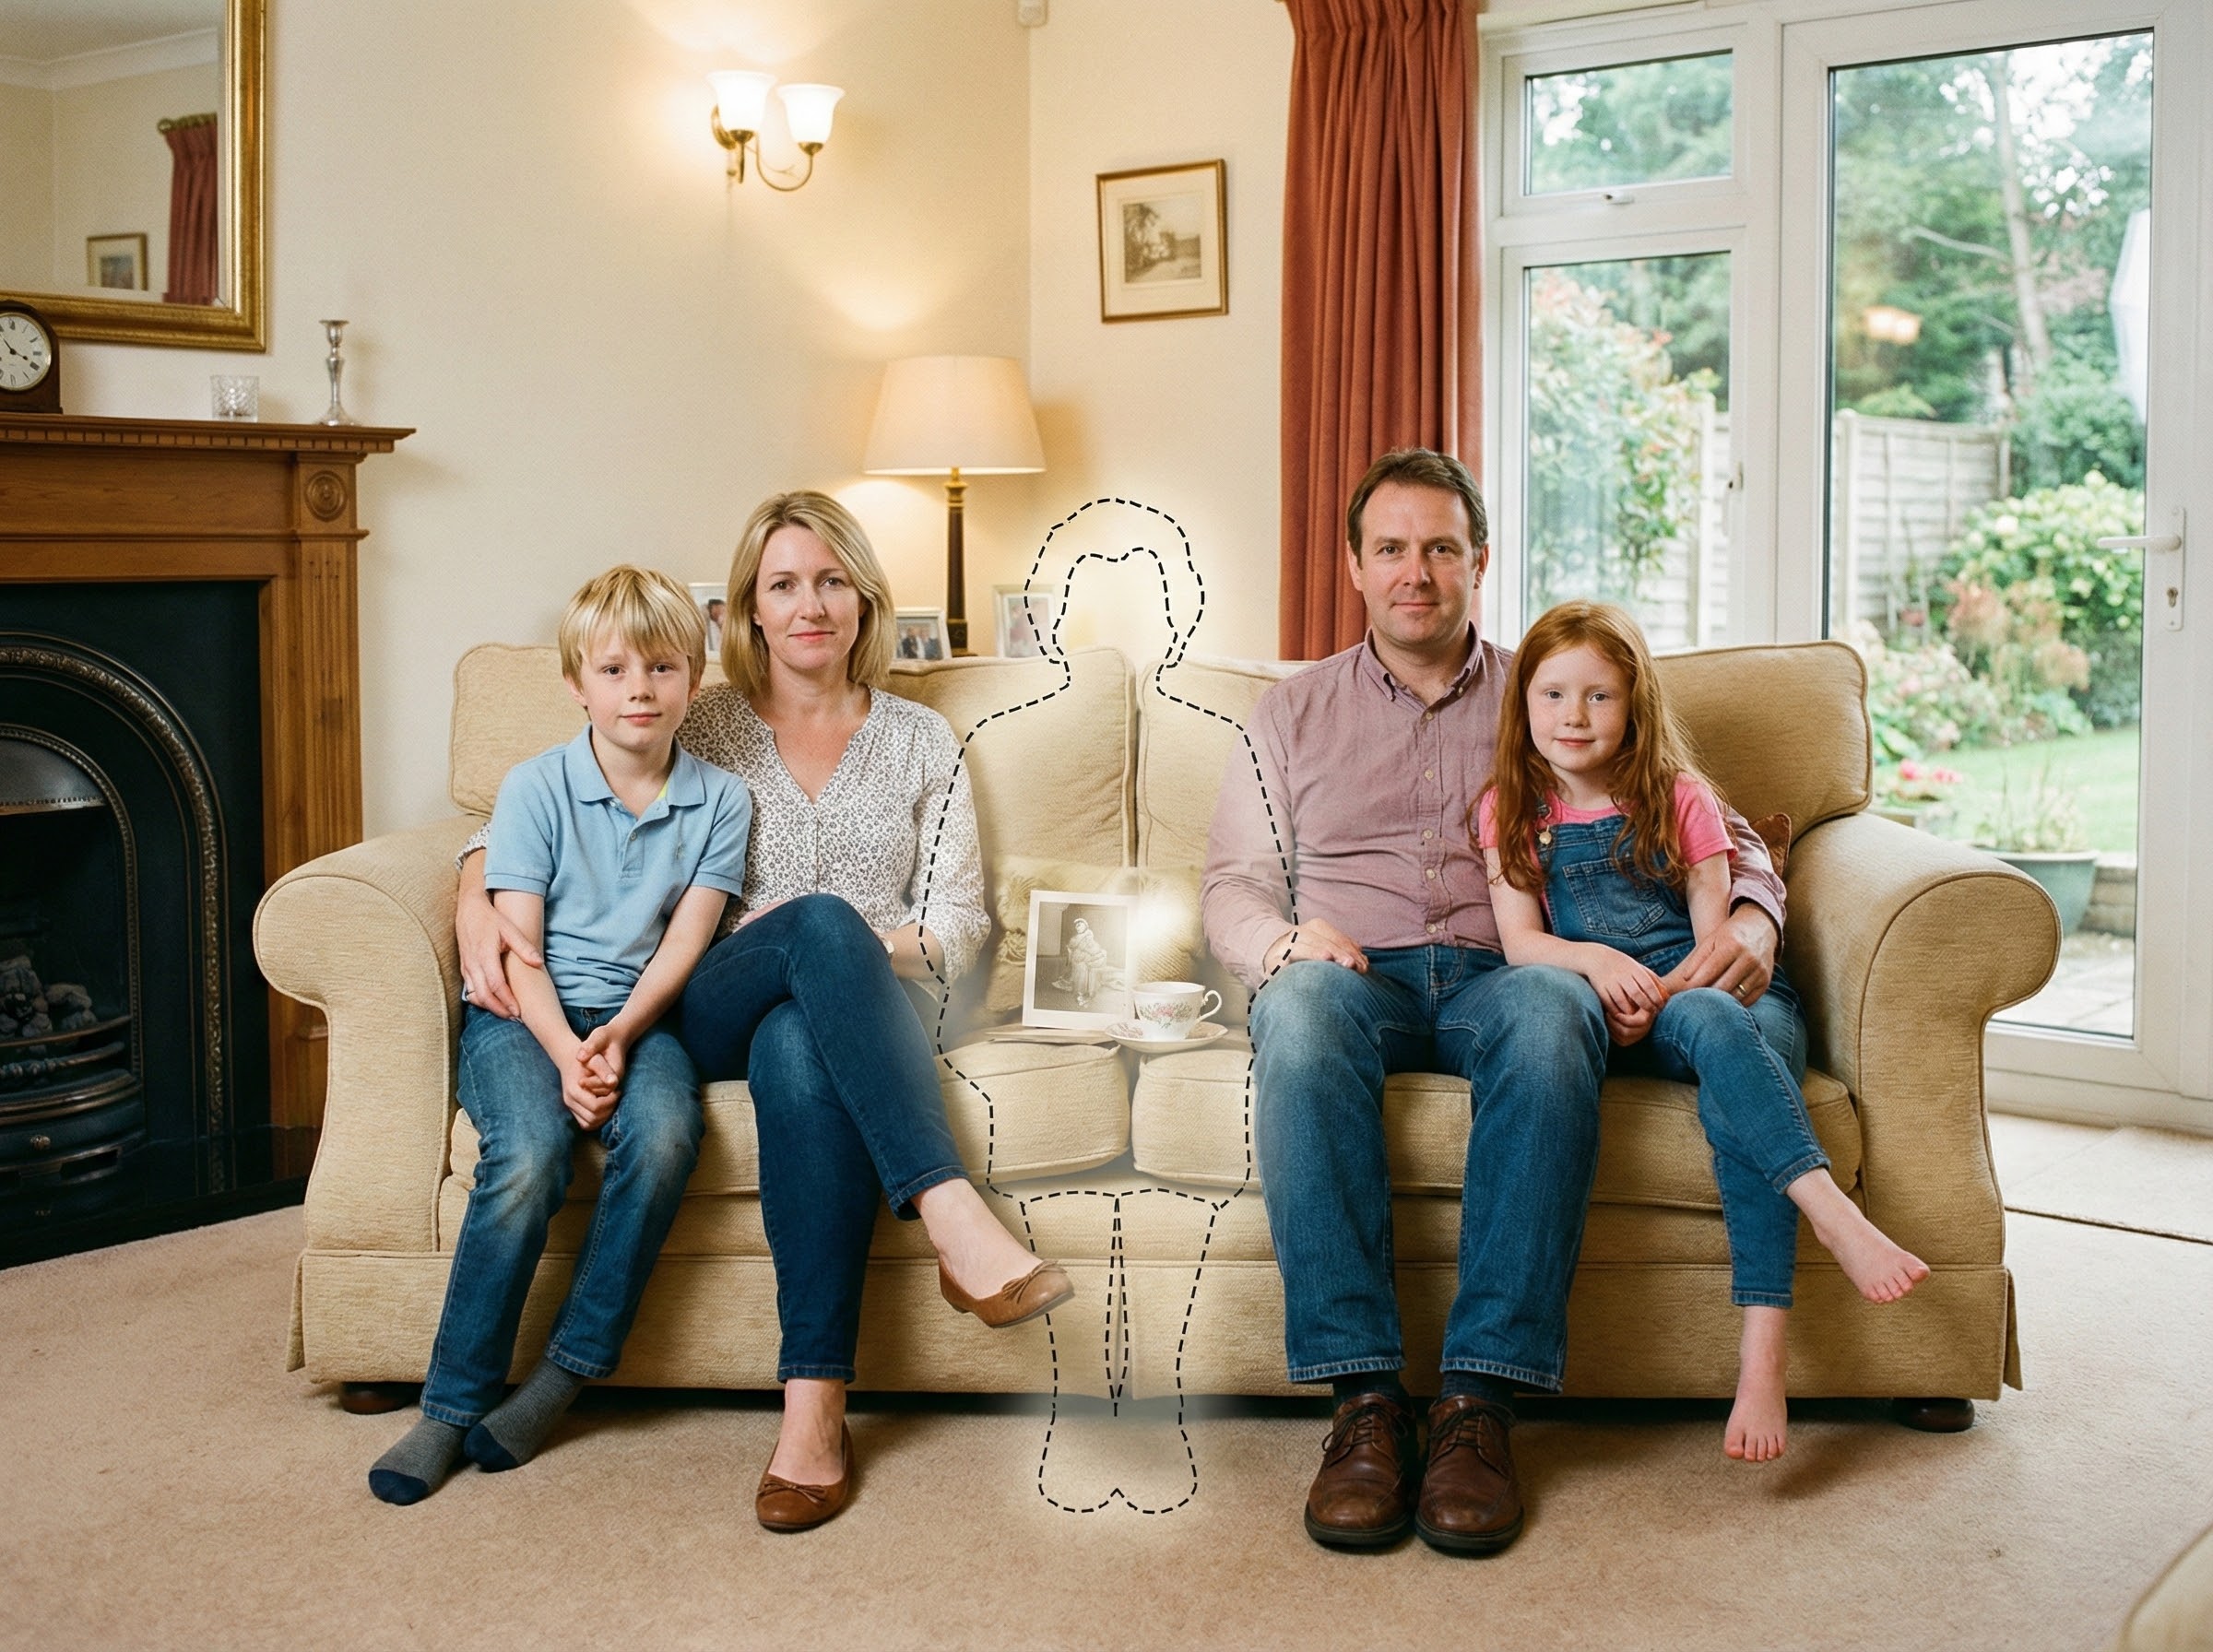
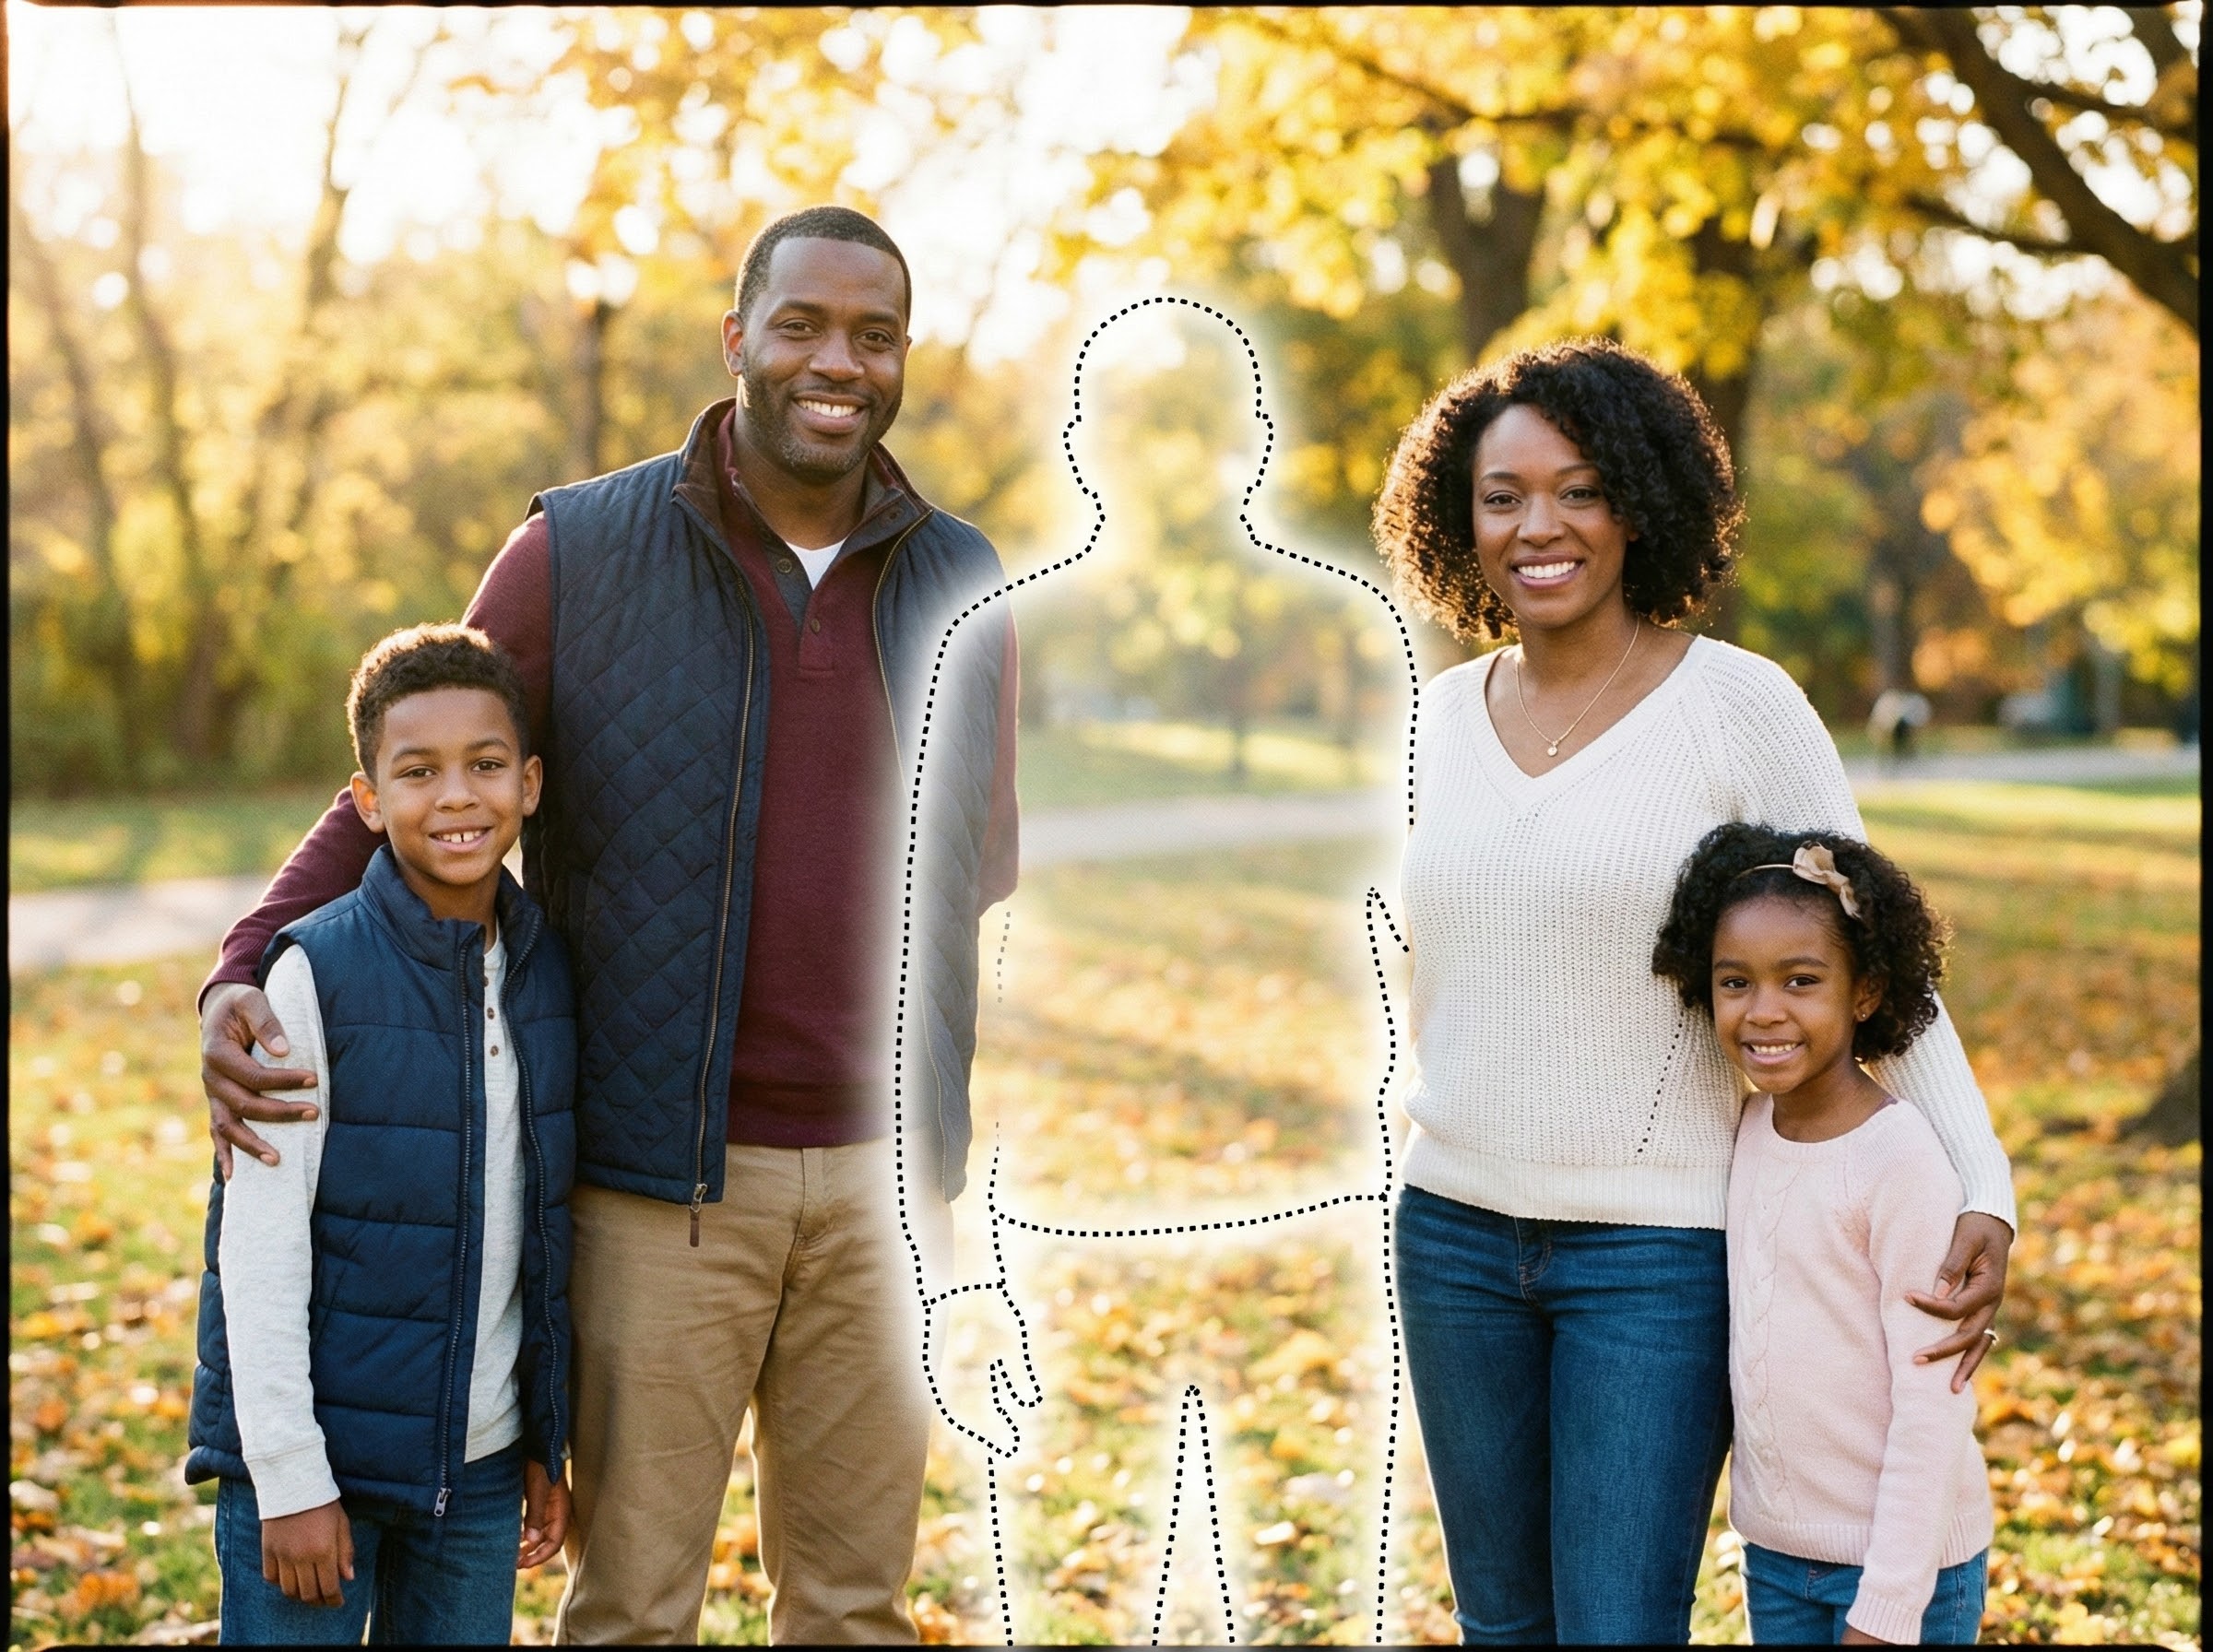
Apps work best when the scene logic is simple.
- Main photo: original file (avoid screenshots), minimal filters
- Loved one photo: face visible, soft light if possible
- Choose placement that matches the scene (standing vs seated)
Why people search for an app
When someone looks for an add deceased loved one to photo app, they’re usually not looking for complicated editing. They want something simple and private: pick two photos, choose where the person belongs, and keep the original moment intact.
The need is often emotional and practical at the same time. The photo matters, but so does the process. People don’t want a dramatic transformation — they want a respectful completion that still feels like the same day, the same camera, the same scene.
That’s also why “app” is the keyword. Apps feel approachable. No layers. No masks. No learning curve. Just a straightforward workflow.
The challenge is that many apps optimize for speed, not realism. The sections below explain how to get an app-simple workflow while still prioritizing believable blending.
How an app-like workflow works
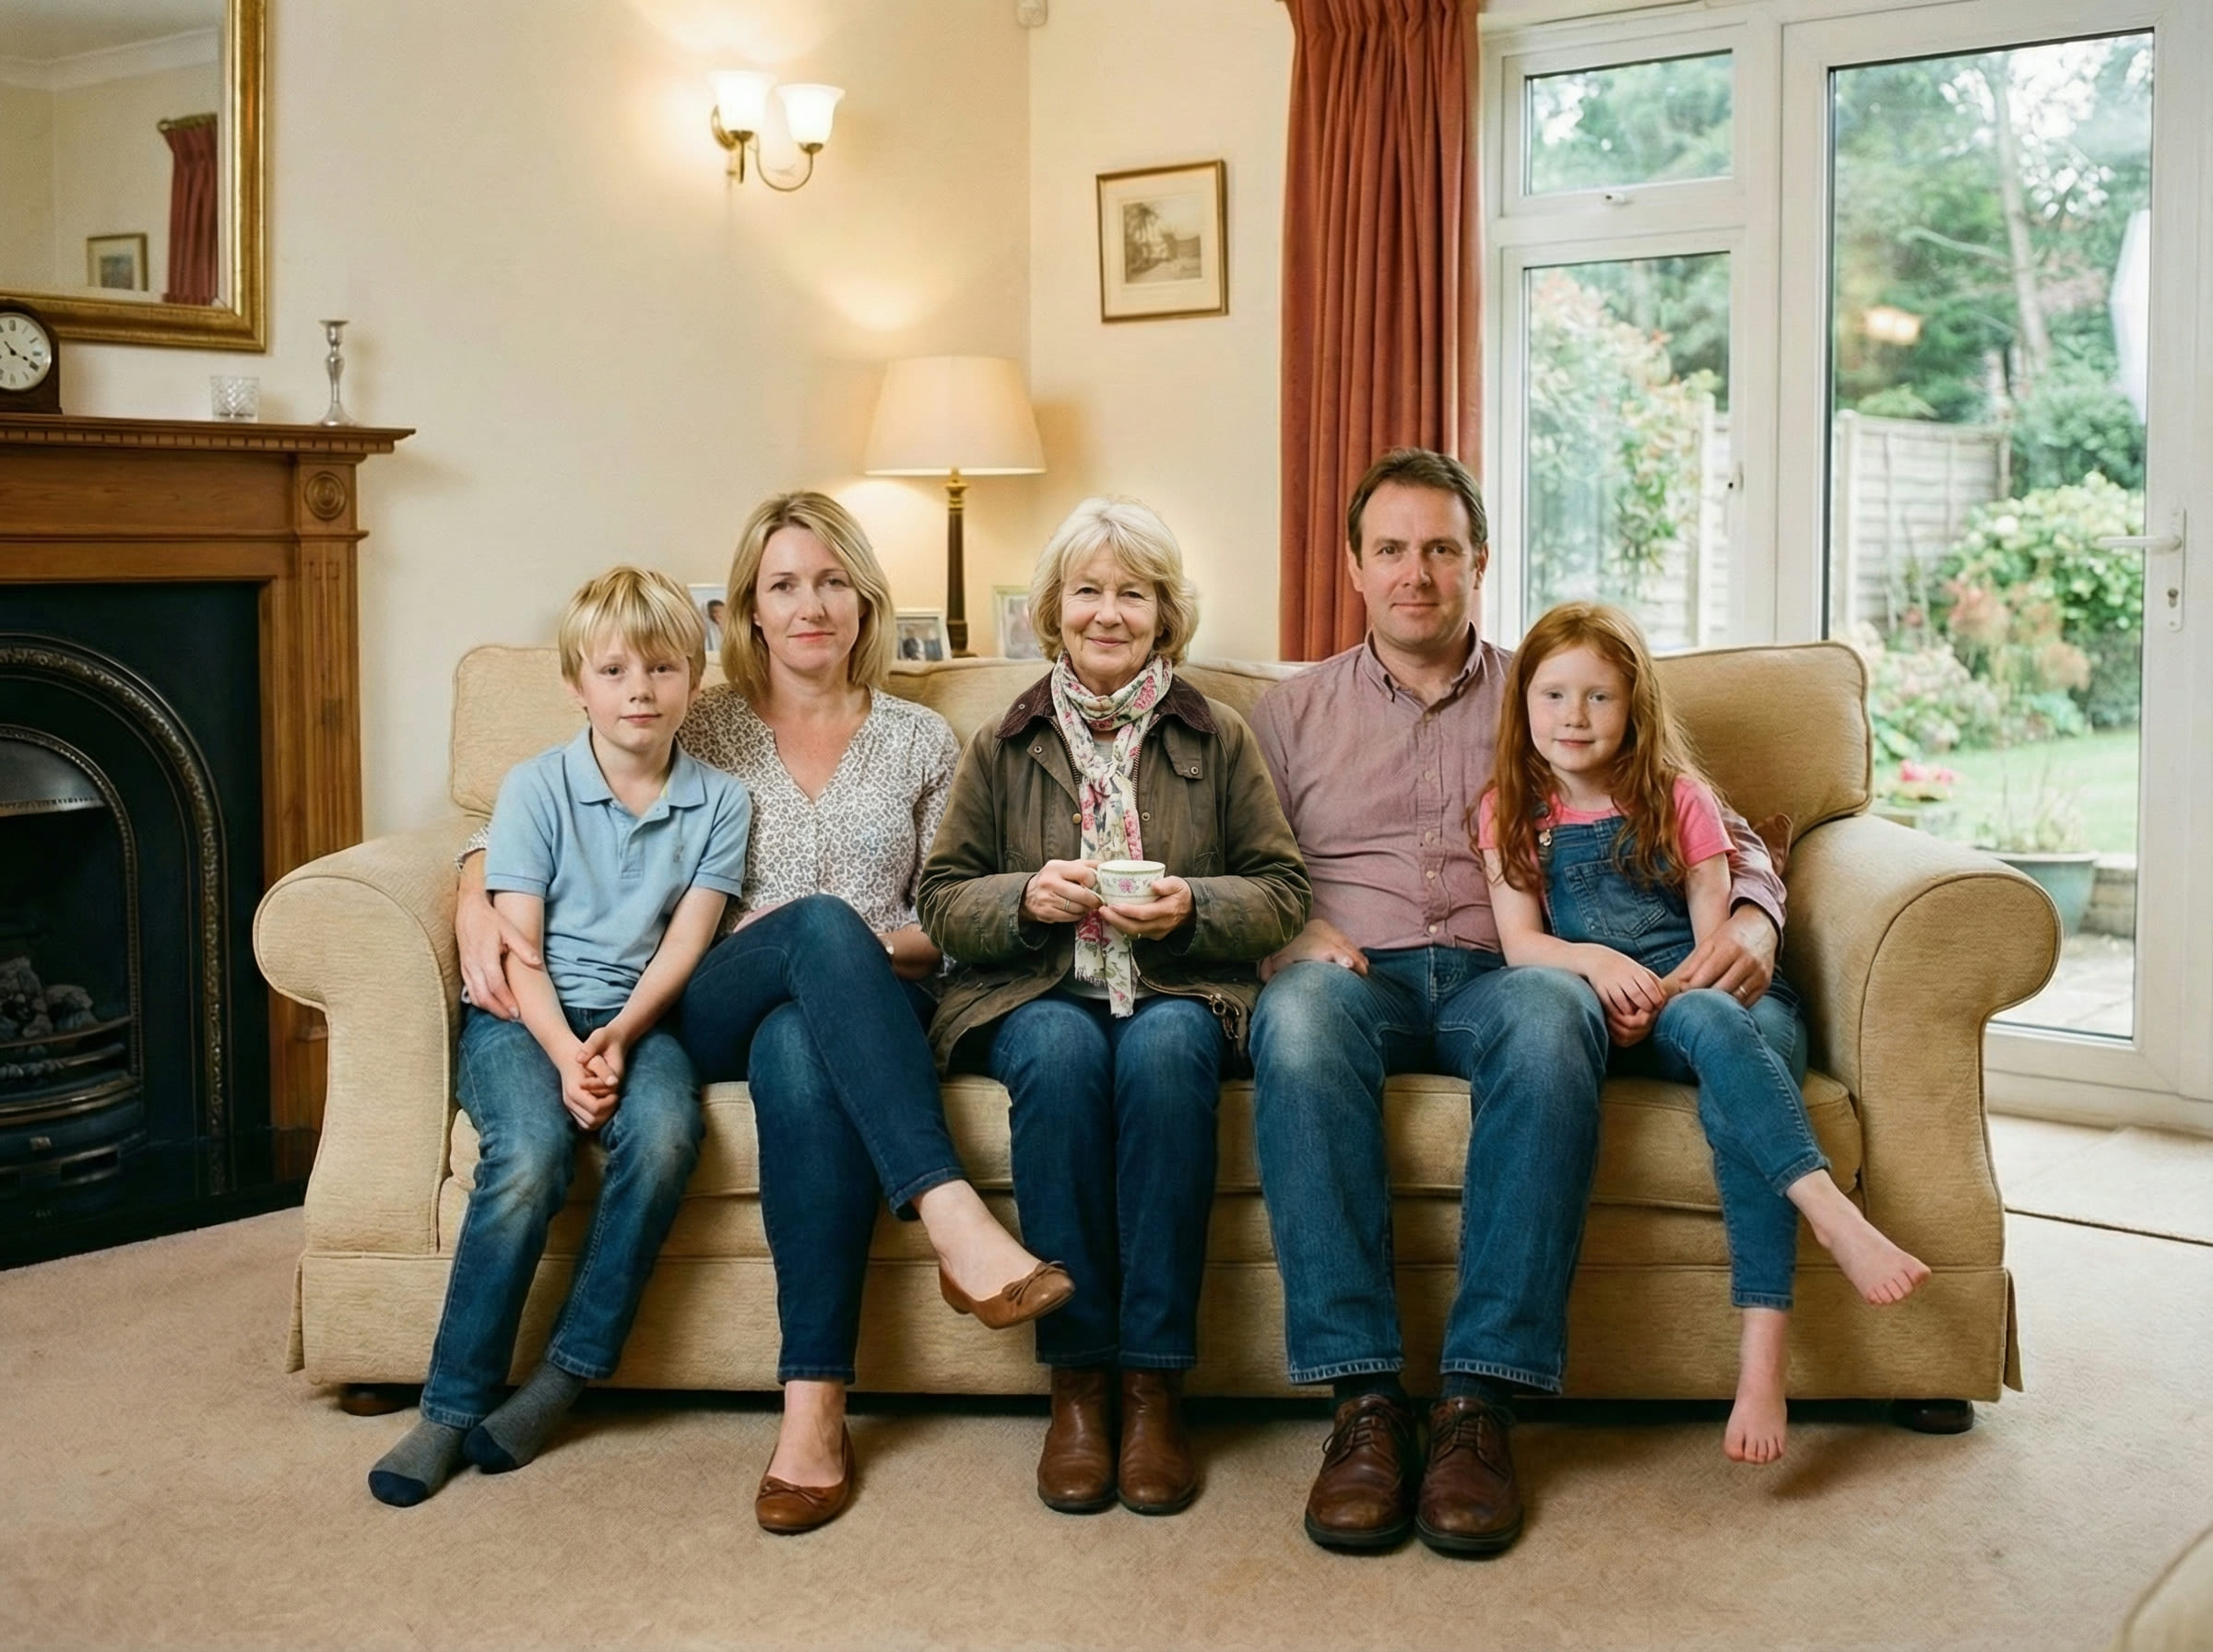
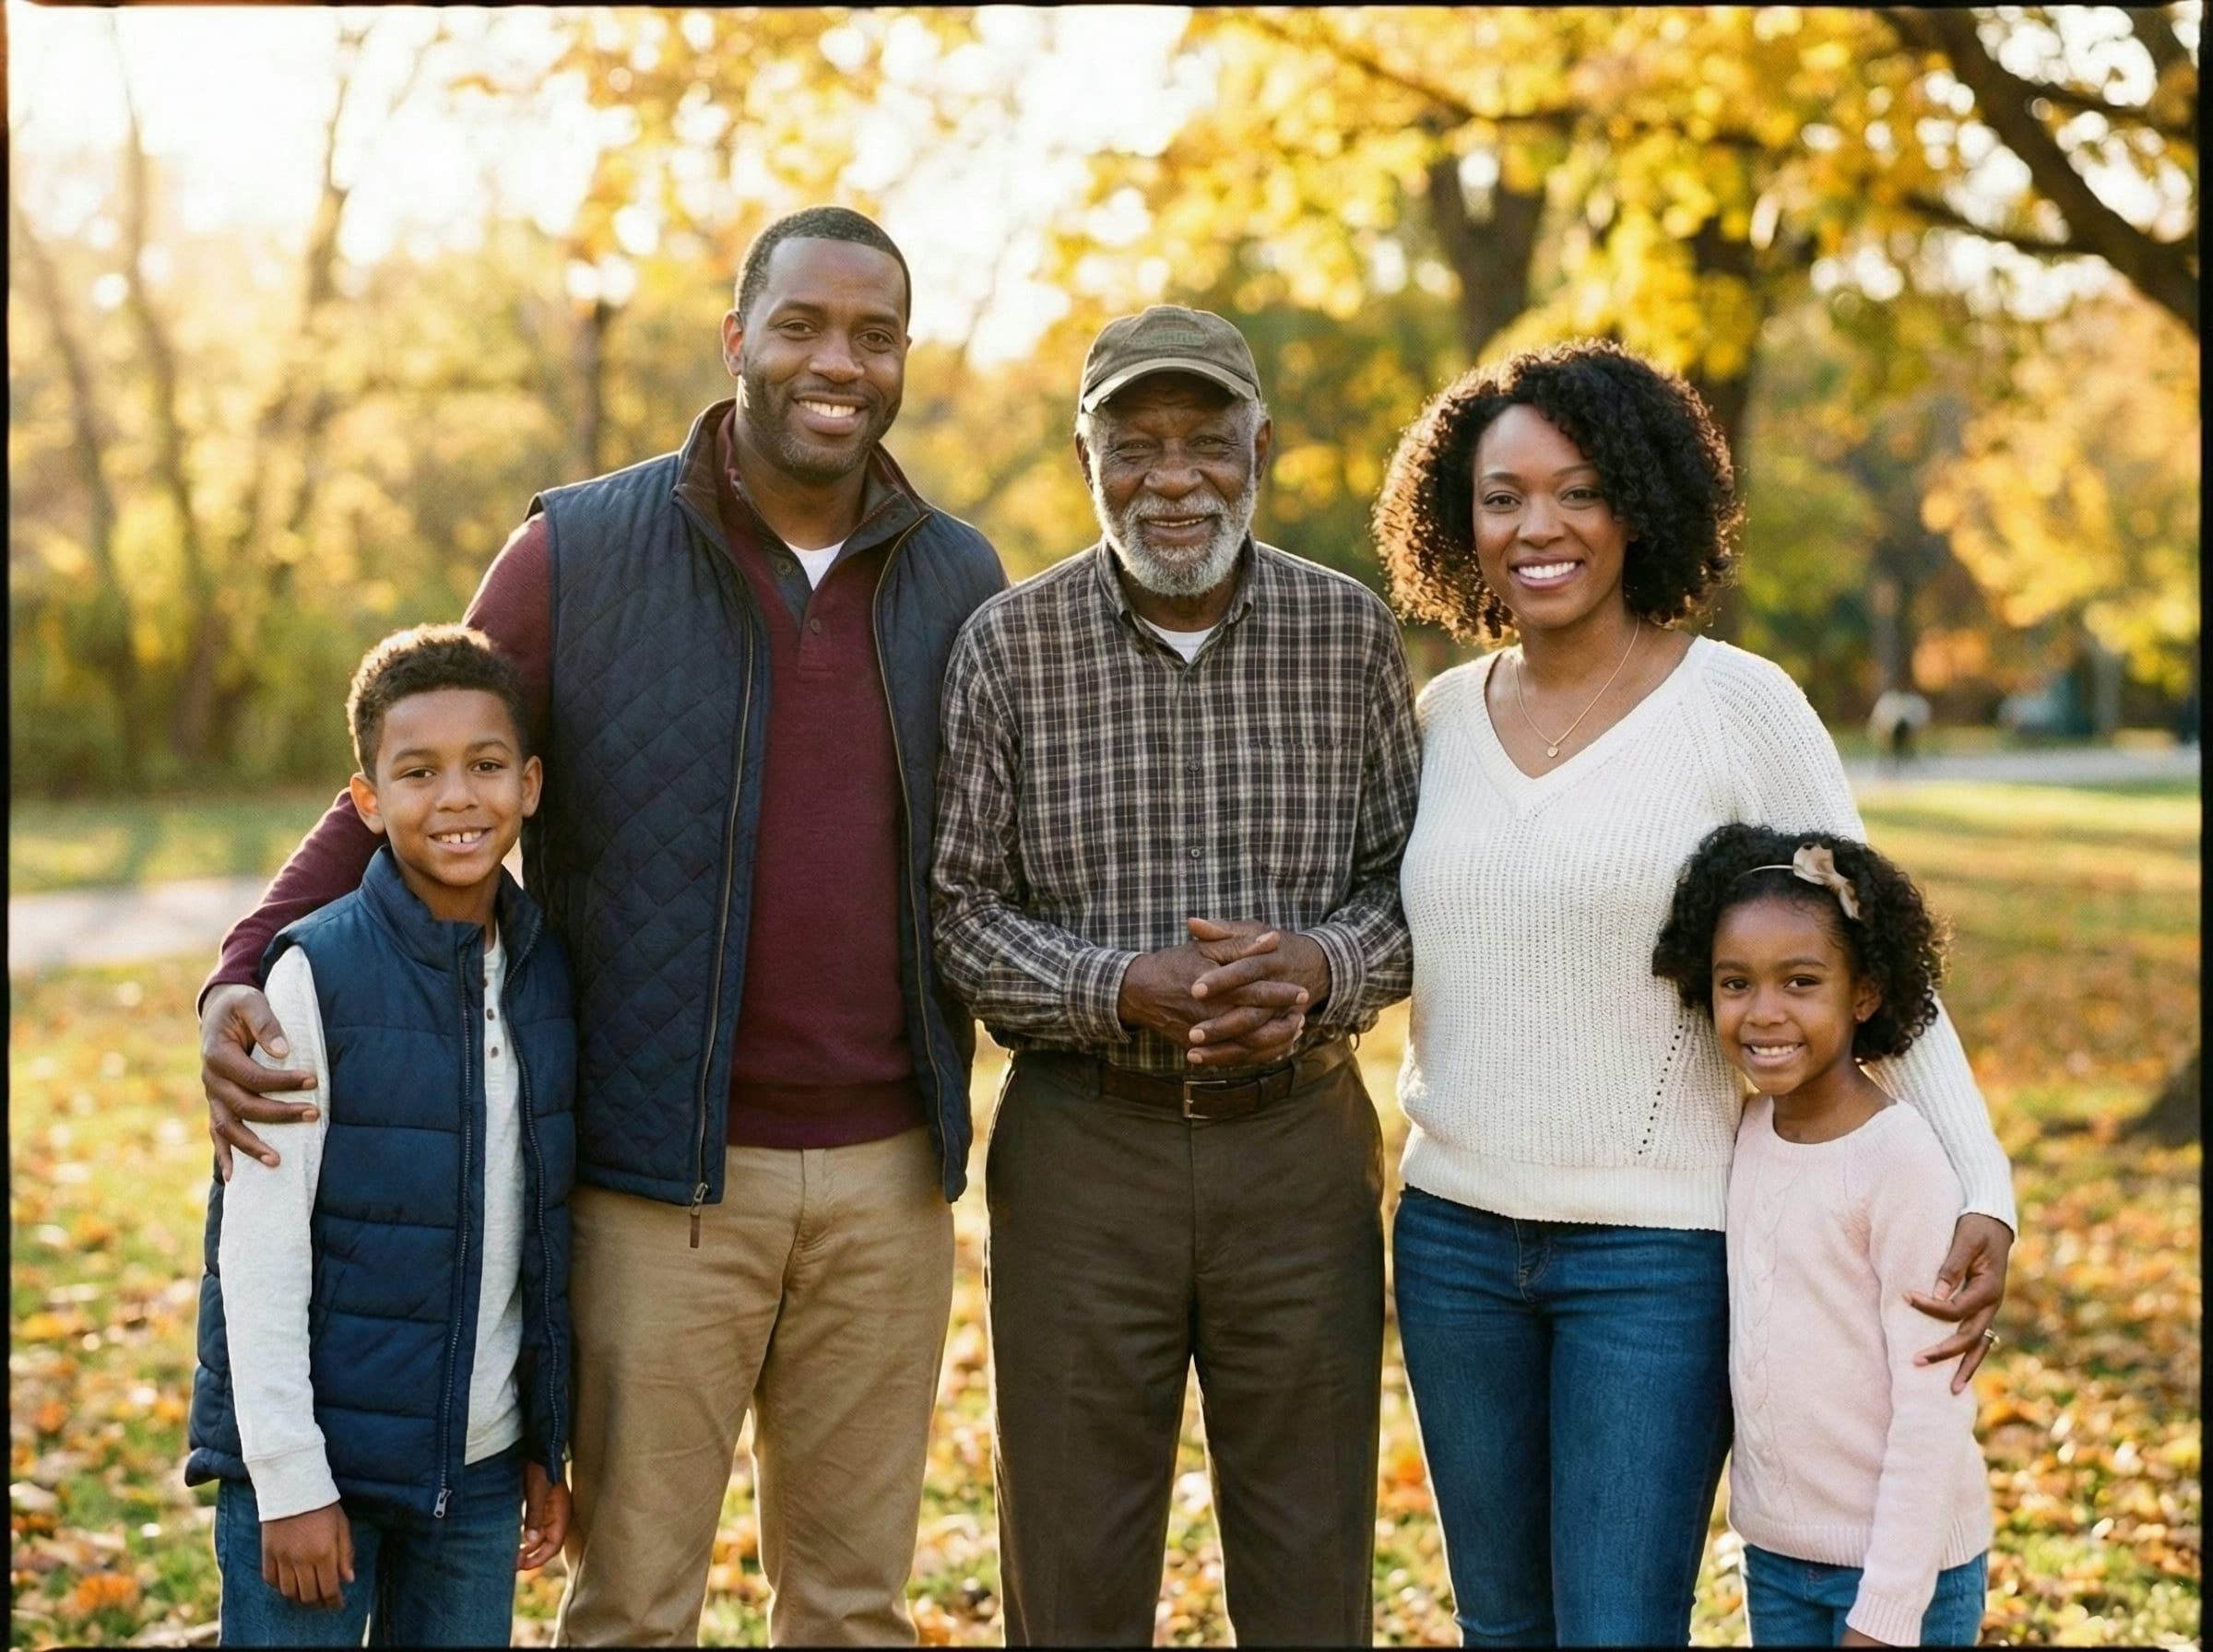
A good add deceased loved one to photo app workflow keeps the process simple while respecting the scene’s logic. The main photo should remain the “truth” of the moment — everything else adapts to it.
Most people do 2–3 attempts, not because the tool is hard, but because the right placement is subtle. A small shift in depth or scale can instantly change whether the result feels like one moment.
What makes app results look natural
Most “fake-looking” app results don’t fail because of the face — they fail because the scene stops making sense. The best add deceased loved one to photo app outcomes follow three rules: consistent depth, consistent light, and natural edges.
Where most apps fall short
Many apps are built for fast edits: stickers, cutouts, background swaps, beauty filters. Those workflows are fine for casual images, but they can feel wrong for memory completion.
When people search add deceased loved one to photo app, they often assume the app will understand the scene automatically. In reality, most apps don’t deeply match perspective, lighting direction, and camera depth — which is why results can look like a collage.
Apps also tend to “sharpen” and “enhance” aggressively. That can make the added person stand out in a way that breaks the calm tone of the original moment.
A better approach is app-simple steps with realism-first rules: keep the scene consistent, choose believable placement, and prefer subtlety over enhancement.
Tips for better app results
If you’re using an add deceased loved one to photo app workflow, these tips improve realism fast:
If you plan to print, always keep the final file uncompressed. Printing reveals tiny edge and lighting issues that are easy to miss on screens.
Common scenarios
People search for an app because they want a simple way to complete a photo they’ll keep. Common scenarios include:
- Wedding and family milestone photos
- Graduations and achievements
- Holiday portraits and annual family pictures
- A framed keepsake for home
- A remembrance table photo or album page
Across all scenarios, the goal stays consistent: one scene, one moment, and a result that feels emotionally comfortable to keep.
Is an app the right choice?
An add deceased loved one to photo app approach is a good fit when you want simple steps and quick retries — and you’re aiming for subtle realism rather than dramatic effects.
- Want app-simple steps with placement control
- Prefer calm realism over flashy edits
- Plan to download a printable PNG/PDF
- Are okay doing 2–3 attempts for best placement
- Need a flawless match in one try
- Have extremely low-quality inputs
- Want stylized or artistic transformations
- Prefer heavy enhancement over realism
A realism-first workflow keeps expectations aligned.
If you’re unsure, start with the clearest two photos and try one simple placement. You can refine gently until it feels right — or stop when it feels respectful to keep.
Frequently asked questions
Start when you feel ready
Upload your main photo and a clear photo of your loved one. Choose a natural placement, then download a printable PNG/PDF for albums and frames.